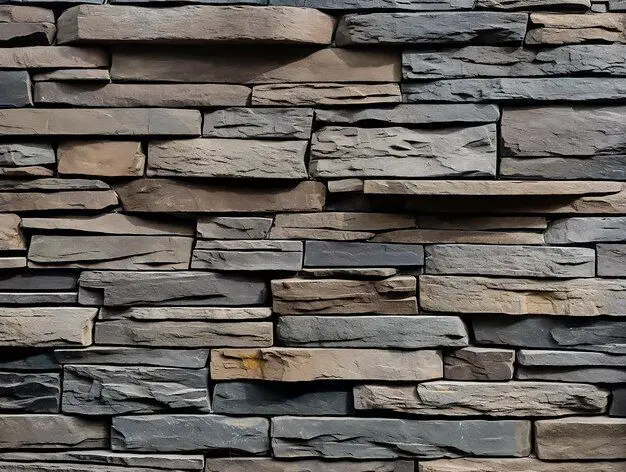
Drystack stone, also known as dry stone, refers to a type of masonry where stones are stacked on top of each other without using any mortar. This ancient technique has been used for thousands of years to build retaining walls, fences, foundations, and other structures. Drystack stone construction relies solely on the skill of the mason in selecting and fitting the stones together so that they lock in place through their weight and friction.
Installing drystack stone properly requires planning, preparation, and attention to detail. While it may look simple, dry stacking involves an intricate process to create a structurally sound finished product. In this comprehensive guide, we will walk through everything you need to know to install drystack stone successfully on your property.
Page Contents
- 1 Benefits of Drystack Stone
- 2 What You’ll Need
- 3 Choosing a Stone Type
- 4 Calculating How Much Stone You Need
- 5 Preparing the Installation Site
- 6 Basic Rules for Structurally Sound Construction
- 7 Step-by-Step Installation Process
- 8 Tips for Achieving an Organic, Natural Look
- 9 Capping Walls and Rock Formations
- 10 Sealing and Coloring Drystack Stone
- 11 Maintenance and Repair
- 12 Conclusion
Benefits of Drystack Stone
There are several key advantages to using drystack stone construction:
– Natural appearance – Dry stacking creates an organic, rustic look that blends beautifully into gardens and natural landscapes. Mortared walls can sometimes appear too uniform.
– Durability – Well-built drystack stone structures can last for decades or even centuries without crumbling or shifting. The stones reinforce and stabilize each other.
– Permeability – Without mortar, tiny spaces between the stones allow for drainage and air circulation. This prevents hydrostatic pressure behind the wall.
– Lower cost – Dry stacking eliminates the need for expensive mortar mixing and bonding. The raw materials of stone and gravel are also cheaper.
– Ease of repair – It’s simple to take apart and rebuild sections of drystack stone walls or other structures. No chiseling out hardened mortar required.
– No special skills – Basic masonry skills are all that is needed to install drystack stone successfully. No need to mix mortar or learn bricklaying.
For these reasons, drystack stone is an appealing choice for DIYers and professionals alike. The natural look and lower cost make it perfect for decorating gardens, yards, and landscapes.
What You’ll Need
Drystack stone construction utilizes a fairly short list of materials and tools. Here’s what you’ll need on hand:
Stone
– Stone type – Granite, limestone, and sandstone are common choices. Avoid fragile sedimentary rocks like shale. Stones should be blocky and angular.
– Stone size – They should range from fist-sized rocks down to chinking stones. Larger rocks add stability.
– Amount – Estimate 1 ton of stone per every 1 cubic yard of wall space. It’s better to have extra than not enough.
Base Materials
– Compactible gravel – As a sub-base layer under stones. Should be angular, not rounded.
– Drainage gravel – Behind the wall to allow water drainage. Pea gravel or crushed rock works.
– Geotextile fabric – Lines the trench behind the wall to keep soil and gravel separated.
– Landscape fabric – Optional under the base layer to inhibit weed growth.
Tools
– Gloves – Protect your hands from rough stones and sharp edges.
– Safety glasses – Shield your eyes from flying chips and debris.
– Steel rake – For leveling the sub-base gravel layer.
– Mason’s hammer – Essential for tapping stones into position and chipping uneven edges.
– 4 foot level – Check that courses are level as you build up.
– Tape measure – Monitor width and ensure corners are square.
– Spray paint – Mark layout lines if needed.
– Shovel and mattock – Dig the base trench and move stones/gravel.
– Wheelbarrow – Transport materials around the site.
Having these basic tools and materials on hand will make the installation process go smoothly from start to finish.
Choosing a Stone Type
The characteristics of the stone itself will impact the look and structural integrity of your drystack stonework. Let’s go over the properties to consider when selecting a stone type:
Granite
Granite is one of the strongest and most durable natural stones. Its speckled appearance featuring flecks of quartz, feldspar, and biotite mica make it highly decorative. Granite’s density and hardness also make it quite heavy.
Pros:
– Extremely long-lasting and weather resistant
– Interesting color variations and textures
– Does not need a concrete footing beneath
Cons:
– On the expensive side
– Very heavy and difficult to lift/place
– Can crack other stones on impact while building
Limestone
Limestone is readily available in many regions and is known for its light color range. It is a sedimentary rock formed by compressed calcium carbonate. Limestone is softer and lighter than granite.
Pros:
– Affordable and accessible
– Subtle neutral tones fit any landscape
– Lighter weight than granite
Cons:
– Not as hard and durable as granite
– Can be damaged by freeze/thaw cycles
– Requires a concrete footing for stability
Sandstone
Sandstone is composed of quartz grains cemented together into blocks. The natural grainy texture provides excellent grip between stones. Colors range from red to grey to yellowish.
Pros:
– Grainy surface creates good friction
– Softer than granite for easier cutting/chipping
– Vibrant natural color variations
Cons:
– Not as hard-wearing as granite
– Can flake or deteriorate over time
– Absorbs more water than granite or limestone
Choose a stone type that fits your climate, matches the surrounding landscape, and fits within your budget constraints. Heavier, denser rocks like granite will typically make the most durable drystack structures.
Calculating How Much Stone You Need
It’s crucial to estimate the right amount of stone for your project. Under-ordering stone means construction delays while you wait for additional deliveries. Over-ordering can cost you too much upfront and leave you with piles of unused stone.
Here are the key measurements needed:
– Length of the wall or structure
– Height of the wall
– Width or thickness of the wall
Multiply these together to find the cubic yardage (volume) of the space to be filled. The standard estimate is 1 ton of stone per 1 cubic yard.
For example, a retaining wall that is 20 feet long, 4 feet tall, and 2 feet thick would need:
20 x 4 x 2 = 160 cubic feet
160 cubic feet / 27 cubic feet per cubic yard = 5.92 cubic yards
Round up to 6 cubic yards
6 cubic yards x 1 ton per cubic yard = 6 tons of stone needed
Always round up on your stone order and buy 10-20% extra to allow for waste, chinking stones, reshaping, etc. Having a few tons left over is ideal compared to running out mid-project.
Preparing the Installation Site
Proper site preparation is a crucial first step in any drystack stone project. Rushing this stage can undermine the integrity of the entire structure. Carefully follow these steps:
Mark Layout Lines
Mark the footprint of where the wall or structure will sit using string lines, paint, or stakes. Having guidelines in place makes it easier to square off corners and edges as you build.
Dig Foundation Trench
Excavate a trench the full length and width of the wall. The depth depends on the height – around 1/3 to 1/2 the total height is sufficient. This embedment anchors the first course of stone.
Level and Compact Soil
Clear any loose topsoil from the base of the trench. Use hand tampers or rent a vibrating compactor to create a flat, packed subgrade for stability.
Add and Compact Gravel Base
Dump 4-6 inches of compactible gravel into the trench. Shovel and rake it level. Then run a compactor over it for maximum density.
Line Trench with Fabric
Cut pieces of geotextile fabric to fit the trench dimensions and lay them in place. This separation fabric prevents soil from migrating up into the gravel layer.
Build Up Gravel Sub-Base
Add more gravel on top of the fabric to the desired depth and pack it down. The finished sub-base should extend at least 6 inches past the wall on all sides.
With the gravel foundation in place, you’re ready to start stacking stone!
Basic Rules for Structurally Sound Construction
Drystack structures rely fully on the skill of the builder. Follow these guidelines to create walls and formations able to stand the test of time:
Use Larger Stones on Bottom
Start with your biggest, flattest stones to form a wide base. Substantial lower courses prevent the wall from shifting or sinking.
Keep Middle Larger than Edges
To increase stability, use larger stones toward the center and taper down in size toward the edges.
Offset Joints Between Stones
Never stack stones vertically above one another. Overlap joints like bricks for strength.
Angle Stones Back Slightly
Tilting each stone back just a few degrees toward the fill creates a natural batter that resists forces.
Keep Courses Level
Check that each horizontal row stays level as you build up. Place shims to maintain even courses.
Pack Filler Stones into Gaps
Carefully select small chinking stones to wedge tightly into openings between rocks. Eliminate large voids.
Repeat Techniques on Both Sides
Consistency is key. Use the same patterns on the front and back to interlock the stacked stones.
Adhering to these proven masonry guidelines will result in attractive, long-lasting drystack structures able to handle weather, soil pressure, and gravity over time.
Step-by-Step Installation Process
Now we’re ready for the fun part – actually selecting and fitting the stones together into a finished masterpiece. Follow this step-by-step process:
Lay First Course
Position your largest, flattest rocks along the bottom gravel base. Level and shim as needed. Space about 1 inch apart.
Backfill Behind First Course
Shovel drainage gravel behind the base layer of stones. Compact it in 4-6 inch layers with tampers.
Add Geotextile Fabric
Cut fabric strips to tuck in behind the first course, on top of the gravel backfill. Overlap seams 6-12 inches.
Build Up Subsequent Courses
Continue stacking stones, overlapping joints and packing smaller filler rocks into gaps. Check level frequently.
Repeat Backfilling/Fabric
Backfill behind each 1-2 courses with gravel, and cover with fabric before adding more stone.
Shim and Shape as Needed
Use shims, chipping or extra force from mason’s hammer to make irregular stones fit together.
Keep Wall Anchored at Corners
Alternate large corner stones side-to-side to tie the structure together.
Install Cap Stones
For retaining walls, choose wide cap stones to distribute weight above the top course. Shim to level.
Follow this sequence, slowly and methodically building up the courses. soon you’ll have a professional-looking drystack masterpiece!
Tips for Achieving an Organic, Natural Look
While structural integrity is essential, you also want your drystack creation to have an authentic, rustic aesthetic. Here are some tips:
– Mix up stone sizes, shapes and colors within each course rather than keeping rows uniform.
– Allow some character by leaving tiny gaps rather than cramming chinking stones into every spot.
– Angle some stones out slightly rather than keeping everything perfectly vertical.
– Vary the thickness slightly from bottom to top – don’t keep courses perfectly even.
– Set larger stones slightly out of the plane for depth and visual interest.
– Use rounder boulders sporadically to contrast with the squared rubble stones.
– Plant moss, sedums or creeping vines to accentuate the organic vibe.
Embracing the imperfections and allowing for controlled randomness is the key to achieving a natural drystack stone look that blends beautifully into the landscape.
Capping Walls and Rock Formations
Any free-standing drystack structure will need some type of finishing cap to complete the look. Here are two simple capping methods.
For retaining walls:
– Select cap stones at least 6 inches wider than the course below.
– Use shims and a level to position flat cap stones evenly.
– Stagger overlaps between cap stones at least 6 inches.
– Glue down cap stones if desired for added hold.
For rock sculptures and standalone formations:
– Finish the top similarly to other courses, interlocking stones.
– Level off roughly with shims – no need for precision.
– Soil and plants can be added in gaps to mask the top and give an organic finish.
Proper capping protects underlying stonework and completes the aesthetic. Take time to select cap stones that complement the overall style.
Sealing and Coloring Drystack Stone
For added durability or a change of appearance, drystack stone can be sealed or colored using specialty masonry products.
Sealers
Penetrating sealers soak into pores to prevent water damage and resist breakdown in winter freezes. Use for softer, porous stones like limestone and sandstone. Apply with sprayer or roller.
Concrete Stain
Concrete-based stains add color to natural stone. Acid stains create mottled undertones while concrete stains are more solid. Multiple coats may be needed.
Pigmented Sealer
Combination products infuse color while sealing. Available in many earthy tones that emulate the natural stone shades. Just one coating required.
Test products first and follow manufacturer instructions carefully when applying. Re-apply sealers every 2-4 years for maximum effectiveness.
Maintenance and Repair
Like any outdoor structure, your drystack stonework will require some periodic maintenance and repairs over time:
– Clear debris like leaves and branches from gaps to allow drainage.
– Re-apply sealer every few years as protection.
– Monitor soil buildup behind walls and clear out excess.
– Refill washed out gravel areas behind walls to prevent settling.
– Replace individual damaged stones as needed.
The benefit of drystack construction is it allows easy dismantling and repairs. Stones can be removed and replaced without needing to chisel out hardened mortar first. With basic care, your drystack creation can last for generations.
Conclusion
Installing beautiful, functional drystack stone on your property is a rewarding DIY project. Follow this guide to plan your design, select appropriate materials, prepare the site, and build up courses properly. Master the techniques of fitting stones closely with offset joints, using chinking stones, and maintaining level courses.Complement structural integrity with artistic touches for an authentic drystack look.soon you’ll be enjoying an incredible hand-crafted stone masterpiece you created yourself!