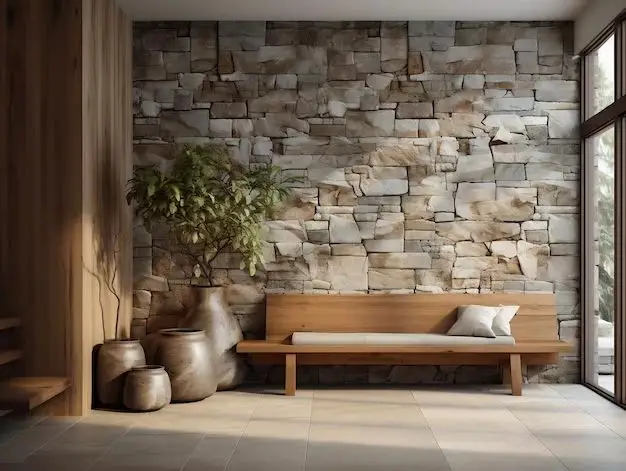
Installing real stone on interior walls can add beautiful, natural texture and completely transform a room. While stone installation may seem daunting, it can be done as a DIY project with careful planning and preparation. The key steps include choosing the right stone, preparing the wall surface, applying a mortar scratch coat, installing stone veneer, grouting, and sealing. With patience and proper technique, even novice DIYers can achieve professional-looking results.
Page Contents
What are the benefits of using real stone?
There are several advantages to using real stone for interior walls:
- Natural beauty – Real stone has depth, variation, and texture that man-made materials cannot replicate. Stone creates an organic, earthy look.
- Durability – Natural stone is extremely durable and can last for decades with proper care.
- Timeless appeal – Stone does not go out of style. It has graced interiors for centuries.
- Value boost – Stone walls add monetary value by increasing a home’s quality and desirability.
- Variety – Stone comes in a wide range of colors, textures, shapes, and styles. Granite, marble, limestone, travertine, slate, and quartzite are some popular options.
- Temperature control – Stone stays cooler in summer and warmer in winter, helping regulate indoor temperatures.
With the right protective sealant, stone can stand up to moisture, stains, and everyday wear and tear while bringing natural charm to any space.
Choosing the Right Stone
Many factors go into choosing interior wall stone:
- Color/pattern – Select a hue that complements your design scheme. Stones come in warm neutrals like tans and browns as well as bold, vibrant colors.
- Finish – Polished, honed, flamed, and rough-cut finishes offer different looks. Consider maintenance – smoother finishes are slightly easier to clean.
- Thickness – Thinner stone veneers (1″-2″) are common for walls. Thicker slabs (2″-4″) provide a more rustic style.
- Style – Choices include square-cut, ashlar, mosaic, ledger panel, drystack, and more. How the pieces are cut impacts the overall visual.
- Budget – Prices may range from $5-50+ per square foot depending on the stone type and thickness.
Visit stone suppliers to view products in person. Speak with knowledgeable salespeople about the best stones for your project type.
Preparing the Wall Surface
Proper prep work ensures the stone stays securely affixed over time:
- Clean the walls thoroughly to remove any dirt, grease, or debris. Wash with TSP substitute if needed.
- Repair any dents, cracks, or damages using joint compound for drywall or cement patch for masonry.
- Remove any accessories, outlet covers, switch plates, mirrors, etc. prior to installation.
- Paint the walls with primer to improve adhesion. Concrete or block walls may need an acrylic bonding agent instead.
- Mark the wall at the desired height for the top stone row. Use a level to ensure an even line.
Proper prep prevents stones from eventually popping off due to poor adhesion or an uneven base layer.
Applying the Mortar Scratch Coat
A mortar scratch coat roughs up the wall surface so the mortar adheres tightly during stone installation:
- Mix mortar per package directions, adding just enough water for an easily troweled consistency.
- Apply 1/4″-3/8″ thick layer using a notched trowel held at a 45° angle.
- Immediately scratch horizontally across the mortar using the trowel to create ridges.
- Allow the scratch coat to partially dry per manufacturer directions before installing stone.
This provides a textured, porous surface for the mortar behind the stone to grip onto. Without it, the mortar may slide down the smooth wall.
Installing the Stone Veneer
Once the scratch coat has partially set up, it’s time for the real stone installation:
- Dampen stones slightly with water to prevent excess absorption of mortar moisture.
- Use a notched trowel to apply a 1/2″-3/4” thick layer of mortar to the back of each stone.
- Firmly press stones into place on the wall, gently wiggling to ensure good mortar contact.
- Check level often and use spacers to maintain even grout joint thickness.
- Continue working row by row up the wall, cleaning any squeezes of mortar as you go.
- Allow the mortar to fully cure for 24-48 hours before grouting.
Stones may have a rough, unfinished look at this stage – grouting will clean this up. Take care to keep the installation plumb, level, and square.
Grouting the Stone
Grout fills the joints, seals the stones, and cleans up the overall look:
- Mix non-sanded grout per package instructions to a thick, peanut butter-like consistency.
- Force grout into joints using a rubber grout float or squeegee, removing any excess.
- Wipe diagonally across the stones with a damp sponge to smooth joints and clean the surface.
- Allow grout to fully cure for 72 hours, keeping the area dry.
Choose an unsanded grout in a color that matches or complements the tones in your stone. Grout haze can be further cleaned off with cheesecloth and cleaner.
Sealing and Finishing Touches
Sealing is the final step to protect natural stone and complete the installation:
- Read product instructions to determine when grout should be fully cured before sealing, usually 7-14 days.
- Apply two coats of penetrating or topical stone sealant using a paint pad, brush, or sprayer.
- Avoid walking on the finished wall for 24 hours to allow sealer to fully dry.
- Reinstall any electrical cover plates, mirrors, pictures, shelves, etc. pulled prior to installation.
- Caulk along tops, sides, corners, and around windows/doors with a flexible, paintable sealant.
With proper sealing and care, a natural stone accent wall can provide years of enjoyment with minimal maintenance required. Transforming a tired, boring space into a stylish feature wall has never been easier!
Conclusion
Installing real stone on interior walls takes careful planning, patience, and hard work. But the beautiful, long-lasting results are well worth the effort for many homeowners. The key steps come down to:
- Selecting stones that match your aesthetic goals and budget
- Properly preparing the wall for installation
- Applying a mortar scratch coat to rough up the surface
- Carefully installing the individual stones
- Letting mortar fully cure before precisely grouting
- Sealing and protecting the finished project
With the right materials and techniques, even novice DIYers can achieve professional-looking stone walls. Just be sure to follow all safety precautions when using mortar, grout, sealants, and tools. Take your time and don’t be afraid to ask suppliers for advice. Your new statement stone wall will provide design sophistication and value to any living space.