Joining two boards together at a 45 degree angle is a common woodworking technique that allows you to create frames, boxes, furniture, and other structures with angled corners. While it may seem tricky, it can be done with just a few basic tools and some careful measuring.
Page Contents
What You Need
Here are the basic supplies you’ll need to join boards at a 45 degree miter joint:
- Two boards you want to join (same thickness)
- Miter saw or miter box with backsaw
- Wood glue
- Clamps
- (Optional) Brad nails, small nails, or wood screws
- Sandpaper
- Wood file
- Tape measure
- Pencil
- Trimmer (for minor adjustments)
Cutting the Miters
The first step is to cut 45 degree miters on the ends of the boards you want to join. Here are some tips for getting accurate miters:
- Use a miter saw if you have one – it allows for the most precise angles. Make sure the blade is set exactly to 45 degrees.
- Use a miter box as a guide if you’re cutting by hand with a backsaw or handsaw. Check that the miter slot is exactly 45 degrees.
- Cut slow and smooth – rushing increases the chance of a crooked cut.
- Make sure your board is lying completely flat along the miter guide.
- Cut just to the edge of your pencil line – leave a little extra wood for final trimming.
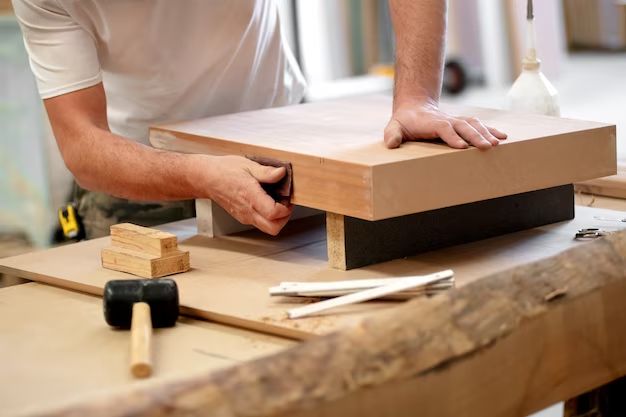
It’s a good idea to test-fit your miters once they’re cut. If there are any gaps, you can make minor adjustments with a wood file, trimmer, or sandpaper. Take your time getting a tight seam before gluing.
Gluing and Clamping
Once your miters are cut accurately, you’re ready to glue and clamp the joints:
- Apply wood glue to both mitered edges. Use a brush or spreader to distribute evenly.
- Press the glued ends firmly together at a 45 degree angle. The miters should fit cleanly without gaps.
- Use clamps to hold the joint tightly as the glue dries. Place clamps near the ends and middle.
- Optionally, you can reinforce the joint with brads, small nails, or screws from the outside. This isn’t required but can add strength.
- Allow the glue to dry fully – at least 30-60 minutes (follow glue instructions).
- Remove clamps and gently sand off any dried glue.
The key is keeping constant pressure on the miter joint as the glue dries. The clamps prevent the angled boards from slipping out of alignment while the glue sets.
Tips for Tighter Joints
For the strongest joints, here are some extra tips:
- Cut test pieces – Practice your miters on scrap wood to dial in your saw angles and technique.
- Use a backup block – Place an offcut or spacer behind the joint while clamping to apply even pressure.
- Buy quality lumber – Straight boards without warps or twists make cutting easier.
- Use fresh glue – Old glue can dry too slowly and lead to weaker bonds.
- Go slowly when sawing – Rushing leads to crooked cuts that won’t join well.
Common Uses
Here are some of the most common situations where knowing how to join wood at 45 degrees comes in handy:
Picture Frames
Simple four-sided rectangular picture frames require four 45 degree miter joints to connect the frame pieces.
Box Frames
Keeping the sides of a wooden box square and rigid requires 45 degree miters at the corner joints. The same is true for open shadow box frames.
Trim Molding
Corner trim, door/window casings, and other finish carpentry often meet at 45 degree inside and outside corners.
Table Legs
Angling the table legs inward or outward is achieved with 45 degree miters cut at the top and bottom of the leg.
Wooden Decor
Many decorative wooden objects like plaques, signs, candle holders, shelves, and jewelry display holders incorporate 45 degree angles in their design.
Troubleshooting
Here are some common issues and solutions when joining boards at 45 degree angles:
| Problem | Solution |
|---|---|
| Gaps in the mitered corners | Recut one or both miters; make sure your saw angle is exactly 45 degrees |
| End grain shows at the tips | Make sure you cut on the waste side of the line; sand or file the miter for a tighter fit |
| Joint separates after gluing | Use fresh glue; clamp tightly and evenly; add glue block spacers for support |
| Boards don’t align at 90 degrees | Make sure the boards and miters are square before gluing; use a square to check |
| Uneven gaps at joint | One or both miters are off angle slightly; recut carefully; shim glue gaps if needed |
Taking extra time to get the miters and alignment precision right will prevent most issues down the road.
Conclusion
Joining two boards at a 45 degree angle requires accurate miter cuts, tight glue joints, and good clamping pressure. With some practice cutting miters and attention to quality glue-up techniques, you can create beautiful angled joints for all types of woodworking projects. Taking your time at each step and not rushing through the process will result in clean, seamless joints.
