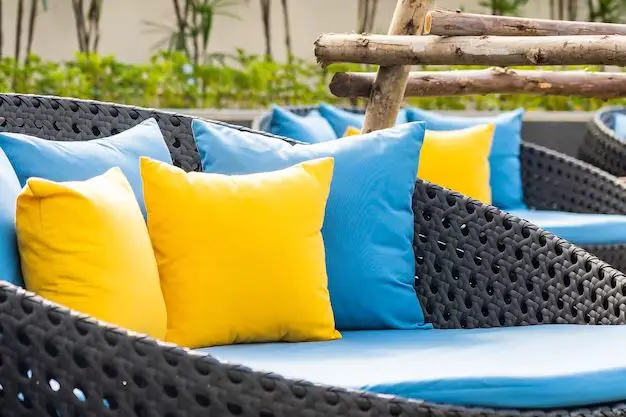
Keeping cushions in place on wicker patio furniture can be a frustrating challenge. As soon as a breeze blows through or someone shifts in their seat, cushions go flying off onto the ground. This not only looks messy, but it can damage the cushions over time as they get wet or dirty. Luckily, there are some simple tricks to keep wicker chair and sofa cushions from slipping and sliding around.
Page Contents
Use Cushion Ties
Cushion ties or straps are by far the most effective way to secure patio seat cushions. These thick straps of fabric have clips or buckles on the ends that attach to the frame of wicker furniture. The straps stretch across the middle of the cushion to hold it in place. Cushion ties come in many sizes to fit different furniture and cushions.
Look for cushion ties made of a sturdy material like cotton webbing with strong plastic or metal clips. The ties should be adjustable to pull tight or loosen as needed. Make sure to get cushion ties long enough to properly stretch across your cushions. Measure across the widest part of the cushion then add several inches more.
To use cushion ties:
- Clip one end of the tie to one side of the wicker frame.
- Pull it taut across the middle of the cushion.
- Clip the other end securely to the opposite frame.
- Adjust the straps as needed so the cushion fits snugly but is not distorted.
Cushion ties blend right in and do not take away from the appearance of patio furniture cushions. The only downside is that they can be a bit tricky to install and remove with each use.
Use Hook and Loop Fasteners
Hook and loop fasteners, like Velcro brand strips, offer another easy system to secure cushions. Simply sew matching strips of the hook and loop material onto the furniture frame and bottom of the cushions. When the cushion is in place, the strips adhere to hold it steady.
Look for strong outdoor rated hook and loop fastener strips in 1-inch widths and at least 2-inches long. Make sure the fuzzy hook side is on the frame and the looping side is on the cushion. Spacing the strips every 8-12 inches around the seat frame and underside edges of the cushion works well.
To attach:
- Mark where to place the strips on the frame and cushion.
- Peel adhesive backing and firmly press onto surfaces.
- Let adhesive cure for 24 hours before use.
- Press cushion into place so the strips adhere together.
Hook and loop fasteners make it easy to remove cushions for cleaning and storage. However, they may wear out more quickly than other methods with repeated use. Check the strips regularly and replace any that become less sticky.
Use Non-Slip Shelf Liner
Self-adhesive non-slip shelf liner provides a quick and cheap way to add traction under cushions. The rubbery texture helps grab the wicker to prevent sliding. Shelf liner comes in rolls or pre-cut sizes to fit the frame or underside of cushions.
Look for non-slip liner made of vinyl, rubber, or textured plastic. Measure the surface area to determine how much liner is needed. Cut pieces to fit using scissors or a utility knife.
To apply:
- Clean frame or cushion bottom with rubbing alcohol.
- Peel off adhesive backing.
- Press liner on firmly, starting at one end and smoothing edges.
For best results, apply liner to both the wicker frame and cushion bottom. The no-slip properties help hold the cushion in position. Reapply new liner annually as needed when pieces wear out.
Use Non-Slip Cushion Inserts
Along with securing outer cushions, using non-slip inserts can help. These sit inside cushion covers to grip against inner fabrics instead of sliding around on smooth fillers. DIY options like silicone shelf liner or rubber mesh work well as inserts. There are also ready-made mesh and silicone inserts for sale.
Look for non-slip inserts about 2 inches wider than the cushion on all sides. This provides full coverage and allows for shrinkage over time. Make sure any DIY materials are non-toxic and rated for outdoor use.
To add inserts:
- Cut insert material to size needed.
- Open zipper on cushion cover.
- Place insert inside, smoothing flat.
- Close cushion cover.
Inserts help prevent inner cushion movement, while ties and fasteners keep the whole cushion from sliding on the frame. Use in combination for best results. Check inserts occasionally for shrinkage or damage.
Use Rubber Cushion Grommets
Another way to add non-slip properties is by using rubber grommets on the cushion bottoms. These sit between the wicker frame and cushion to create friction and traction. The grommets are raised nubs that grips the surface while still allowing air circulation under the cushion.
Purchase large rubber grommets specifically made for outdoor furniture cushions. Look for durable rubber construction and nubs tall enough to hold the cushion above the frame. Self-stick adhesive backs make installation fast and easy.
To install:
- Mark where to place grommets on underside edges of cushion.
- Clean surface thoroughly with rubbing alcohol.
- Remove adhesive backing and press firmly in place.
- Let adhesive cure fully before use per package instructions.
Add grommets every 4-6 inches around the perimeter of the cushion bottom. Make sure they sit flat against the frame when the cushion is in place. Replace any missing or worn out grommets seasonally.
Add Weight to Cushions
For cushions that keep blowing away in the breeze, try securing them with a little added weight. Things like decorative pillows, outdoor safe river rocks, or resealable plastic sandbags can do the trick.
Place weights on each corner and middle of the cushion. Straps or fabric flaps sewn to the cushion bottom help hold weights in place. Look for small bagged weights or flat items that conform to the cushion shape.
To add weights:
- Determine how much weight each cushion needs.
- Place weights evenly spaced on cushion underside.
- Sew straps or flaps in place over weights if needed.
- Check weights weekly to ensure they stay securely in place.
This method adds security against wind without altering the cushion appearance. Make sure weights are not so heavy that they warp or crush the cushions. Remove weights before storing cushions seasonally.
Secure Ties on Cushion Covers
For loose cushion covers that are not securely attached, installing ties can help. Simply sew ties at strategic spots onto both the cushion and cover. Tie them together to keep the cover from shifting around.
Use strong ribbon, cording or fabric ties that match or complement your cushion colors. Mark where to place ties on the corners and middle parts of the cushion cover. Sew the ties at these marks by machine or hand.
To attach ties:
- Line up cushion and cover.
- Tie matching ties together into bows or knots.
- Adjust fit and flatness as needed.
- Check ties periodically for tightness.
With the ties connecting the cushion and cover, the outer fabric stays snugly in place. Add 2-4 ties per cushion for optimal security. Choose a tie length that keeps the cushion flat but allows easy removal.
Use a Cushion Cover Lock
For DIY cushion covers without ties, install a cover lock device instead. This plastic piece has teeth that grip the cushion to hold the cover in place. Locks screw or stick onto the cushion then clip the cover into place over it.
Purchase cushion cover locks designed specifically for outdoor use. Look for strong and durable plastic construction that will not degrade in weather. Measure cushion thickness first to ensure proper lock size.
To install:
- Screw or adhere lock piece to center of cushion.
- Insert cushion into cover.
- Clip cover over teeth on lock device.
- Adjust as needed for smooth tight fit.
The locks blend right in but provide security to keep covers from shifting around. Make sure to get a lock size appropriate for the thickness of the cushion. Test it out first before permanently installing into the cushion.
Use Fabric Adhesive
Applying fabric adhesive is another way to bond cushion covers directly to foam fillers. This prevents covers from separating or sliding around on the filling. Purchase a flexible outdoor rated fabric glue specifically made for bonding fabrics and cushion materials.
To use fabric glue:
- Clean underside of cover and surface of cushion filler.
- Apply thin layer of glue to both surfaces.
- Once tacky, press cover and filler together, smoothing out.
- Clamp tightly or weigh down until fully bonded, around 24 hours.
The fabric glue creates a strong connection between the cover and filler. This helps everything stay snugly in place during use. Reapply glue seasonally or whenever covers start to separate again.
DIY Solutions
If you want to get crafty, there are also easy DIY solutions for securing patio seat cushions:
Plastic lacing: Weave plastic lacing or packing ribbon through wicker gaps beneath the cushion then tie ends together.
Hook and eye closures: Sew large hook and eye pairs onto the cushion underside and furniture frame.
Short bungees: Secure small bungee cords under and over the cushion to hold it down.
Giant zip ties: Use extra long zip ties around cushion bottoms and the wicker frame.
Shower caps: Use elasticized fabric shower caps with water resistant lining over cushion bottoms.
Double sided carpet tape: Apply thick double sided carpet tape around the wicker seat bottom and cushion.
Furniture pads: Adhere soft rubber furniture pads or feet on the underside edges.
Get creative with materials you already have to devise your own solutions. Just make sure any products used are made to withstand outdoor elements. Test homemade methods first before using them on expensive cushion sets.
Maintenance and Storage
Proper maintenance and storage are also key to keeping wicker cushions looking good season after season. Here are some top tips:
– Bring cushions indoors when not in use for long periods.
– Allow cushions to air out before putting into storage to prevent mildew growth.
– Wash removable cushion covers regularly using mild detergent.
– Spot clean stains right away to prevent setting in.
– Fluff and rotate cushions weekly to maintain shape and support.
– Check ties, grommets and fasteners monthly. Replace as needed.
– Store horizontally on flat clean surfaces during off seasons.
– Avoid piling cushions or storing while still damp.
With some clever securing tricks and proper care, you can enjoy stylish wicker furniture cushions that stay neatly in place. Have fun creating your own solutions to keep cushions from slipping around and blowing away in the breeze. Soon you’ll have the coziest and best looking cushion sets both on and off your patio.
Conclusion
Keeping cushions properly secured on wicker patio furniture may seem difficult, but is easily achievable using the right materials and methods. Cushion ties, fasteners, non-slip liners, weights, and DIY solutions can all help prevent sliding, shifting, and flying cushions. Proper maintenance like frequent fluffing, washing, and indoor storage also helps extend the life of patio furniture cushions. Investing some time upfront to outfit cushions with the right stabilizers will pay off all season long with a classy looking outdoor space you can truly relax in. Get creative mixing and matching different securing solutions to devise a system that works perfectly for your own wicker seating setup.