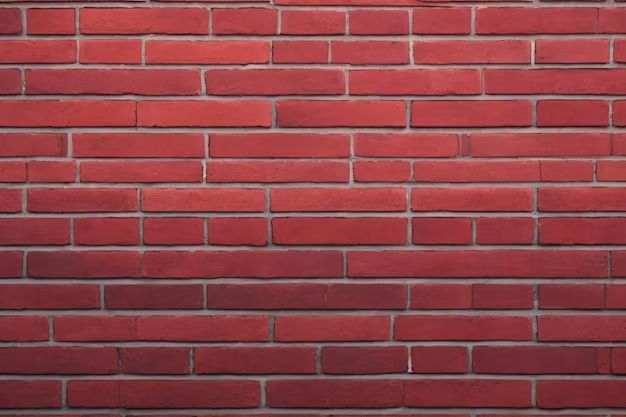
Laying brick edging around gardens, pathways, and patios is an attractive way to define spaces in your yard. Red brick edging provides a classic, timeless look that complements all styles of landscaping. With some planning, basic tools, and proper technique, you can install a red brick border that will last for years to come.
Page Contents
Benefits of Brick Edging
Brick edging offers numerous advantages over other types of landscape borders:
- Durable and long-lasting. Properly installed brick borders can remain intact for decades.
- Visually appealing. The color and texture of brick complement gardens, trees, pathways, etc.
- Defines spaces. Brick borders delineate distinct zones in your yard and landscape.
- Containment. Brick edging keeps mulch, gravel, and soil in place in garden beds.
- Neat appearance. Brick has a tidy, finished look compared to plastic, metal, or wooden edging.
- Increases property value. Brick borders add aesthetic value that can increase your home’s worth.
In addition to these benefits, brick edging requires very little maintenance compared to other materials. Occasional weed removal is all that is typically needed. The bricks themselves will last many years before needing to be replaced or repaired.
Planning Your Brick Border
Careful planning is important when installing brick edging. Here are some key steps:
Measure the Area
Use a tape measure to determine the linear footage you will need to enclose with the border. Remember to calculate any corners or curves when measuring. Adding an extra 10% over your estimate allows for mistakes and last-minute adjustments.
Sketch a Layout
Draw a rough outline of the area and where you want the border installed. Note any existing plants, structures, or features to avoid. Planning the layout will make installing the bricks go smoother.
Select Brick Type and Color
Red brick edging can be created from either clay or concrete bricks. Clay offers a more traditional, old-world look. Concrete bricks are less expensive but provide a long-lasting border. Choose bricks that complement your home’s color scheme and landscape elements.
Gather Tools and Materials
Having the right tools and materials on hand will make installation much easier. You will need:
- Shovel
- Level
- Landscape edging spikes
- Mallet
- String and stakes
- Garden hose
- Sand and gravel
- Extra bricks
Allow time to dig up and remove any existing edging first if replacing old borders. With planning and preparation taken care of, you’ll be ready to get started installing your brick edging.
Installing Brick Edging
The actual installation process involves excavation, laying a base, leveling, placing the bricks, and backfilling. Here are the step-by-step instructions:
Step 1: Excavate a Trench
Dig a 6-8″ deep trench along the border’s planned outline using a shovel. The trench should be a few inches wider than the bricks you are installing. Remove any sod or grass as you dig.
Step 2: Add Gravel Base
Fill the bottom 2-3″ of the trench with packed gravel or sand. This creates a base to level and stabilize the bricks.
Step 3: Install Landscape Edging
For extra stability, use landscape edging spikes every few feet in the trench’s center. Hammer the spikes in vertically with a mallet so the flat edge protrudes above the base gravel.
Step 4: Level Bricks and Fill Gaps
Place bricks lengthwise end-to-end in the trench atop the gravel base. Use a level to maintain even height on both sides. Fill any gaps between bricks with extra gravel or sand.
Step 5: Backfill Along Border
Once all bricks are laid, backfill the trench along the outside of the edging with soil. Pack down the soil firmly and water well to settle it.
Step 6: Stake Down Edging
For added strength, drive landscape edging stakes vertically on the outer side of the border every couple of feet. The stakes prevent shifting.
The border should now be fully installed and ready to contain and accent your landscape elements. Be sure to make any final leveling adjustments and fill all gaps between bricks.
Maintenance Tips
Brick edging requires very little ongoing care and maintenance if installed properly. Here are some tips for keeping your border looking its best:
- Pull weeds – Occasionally weed around the border to prevent roots from shifting bricks.
- Add sand – Sweep in sand or gravel to fill any new gaps between bricks as they arise.
- Spot clean – Use mild soap and water with a stiff brush to clean dirty or stained areas.
- Power wash – For a deeper clean, use a power washer on a low setting to blast off grime.
- Re-level – Check for levelness yearly and make alignment adjustments as needed.
- Sealant – Consider applying brick sealant every few years to protect from moisture damage.
With proper installation and occasional maintenance, red brick edging can provide an elegant border that will last for decades. The classic, finished look it provides makes brick a go-to choice for yard borders.
Cost to Install Brick Edging
If installing the edging yourself is not an option, hiring a professional landscape company is advised. The cost to have brick edging installed typically ranges from $15 to $30 per linear foot. This covers labor and all materials. Additional costs may apply for preparation work like removing old borders or excavating rocky soil.
Factors that can increase the overall cost include:
- Specialized brick shapes or patterns – Using anything beyond basic straight bricks will add cost in labor and materials.
- Curved borders – Laying bricks along curves takes more time and expertise which adds expense.
- Accessibility – Sites with limited space or obstacles will drive up the installation price.
- Soil conditions – Hard, dense, or overly rocky soil can make excavation difficult and time-consuming.
- Landscape features – Working around existing trees, structures, or elements slows the process and adds cost.
However, hiring a professional ensures proper techniques are used and an enduring, quality result. The price reflects the expertise needed to correctly excavate, grade, level, and install the edging.
Conclusion
Laying a new brick border offers an elegant way to define and accent landscape spaces. With careful planning, thorough excavation, an even base, and proper installation, red brick edging can provide timeless beauty and functionality for decades. While hiring a professional is advised for most homeowners, the project can be completed yourself by following the steps outlined above. Maintain your new border by keeping a clean, weed-free edge and making periodic repairs or realignments as needed. Investing in a brick edging project will upgrade your yard with a durable, decorative border that withstands the test of time.