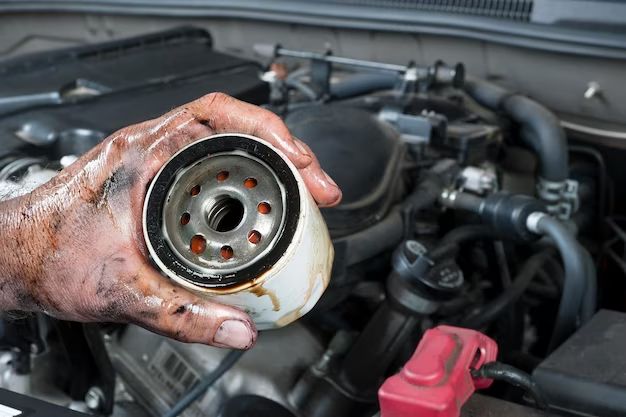
Getting a stubborn, tight oil filter off can be one of the most frustrating parts of an oil change. Oil filters are designed to be tightly sealed, and over time can become difficult to remove. There are several methods you can try to loosen a tight filter. Here are some quick answers to common questions about removing stuck oil filters and step-by-step instructions to get the job done.
Page Contents
- 1 Quick Answers
- 1.1 What causes an oil filter to get stuck?
- 1.2 What do you need to remove an oil filter?
- 1.3 Can you remove an oil filter without a wrench?
- 1.4 How do you loosen a tight filter by hand?
- 1.5 What can happen if the oil filter is too tight?
- 1.6 Should you pre-fill an oil filter?
- 1.7 How much oil should you put in the new filter?
- 1.8 What’s the best oil filter brand?
- 2 Step-by-Step Instructions
- 2.1 1. Allow engine to cool
- 2.2 2. Position drain pan
- 2.3 3. Clean filter exterior
- 2.4 4. Lubricate the gasket
- 2.5 5. Position oil filter wrench
- 2.6 6. Tap wrench with mallet
- 2.7 7. Rock back and forth
- 2.8 8. Check for cracks
- 2.9 9. Remove filter
- 2.10 10. Clean mounting surface
- 2.11 11. Install new filter
- 2.12 12. Tighten per instructions
- 2.13 13. Refill oil
- 3 Tips for Next Oil Change
- 4 Warnings
- 5 When to Call a Mechanic
- 6 Conclusion
- 7 Oil Filter Removal Troubleshooting Table
- 8 Oil Filter Brand Comparison
Quick Answers
What causes an oil filter to get stuck?
There are a few common reasons oil filters get stuck and difficult to remove:
- Over-tightening – Oil filters are designed to be sealed tightly but over tightening can make them very difficult to remove later.
- Dirty threads – Built up dirt, grime, old oil on the threads can cause the filter to stick.
- Oil filter gasket sticking – The rubber gasket can adhere tightly to the engine over time making it hard to break the seal.
- Cold oil and shortened drain intervals – Thicker oil and shorter between changes can cause more build up.
What do you need to remove an oil filter?
Having the right tools makes removing a stubborn filter much easier. Here are the tools you’ll need:
- Oil filter wrench – This is a special wrench made to grip and turn oil filters.
- Rubber mallet – Helps jar filter loose.
- Rag – For cleaning area around the filter.
- Drain pan – Catches oil as filter is removed.
- Gloves – Protect your hands against hot oil.
Can you remove an oil filter without a wrench?
While specially designed oil filter wrenches make the job much easier, you can remove a stuck filter without one. Some other methods include:
- Pliers or channel locks – get a good grip and turn slowly.
- Screwdriver – hammer it through filter and use for leverage.
- Strap wrench – wraps around entire filter for grip.
- Chain wrench – chain tightens around filter.
How do you loosen a tight filter by hand?
If trying to remove a stuck oil filter by hand, here are some tips:
- Use latex gloves for better grip.
- Wrap rag around filter for grip.
- Push up from underneath for more leverage.
- Rock back and forth to break the seal.
- Tap around perimeter with mallet.
What can happen if the oil filter is too tight?
Here are some potential issues with an over-tightened oil filter:
- Difficult removal – Filter is too tight to be removed by hand.
- Filter housing damage – Extreme torque cracks the metal housing.
- Gasket sticking – Tight seal causes gasket to adhere to engine.
- Oil leaks – Cracks or housing damage can lead to leaks.
- Waste oil – Leftover oil spills during removal.
Should you pre-fill an oil filter?
Pre-filling a new oil filter before installation is recommended for a few reasons:
- Prevents dry startup – Ensures engine has oil circulation immediately.
- Faster oil pressure – Less time waiting for oil to reach bearings.
- Less strain on the pump – Pump doesn’t have to prime a dry system.
- Added protection – Bearings already have oil coating before startup.
How much oil should you put in the new filter?
Most filters take about 3/4 to 1 quart of oil before installation. Follow these steps:
- Add oil up to the bottom of the threads – Around 3/4 full.
- Install new filter gasket.
- Lubricate gasket with new engine oil.
- Tighten filter per manufacturer specs.
What’s the best oil filter brand?
Some top oil filter brands include:
- Mobil 1
- Royal Purple
- Bosch
- AC Delco
- Purolator
- FRAM
The best brand for your vehicle depends on the recommended filter in your owner’s manual.
Step-by-Step Instructions
Once you’ve identified the filter is stuck too tightly to be removed by hand, follow these steps to remove it more easily.
1. Allow engine to cool
Make sure the engine has cooled completely before attempting to loosen the oil filter. Hot oil can cause severe burns if spilled. Cool oil will also make your tools work more efficiently than on a hot engine.
2. Position drain pan
Slide your oil drain pan under the filter area to catch any spilled oil as you work. Wear protective gloves and eye wear when changing your oil.
3. Clean filter exterior
Use a degreaser or solvent on a rag to scrub the outside of the stuck filter. Remove any large build-ups of dirt, oil or grease. This allows your tools to grip better.
4. Lubricate the gasket
Spray some penetrating oil or lubricant on the gasket area where it meets the engine surface. Allow it to soak for several minutes. This helps break down any “glue” from the gasket adhering to the engine.
5. Position oil filter wrench
Fit your oil filter wrench over the filter. Tighten the handle on the wrench until the metal band digs into the filter canister. This gives you much needed leverage versus using your hands.
6. Tap wrench with mallet
While holding the wrench handle firmly, use a rubber mallet to tap the wrench handle. This helps jar the filter free from its sealed position. Apply even taps all around the perimeter.
7. Rock back and forth
While maintaining an inward pressure, rock the wrench back and forth to break the seal. After several passes, you should begin to feel some movement.
8. Check for cracks
Inspect the canister housing as you go to make sure no cracks are forming. Cracks indicate you need to ease up before damaging the filter housing.
9. Remove filter
Once the filter feels loose enough, press the wrench firmly against the base of the filter and turn counter clockwise to unthread it. Twist slowly to avoid spillage. Remove the old filter and discard.
10. Clean mounting surface
Use your degreaser rag to wipe clean the now exposed filter mounting surface on the engine block. Remove all old oil and debris.
11. Install new filter
Lubricate your new filter gasket with fresh oil. Fill filter about 3/4 full. Hand thread new filter clockwise until gasket contacts the mounting surface.
12. Tighten per instructions
Once seated by hand, use your oil filter wrench to tighten further per the manufacturer’s instructions. Do not over-tighten.
13. Refill oil
Refill engine oil through the fill hole to proper level. Start engine and check for any leaks. Correct as needed.
Tips for Next Oil Change
Here are some tips to prevent stuck filter issues on your next oil change:
- Tighten only to specification – Don’t over-tighten.
- Note position – Install in same vertical position.
- Mark filter – Make alignment marks on filter and engine.
- Check more frequently – Don’t exceed recommended change intervals.
- Use torque wrench – Helps prevent over-tightening.
- Consider a cartridge filter – Easier to remove and replace next time.
Warnings
- Hot oil can cause severe burns. Allow engine and oil to cool completely before attempting filter removal.
- Wear protective gloves, eye wear, and clothing to prevent injury.
- Incorrect filter removal can damage engine components.
- Excessive force or cross-threading installation can damage new filter.
When to Call a Mechanic
While you can usually remove a stuck oil filter at home, consider calling a mechanic if:
- The filter housing is cracked or damaged.
- The mounting threads are damaged or crossed.
- You need to have the housing welded or machined.
- There is an oil leak not stopped by new filter.
- The filter will not budge even with special tools.
Conclusion
Removing a stubborn, over-tightened oil filter is very common during an oil change. With some patience, the right tools, and proper technique, you can break the seal and remove even the tightest filters. Using caution not to damage components, and being careful during installation helps prevent issues from recurring. Follow the step-by-step process outlined above and you can avoid having to call a mechanic to change your oil filter.
Oil Filter Removal Troubleshooting Table
| Issue | Possible Causes | Solutions |
|---|---|---|
| Filter too tight to remove by hand |
|
|
| Oil leaking during removal |
|
|
| Filter housing cracked |
|
|
| Mounting surface leaks |
|
|
Oil Filter Brand Comparison
| Brand | Prices | Sizes | Features | Rating |
|---|---|---|---|---|
| Mobil 1 | $$$ | Extended Performance | Synthetic media, silicone anti-drain valve | ***** |
| Royal Purple | $$$ | Max-Flow | Silicone treated media, metal base plates | **** |
| Bosch | $$ | Original Equipment | Exclusive media, steel base plates | **** |
| AC Delco | $ | Professional | Cellulose media, nylon reinforcement | *** |
| Purolator | $$ | Classic | Silicon anti-drainback valve, 99% filtration | **** |
| FRAM | $ | Tough Guard | Cellulose tributary media, steel case | ** |