Making a perfect arc out of wood requires some careful planning, the right tools, and good technique. Whether you’re building furniture, constructing architectural elements, or creating decorative woodworking projects, being able to bend wood into smooth, shapely arcs is an invaluable skill.
Page Contents
What tools and materials do you need to make a wooden arc?
To make a nice wooden arc, you’ll need:
- Wood boards or planks – The type of wood, thickness, and grain orientation will impact how tightly you can bend the wood. Thinner stock bends more easily. Woods like white oak, ash, hickory, and maple bend well.
- A tub or form to bend the wood around – This provides the shape and structure as the wood is bent.
- Clamps – Bar clamps, pipe clamps, or ratchet straps to apply bending pressure and hold the shape.
- moisture – Water, steam, or wet towels to help make the wood more pliable.
- A block or piece of wood cut to the desired curve – Use as a guide for shaping the bend.
- Wood glue and tools – For joining and smoothing wood pieces.
- Sandpaper – To sand and refine the final arc shape.
What techniques are used for bending wood?
There are several techniques woodworkers use to get clean, consistent bends in wood:
Wet Bending
Wet bending involves soaking or steaming the wood first to make it more flexible. The moist wood is then clamped over a form or jig and left to dry in the desired curve. This is a common technique for tight arcs and works best with thin boards. The wood can be soaked in water for 1-3 days or steamed in a steam box for an hour or more before bending. Good moisture levels need to be maintained as the wood dries in the jig to avoid cracking or splitting.
Bent Lamination
This technique uses multiple thin layers of wood glued together in the bent shape. Each thin laminate is very pliable, so many can be stacked to create the curve. The glued laminates are clamped to the bending form and allowed to dry. The strength comes from the glued joints between each layer. Almost any type of curve is possible with laminations.
Kerfing
Kerfs or thin saw cuts are made on the backside of the wood before bending to allow it to curve more easily. The kerfs act like a series of hinges in the wood. The depth and spacing of the kerfs will determine the tightness of the bend. With enough kerfs, even thick wood boards can be bent to tight radii.
Compounding
Rather than bending the wood in just one direction across the grain, compound bending adds a slight bend along the grain too. This reduces stress and allows tighter curves to be achieved without breaking the wood fibers. It’s useful for shaping complex curves and domes. The wood can be pre-bent along the grain before being clamped across the grain over a form.
| Bending Method | Best Uses |
|---|---|
| Wet bending | Smooth, sweeping arcs. Tight bends in thin stock. |
| Bent lamination | Complex curves and shapes. Tight bends in thick wood. |
| Kerfing | Moderate arcs and curves in thick stock. |
| Compounding | Very tight arcs. Domes and compound curves. |
Step-by-Step Process for Bending Wood
Here is an overview of the key steps involved in wet bending solid wood into an arc:
- Prepare the bending form – Size the form so that it matches the desired curve or shape you want to bend the wood into. Smooth the form well so it doesn’t mar the wood surface. Apply a release agent like wax so the wood doesn’t stick.
- Cut the wood to size – Cut your wood slightly longer and wider than the finished arc will be. Remember the wood will thin and narrow as it bends. Cutting with the grain direction in mind will help avoid cracks.
- Moisten the wood – Soak or steam the wood for the time needed to achieve good flexibility. Test bends by hand to see if further softening is needed.
- Clamp the wood – Start clamping at the center of the curve and work outwards. Apply just enough clamping pressure to get the bend without breaking the wood fibers. Cauls or small blocks help distribute the pressure.
- Allow wood to dry – Once clamped tightly, let the wood dry completely in the curve. This can take 1-7 days depending on moisture levels. The curve should remain stable once dried.
- Smooth and finish the arc – Remove clamps and sand away any marks. The arc can then be incorporated into your project or finished as desired.
It takes some practice to consistently bend wood into perfect arcs. Having the right moisture levels and applying the ideal clamping pressure is key. Test on scrap pieces first. Minor inconsistencies in the curve can be sanded out later. With careful technique, you can create all kinds of elegant curved forms from wood.
Tips for getting clean bends
Here are some helpful tips to get the best results as you learn how to steam bend wood:
- Orient the wood grain correctly – For the smoothest outside curve, the growth rings should arc concave to the bend. For inside curves, orient rings convex.
- Seal the wood ends – Coat the end grain with glue or sealer so moisture doesn’t escape too quickly as it dries.
- Distribute pressure evenly – Use cauls and clamp across the full width to prevent localized stress.
- Work in stages for tight bends – Do the bend in increments, drying in between, to avoid over-stressing the wood.
- Allow time for relaxation – After clamping, give the wood 15-20 minutes to relax before fully tightening clamps.
- Check moisture regularly – For wet bends, re-wet the wrapping if wood is drying out too quickly.
Patience and careful methodical work will help you master steam bending to get arcs and curves that truly stand out.
What projects can you make with bent wood?
Bending wood opens up amazing possibilities for all kinds of decorative and functional projects. Here are some ideas to inspire you:
- Furniture – Chairs, rockers, chaise lounges, and other furniture can feature graceful bentwood elements.
- Cabinets – Doors, drawer fronts, and faces can be shaped with subtle curves.
- Trim and molding – For adding flair to doorways, mantlepieces, and built-ins.
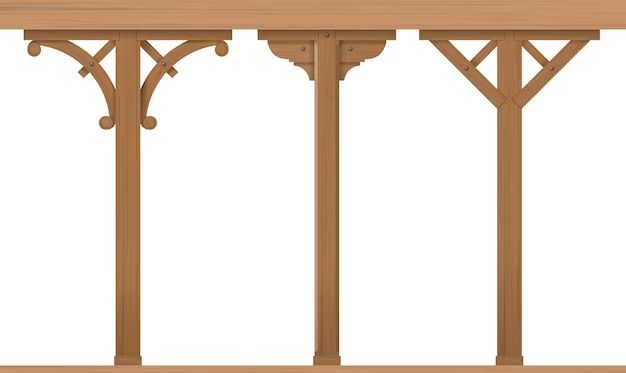
- Archways – Bend planks to make arched walkways, window frames, and architectural accents.
- Musical instruments – Instruments like guitars and violins require expert bends for their resonant soundboards.
- Containers – Create round boxes, bowls, and storage baskets woven from bent slats.
- Signs and decor – Apply bentwood in creative ways for wall art, hanging lights, and decor pieces.
Any project that would benefit visually or functionally from having curves is a great opportunity to incorporate bentwood elements. Experiment with scrap wood and bending forms until you feel confident working on full-scale projects.
Conclusion
Bending wood may seem intimidating at first, but with the right techniques and tools, you can shape beautiful, sweeping arcs and curves to enhance your woodworking projects. Understand how factors like grain orientation, moisture, clamping pressure, and scaling affect the quality of the bend. Be patient, thoughtful, and meticulous in your method. Practice will improve your ability to predictably and accurately bend wooden slats, planks, and boards into elegant forms. Incorporating bentwood work can take your craftsmanship to the next level.