Wall planter boxes are a great way to grow flowers, herbs, or small vegetables on a vertical surface. They allow you to maximize your gardening space and are perfect for small yards, patios, decks, or areas with poor soil quality. Wall planter boxes can be purchased pre-made, but are simple enough to construct yourself from basic materials. With a few tools, some lumber, and a weekend, you can build your own customized wall planter to fit your space and needs.
Page Contents
Benefits of Wall Planter Boxes
There are many advantages to using wall planter boxes:
- Maximize gardening space – By gardening vertically, you can grow plants in areas that would otherwise go unused. Wall planters are great for small yards.
- Good for poor soil – Plants in raised planter boxes can thrive in high quality potting mix instead of struggling in dense or poor quality soil.
- Good drainage – Planter boxes allow you to provide proper drainage for your plants by adding gravel at the base.
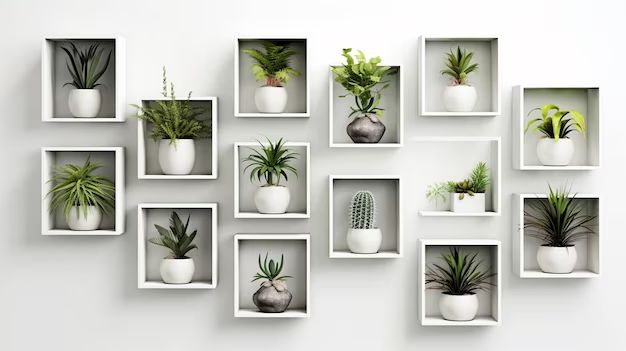
- Aesthetic appeal – Wall planters can help beautify bare exterior walls and fences. They add color and life to blank spaces.
- Plant customization – With separate planter boxes, you can control the soil, drainage, and irrigation needs of individual plants.
- Height control – Wall mounted planters can be installed at any height to make tending and harvesting easy.
- Weed and pest control – Confined planter boxes reduce weeds and keep plant roots separate from underground pests.
Installing wall planter boxes can help you grow more in less space, while adding an attractive element to your exterior. The vertical gardening possibilities are endless!
Planning Your Wall Planter Box
Before building your wall planter, there are a few key considerations:
Location
Determine the optimal placement for your planter box. It should receive adequate sunlight and drainage. At least 6 hours of direct sun is ideal for most edible plants. Take into account existing structures that could provide partial shade. Also consider the location of gutters, downspouts, hoses, and electrical outlets if you intend to install an irrigation system.
Size
Measure the area where you want to place the planter box. Determine the approximate length, width, and height you wish to construct. Larger planter boxes will be heavier, so make sure your mounting surface can support the weight when full of soil and plants. A good starter size is between 24-36 inches long and 8-12 inches deep.
Materials
Choose weather resistant lumber such as cedar, redwood, or treated pine wood. Outdoor grade screws or galvanized nails are also essential hardware. Optional materials could include landscape fabric, gravel or pebbles for drainage, and brackets to attach the box to the wall.
Plants
Select plants that will thrive in your light conditions and in the dimensions of your planter box. Herbs, leafy greens, strawberries, and dwarf tomato varieties are good choices. Make sure your box size accommodates the mature plant widths including foliage.
Irrigation
Plants in wall mounted boxes will need more frequent watering than in-ground plants. Decide if you will water by hand or install an automated drip irrigation system. Containing the roots makes irrigation easier than in the ground.
Once you have made these key considerations, you’re ready to start building. The basic steps are assembling the box, preparing the mounting area, and installing the hardware to hang the box.
What You’ll Need
- Lumber (cedar, redwood, treated pine)
- Landscape fabric (optional)
- Screws or galvanized nails
- Sandpaper
- Saw
- Drill
- Wall fasteners (brackets, toggle bolts, etc.)
- Potting soil
- Plants
- Gravel or pebbles (optional)
- Trowel
- Gardening gloves
Building Your Wall Planter Box
Cutting the Wood
Using your measurements, cut your lumber to size with a saw. You will need boards for the front and back (same length as width of box), and the sides (same length as height of box). Cut an additional lumber piece as the base (same dimensions as length and width of box bottom). Sand edges smooth.
Assembling the Box
Attach the back board to the two side boards using screws or nails. Then attach the front board so the open box takes shape. Finally, attach the base board to the bottom to complete the box frame. Make sure corners are securely connected and the box feels sturdy when lifted.
| Side | Dimensions | |
|---|---|---|
| Back board | Length = Box width | |
| Front board | Length = Box width | |
| Side boards (x2) | Length = Box height | |
| Base board | Length = Box length | Width = Box width |
Lining the Box (Optional)
For additional waterproofing, you can line the inside of your box with landscape fabric. Cut fabric pieces slightly larger than each wall panel. Staple or adhere the fabric to the inside walls. The excess can be folded over the edges.
Adding Drainage (Optional)
To improve drainage, place a 1-2 inch layer of gravel, pebbles, or broken terra cotta at the bottom of the lined box before adding soil. This will prevent soil from washing out drainage holes.
Mounting Your Wall Planter Box
There are several methods for securely mounting your wall planter box:
Brackets
Use sturdy L-brackets attached to the back top edge of the box and fastened into wall studs. Make sure the brackets are rated for the full weight of the planter box when loaded with wet soil and plants.
Shelf Brackets
Install metal shelf brackets into the wall studs. The bottom of the planter box will rest on the brackets. Be sure to countersink the screws or bolts so the heads are flush with the wood surface.
Ledgers
Screw a horizontal 2×4 ledger board into the wall studs. Then attach the back of the planter box to the ledger using additional screws or brackets.
Toggler Bolts
Use toggler bolts (or other hollow wall anchors if mounting to masonry) to install the box if you cannot locate wall studs. Drill holes through the back board to insert the toggler wings and tighten.
Planting Your Wall Planter
Once securely installed, it’s time to fill your planter box with soil and plants!
Filling With Soil
Fill your planter box nearly to the top with a quality potting soil or soilless planting medium. Avoid heavy garden soil which can easily become waterlogged. A mix containing peat moss, perlite, and vermiculite is ideal.
Plant Selection
Refer to your plan and choose plants suited to the sunlight exposure and space of your box. Favor compact, bushy annuals and perennials over vining plants. Herbs, leafy greens, dwarf tomatoes, and strawberries are great choices!
Planting
Follow instructions on plant tags for spacing and depth. Gently remove plants from containers, loosen roots, and plant into moistened soil. Press soil firmly around roots to eliminate air pockets. Allow proper clearance between plants when mature for air circulation.
Finishing Touches
Consider adding a layer of decorative mulch on top of the soil to retain moisture and inhibit weed growth. Attaching a drip irrigation system will make watering easy. Now enjoy watching your vertical garden thrive!
Caring for Your Wall Planter
Wall mounted planter boxes come with unique care requirements:
- Watering – Check soil moisture frequently. Water when the top few inches become dry. Consider setting up a drip irrigation system on a timer.
- Fertilizing – Use a balanced liquid fertilizer monthly or slow release granular fertilizer at planting time.
- Pruning – Trim back overgrown foliage obstructing other plants. Prune wayward vines.
- Weeding – Pull weeds when small to prevent them from spreading and competing with your plants.
- Replenishing mulch – Reapply mulch layer annually to retain moisture and suppress weeds.
- Securing plants – Stake tall or heavy plants for extra support in the confined space.
- Cleaning – Remove dead leaves and spent plants at the end of the season.
Proper care will keep your wall planter thriving season after season!
Alternative Design Options
The basic wall planter box can be customized in many ways:
- Use trellises or obelisks to support vining crops like beans, cucumbers, or tomatoes.
- Incorporate automatic drip irrigation tubing.
- Use brackets to install boxes at varying heights on the wall.
- Stagger multiple boxes in pyramid shapes for visual interest.
- Paint or stain the exterior to match your home.
- Use plastic boxes instead of wood for lighter weight.
- Include wheels or casters on the bottom to make boxes portable.
- Add decorative architectural elements like shutters, trim, or benches.
Let your creativity run wild! The possibilities are endless for customizing your perfect wall planter box design.
Conclusion
Creating and installing your own wall planter box is a simple weekend DIY project! With minimal time and tools, you can construct the perfect vertical garden to beautify your exterior space. Make sure to properly mount your box and select appropriate plants for the conditions. Follow the steps for assembly, mounting, planting, and care outlined above. Don’t be afraid to add your own flair. With just a few boards and plants, you’ll be growing food, herbs, or flowers in no time. Vertical gardening opens up numerous possibilities, so have fun designing and building a customized wall planter box to maximize your outdoor space.