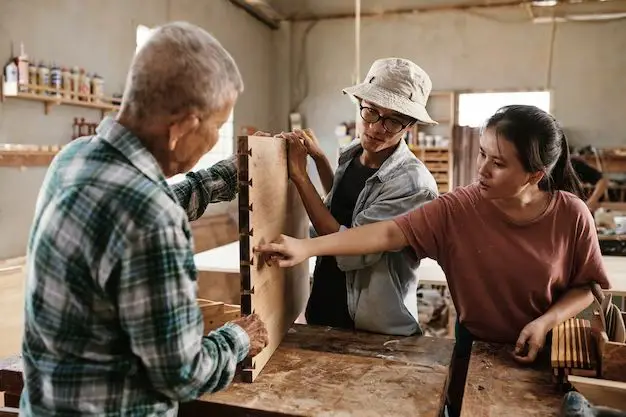
Wood inlays are a beautiful way to decorate furniture, boxes, and other wood projects. The intricate patterns and designs created by contrasting different colored woods can really make a piece stand out. While wood inlay work requires some specialized tools and a lot of patience, the techniques are approachable for any woodworker with some basic skills.
Page Contents
What is wood inlay?
Wood inlay is a technique where you cut channels or cavities out of a solid wood surface and insert thin pieces of wood inside to create patterns, designs, borders, medallions, and more. The thin wood insert pieces contrast with the main wood body to form the inlaid design.
Some common examples of wood inlay projects include:
- Decorative borders on tables, cabinets, boxes
- Intricate medallion designs on tabletops
- Bowl and tray decorations
- Chessboard squares
- Guitar fretboard inlays
The possibilities for wood inlay designs are endless! From simple patterns to complex scenes, you’re only limited by your imagination and skill level when it comes to creating wood inlays.
Tools and Materials Needed
While you can make simple inlays using just standard workshop tools, creating intricate inlaid pieces typically requires some specialized tools and supplies. Here are some essential items you’ll need:
Router and router table
A router and router table setup is crucial for cutting precision cavities and channels into the main wood body to accept the inlay material. You’ll need a router capable of slow spins with large diameter bits installed.
Inlay kit
An inlay kit contains essential specialty bits like straight bits, core box bits, and V-groove bits used to cut channels and cavities.
Hammer and chisels
Small carving chisels help trim and tune inlay pieces so they fit perfectly into the routed channels.
Veneers
Thin veneer sheets, typically 1/42″ thick, make the best inlay material and provide a wide variety of wood colors and grain patterns to work with.
Glue
Use high quality wood glue suitable for fine woodworking. Small bottles with thin applicator tips help apply glue into the inlay channels.
Clamps
Spring clamps or other rotatable C-clamps allow clamping the inlay pieces into channels from various angles.
Wood backing
Use a material like MDF as a backing board when cutting inlay channels through the full thickness of a workpiece.
Dyes and finishes
Apply stains, dyes, or other coloring to the inlay materials to help them stand out more vividly against the main wood surface.
How to Make Wood Inlays
The basic wood inlay process involves five main steps:
- Design and prepare the inlay pattern
- Cut channels into the main wood body
- Shape and fit the inlay pieces
- Glue the inlay into the channels
- Sand and finish the inlaid surface
Let’s look at each step in more detail:
1. Design and Prepare the Inlay Pattern
Start by creating a design drawing showing the shapes and layout of each inlay element. Convert this to a full-scale pattern that you can trace onto the wood surface. Acrylic templates for geometric shapes or paper patterns work well. Install any guide bushings needed for the router bit on the base plate. Prepare your wood stock by sanding and jointing the surface flat.
2. Cut the Inlay Channels
There are two main methods of cutting channels for inlays:
Routing partway through the wood stock
For simple inlay borders or patterns, cut channels approximately 1/16″ deep into the wood surface using a straight or core box router bit matched to the inlay thickness. Leave at least 1/16″ of wood below the channel.
Cutting through the full thickness
For complex inlaid patterns or replacing sections of wood, cut all the way through the workpiece thickness. Use a backing board underneath to prevent tear-out on the back side. Cut overlapping channels and use multiple inlay pieces for wider designs.
Take light passes when routing channels to slowly approach the final depth. Test fit your inlay pieces as you get close to the full depth.
3. Shape and Fit the Inlay Pieces
Use a jewelers saw or scroll saw to cut out your inlay shapes from the veneer material. Carefully shape and tune each piece with sharp chisels and files until they press fit neatly into their corresponding channels. The goal is a tight friction fit without having to force the inlay into place.
4. Glue the Inlay into the Channels
Dry fit each piece to confirm a good fit before gluing. Apply a thin coat of wood glue into the channels using a small applicator tip. Quickly position each pre-fit inlay piece and use spring clamps to apply pressure down into the cavity while the glue dries. Wipe away any excess squeeze-out glue immediately.
5. Sand and Finish the Surface
Once the glue fully cures overnight, sand the surface flush starting with 120 grit and working up to 220 or 320 grit. Be careful not to sand through the thin inlay material. Finish by applying your choice of stain, dye, oils, lacquer, or other top coats to protect the wood and enhance the appearance of the inlays.
Inlay Design Tips
Follow these tips when planning your custom wood inlay patterns:
- Use thin inlay strips for delicate accent lines or decorative borders.
- Stack multiple borders or intersecting patterns for a striking visual effect.
- Combine wood species with dramatic color contrasts for vibrant inlays.
- Accent the inlaid areas with darker stains or dyes.
- Inlay around moldings, edges, handles, and hardware.
- Experiment with geometric, nature, cultural, or abstract inspired motifs.
- Integrate wood burning, carving, or metel leaf accents.
Common Wood Inlay Patterns
Here are some classic inlay patterns that work beautifully for all types of wood projects:
Herringbone
The zigzag herringbone pattern provides visual motion and interest. Build it from small triangular strips of alternating colors.
Sunburst Medallion
A dramatic sunburst inlay makes a bold statement on tabletops. Cut tapered rays of wood radiating out from a central circle.
Chevron
Chevron striped inlays add dynamic diagonal lines. Use contrasting right triangles to form the zigzag stripes.
Marquetry
Marquetry utilizes intricate cutout pieces assembled into a mosaic-like image. It requires very precise cutting and assembly skills.
Celtic Knotwork
Intertwining Celtic knots formed with rope-like strands of contrasting woods have an elegant, old-world look.
Dutchman Inlay
A Dutchman inlay is a solid wood patch piece used to mend damaged wood by replacing a missing section. Useful for repairs and restoration work.
Butterfly Keys
Butterfly keys are bowtie-shaped Dutchman patches inserted across the grain on table cracks and defects. The ends flair out decoratively.
Common Woods for Inlaying
The specific wood species used will depend on the desired look, but some good choices include:
| Wood Type | Characteristics |
|---|---|
| Maple | Creamy white color, tight grain |
| Walnut | Rich brown tone, visible grain |
| Cherry | Golden red hues, smooth grain |
| Bloodwood | Bright crimson red color |
| Ebony | Deep black color |
| Beech | Pale tan color, subtle grain |
| Mahogany | Warm brownish red tones |
| Padauk | Vivid orange-red color |
| Maple burl | Wild, chaotic figuring |
Some general tips on selecting inlay woods:
- Use woods with striking color contrasts between the main surface and inlays.
- Harder wood species hold intricate shape details better.
- Consider grain patterns and texture contrasts.
- Exotics offer dramatic colors but can be pricey. Domestic hardwoods work very well.
Troubleshooting Wood Inlays
Here are some common wood inlay problems and how to avoid them:
Inlay pieces are too loose in channels
Tune the fit with light sanding or shaving until pieces fit snugly without falling out when tipped vertically.
Inlay pieces don’t fit fully into channels
Re-route the channels slightly deeper. Make multiple light passes to slowly approach the depth.
Glue squeeze-out stuck on surface
Wipe away excess glue immediately before it dries using a damp cloth. Gently scrape dried glue carefully after curing.
Chips and tear-out around inlaid edges
Use a sacrificial backup board when routing channels through the full workpiece thickness.
Edges around inlay pieces visible
Sand surface flush starting with 120 grit paper up to 320 grit, taking care around thin edges.
Inlay pieces shrinking or swelling later
Make sure inlay and substrate woods have reached equilibrium moisture content before assembly.
Best Practices for Quality Inlays
Follow these top tips to help execute professional quality inlaid designs:
- Use ultra sharp router bits and replace when worn.
- Work slowly and make light passes when routing channels.
- Cut inlay pieces slightly oversized then tune for precision fit.
- Use backing boards to prevent blow-out.
- Clamp in multiple directions to seat pieces fully.
- Let glue cure fully before sanding and finishing.
- Pre-finish inlay pieces for stability.
- Start finishing with fine sandpaper and finish by hand.
Creative Wood Inlay Ideas
Looking for unique inlay inspiration? Here are some creative ways to use inlays in your woodworking projects:
Geography Map Inlays
Inlay a map of local state or country outlines in contrasting woods. Add cities or personal dates for custom details.
Song Lyric Inlays
Inlay meaningful song lyrics, poems, or quotes in script fonts. Use light and dark woods for distinction.
Family Tree Inlays
Design a family tree diagram with each relative’s name inlaid on branches or within shapes representing people.
Pet Silhouette Inlays
Cut out the profile shape of a pet animal or bird and inlay it into a table or plaque.
tolerant Inlays
Inlay designs featuring tolerant themes or awareness ribbons to match the cause.
Gaming Inlays
Inlay gaming symbols, favorite characters, or memorable scenes on a game table or board game box.
Hobby Inlays
Incorporate a musical instrument, favorite sport, car, or other hobby theme into your inlay artwork.
Monogram Inlays
Inlay stylized or script initials and monograms for a personalized touch. Use first names or couples’ initials.
Conclusion
The art of wood inlay opens up endless possibilities for making decorative impressions in woodworking projects. With some practice using the fundamental steps of designing, routing, cutting, fitting, gluing, and finishing, you can create stunning works of functional art. Approach inlaying with patience and precision, and you’ll be rewarded with professional quality results. Whether going for bold geometric statements or nuanced marquetry, the intricate beauty of wood inlay is a rewarding skill to develop.