Moving a shed that is already built can seem like a daunting task, but with some preparation and the right equipment, it can be done safely and efficiently. In this article, we will walk through the entire process step-by-step, from assessing the shed and planning the move, to preparing the new site, moving day logistics, and finally settling the shed into its new home. We will also provide tips on how to make the shed moving process as smooth as possible.
Page Contents
Assessing the Shed
The first step is to thoroughly assess the shed you need to move. This will help you understand what is involved and allow you to start planning the move. Here are some key things to assess:
- Size and weight – Measure the length, width, and height of the shed. Use these dimensions to calculate the approximate weight. Knowing the weight will determine how you move it.
- Construction – Is it wood, metal, or plastic construction? This will impact how to lift and transport it.
- Condition – Check for any structural issues or damage that may prevent moving it in one piece.
- Contents – Determine what is being stored inside the shed. These will need to be removed prior to the move.
- Current location – Note any obstructions around the shed, including trees, fences or other structures. This will impact how you can maneuver during the move.
Documenting these details will allow you to determine the equipment, manpower, and process needed to safely move the shed.
Planning the Move
With the shed assessment complete, you can start planning how to undertake the move. Here are key factors to consider:
Choose a moving method
The size and construction of the shed will determine the moving method. Typical options include:
- Rolling the shed – For smaller wooden sheds built on skids, you may be able to use leverage tools like bars or pipes to roll the shed on its skids.
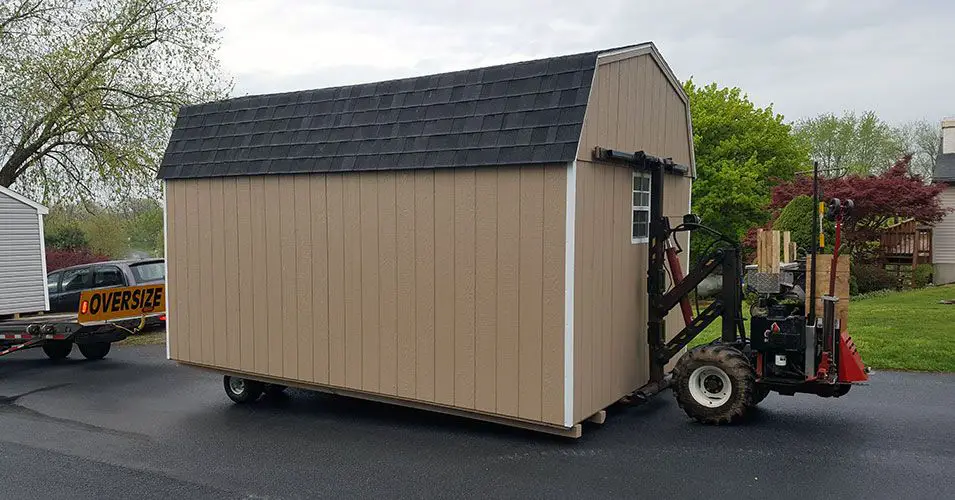
- Lifting and transporting – A small tractor with a forklift or telehandler can lift and carry the shed. Use nylon lifting straps to secure the shed.
- Disassembling – For larger sheds or those affixed to the ground, disassembling may be required to move it safely.
Prepare equipment and supplies
Based on the moving method, gather all required tools and equipment. This may include:
- Lifting equipment – Dolly, pallet jack, forklift, telehandler, etc.
- Moving tools – Bars, pipe, ratchet straps, chains, nylon lifting straps, etc.
- Vessel – Trailer, flatbed truck, etc. to transport the shed
- Building supplies – Lumber, hardware, tools to disassemble/reassemble shed
- Manpower – Friends, moving company, or construction crew
Do not attempt to move the shed without proper equipment and manpower.
Schedule the move
Choose a day to execute the shed move. Avoid high winds, rain or other adverse weather. Check that equipment and helpers will be available on the scheduled day. Notify relevant parties of the move day such as the property manager if renting.
Secure permits
Most jurisdictions require transport permits for moving any building wider than a certain threshold. Contact your local building department to check permit needs for shed moving based on the shed size. Obtain required permits well in advance.
Clear the route
Map out the route from the old location to the new location. Ensure the route is clear of all obstructions like low hanging wires. Contact utility companies if lines need to be raised while moving the shed. For long distance moves, plan a route avoiding underpasses, tunnels or low bridges.
Preparing the New Site
Before moving day, you need to fully prepare the new site where you want the shed located. Here are key site preparation tips:
- Level the ground – Use gravel, fill dirt or sand to create a level, compacted area for the shed foundation. This gives a solid base.
- Foundation – Pour a concrete slab, prepare a gravel/stone foundation or install piers for supporting the shed.
- Access route – Ensure the route from unloading point to new site is clear and accessible for moving the shed.
- Utilities – Have electric, water or other utility connections ready if the shed needs them.
Taking time to properly prepare the new site will make installation of the shed smooth and ensure proper structural stability.
The Day Before Moving Day
Completing pre-move preparations will make moving day as seamless as possible. Here are key tasks for the day before:
- Empty the shed – Remove all contents and store safely away from the moving area.
- Disconnect utilities – Unhook any electrical, plumbing or other utilities attached to the shed.
- Prepare moving route – Clear any debris, trim overgrown vegetation, notify relevant parties.
- Ready equipment/supplies – Stage all required equipment, tools, and hardware needed for the move.
- Check weather forecast – Ensure weather conditions will be favorable for the move.
- Notify contractor/helpers – Confirm everyone involved knows when and where to meet the next day.
Taking care of these items ahead of time prevents moving day delays and complications.
Moving Day Process
When moving day arrives, having a clear process will keep the shed relocation smooth and efficient. Here are the step-by-step stages of moving day:
1. Safety checklist
Start the day by reviewing safety protocols and ensuring everyone involved wears proper safety equipment like gloves, boots, hard hats, and safety vests. Establish hand signals for communication during the move.
2. Lifting/securing the shed
Follow the planned method to detach the shed, lift it onto the transport vessel, and securely strap it down. Use extreme care when lifting from the base. Work slowly and communicate clearly.
3. Transport
Drive slowly and cautiously along the pre-planned route. Watch for low wires, overhangs, weight limits, or other hazards. Have someone guide the driver to ensure proper clearance.
4. Unloading
At the new site, install blocking or supports on the foundation according to the lowering plan. Slowly position and lower the shed precisely onto the supports.
5. Installation
Once lowered, detach the lifting straps/chains. Align the shed into the exact position desired on the foundation. Level, square, and plum the shed, then anchor firmly in place.
6. Clean up
Remove all tools, debris, garbage, and equipment from site. Check for damage and repair if needed. Install utilities, seals, and any other finishing components.
Post-Move Checklist
After completing the shed move, there are still a few important tasks to perform:
- Reconnect utilities
- Secure all anchorage points
- Seal any gaps or joints
- Touch up paint/finishes
- Grade and landscape around the shed
- Return rented equipment
- Dispose debris/trash properly
- Retrieve contents and move into shed
Taking the time to check these items helps ensure your shed is structurally sound, looking good, and ready to use in its new location.
Tips for a Smooth Shed Move
Keep these tips in mind to help your shed moving project go as smoothly as possible:
- Overestimate size and weight to ensure adequate equipment
- Have more helpers than you think necessary
- Rent equipment for stabilize, lift, and transport safely
- Measure dimensions and check route multiple times
- Notify police and utility companies if road closure is needed
- Let nearby homes know about move date and possible impacts
- Keep shed centered and balanced during lifting and transport
- Work slowly with one overseeing communications and safety
Conclusion
Moving an existing shed may seem difficult, but breaking the project down into staged steps makes the process very manageable. With careful planning, safety precautions, the right equipment, and help, you can orchestrate a smooth shed relocation. Just take it slow, double check everything, and don’t be afraid to ask for help. Before long, your shed will be set up in its new home and ready for use once again.