Painting a faux brick wall can completely transform a room by adding visual interest, texture, and character. While faux brick painting may seem daunting, it’s actually a relatively easy DIY project that can be completed in a weekend. With some simple supplies, patience, and the right techniques, anyone can create the look of a realistic exposed brick wall without the hassle of demolishing and rebuilding.
In this comprehensive guide, we will walk through everything you need to know to paint a faux brick wall from start to finish. We’ll cover picking the right paint and supplies, prepping your wall, techniques for laying out your brick pattern, distressing, sealing, and much more. By the end, you’ll have the knowledge and confidence to tackle faux brick painting in any room. So grab your paintbrushes and let’s get started!
Page Contents
Choosing Paint and Supplies
The first step in any faux brick painting project is gathering the right materials. While you may be tempted to run to the hardware store and pick up whatever brick-colored paint you see first, not just any paint will do. For the best, most realistic results, you’ll want to keep the following criteria in mind when selecting your paint:
Flat or Matte Paint Finish
The paint you choose needs to be flat or matte. This non-reflective finish helps disguise imperfections and makes the bricks look more lifelike. Semi-gloss or glossy paint will look too shiny and plastic-y for faux brick.
Masonry Paint
Look for interior masonry paint, which is specially formulated to bond to concrete, stucco, and brick surfaces. This extra adhesion means the paint won’t easily peel or flake off like standard wall paints.
Brick Color Options
You’ll find faux brick paint in just about every brick shade imaginable from warm reds, burnt oranges, and tans to cool greys, whites, and browns. Consider the vibe you want for the space. Traditional red bricks exude a vintage, rustic feel. Grey bricks feel modern and industrial. Tan and buff bricks are warm and inviting.
Textured Paint Additive
For extra realism, you can purchase textured paint additive or actual brick texturing granules. This provides physical dimension that resembles the rough, bumpy surface of real brickwork. Simply mix the texturing particles into your paint.
Along with paint, here are a few other must-have supplies:
– Paintbrushes – Various sizes for edging and filling in
– Paint roller and roller cover for even base coating
– Pencil and ruler for measuring out brick pattern
– Chalk line for snapping gridlines
– Masking tape for crisp edges and grout lines
– Paint tray, rags, sandpaper (optional)
Prepping the Wall
Now that you’ve gathered your faux brick painting supplies, it’s time to start prepping the wall. Proper prep work helps ensure the paint adheres properly for a long-lasting brick effect. Here are the key steps:
Clean the Surface
Wipe down the wall with a damp cloth to remove any dust, grease or grime. Let the wall dry completely before painting.
Sand Glossy Surfaces
If the existing paint has a glossy sheen, sand it down to create a lightly textured surface for the new paint to cling to.
Fill Any Holes and Imperfections
Examine the wall and fill nail holes, cracks, or uneven joints with lightweight spackle or joint compound. Let dry and sand smooth.
Prime the Wall
Before painting, apply a high-quality primer like Zinsser’s Bulls Eye 1-2-3. This helps the faux brick paint adhere evenly for flawless results.
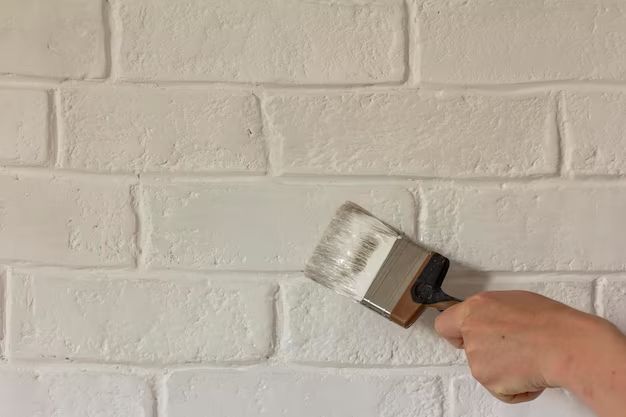
Now the fun part…it’s time to paint!
Painting Your Faux Brick Wall
To create the look of authentic brickwork, you’ll need to establish organized rows, establish realistic shadows, and add distressing for worn character. Follow these key steps:
Map Out the Brick Pattern
Measure out an evenly spaced grid to represent the grout lines between bricks. Use a level and chalk line to snap perfectly straight vertical and horizontal guidelines. Space gridlines based on the size of bricks you wish to simulate:
– Standard bricks = 8″ length by 2 1⁄4” height
– Queen/English bricks = 7 1⁄2” long x 2 1⁄2” tall
– Closure/Utility bricks = 3 1⁄2” long x 2 1⁄4” tall
– Jumbo bricks = 12” long x 2 1⁄2” – 3” tall
Base Coat the Wall
Use a paint roller to apply a solid base layer of your faux brick paint color. Cover the entire grid so the base coat is visible through the “grout lines” you’ll create later. Let the base coat dry fully before proceeding.
Paint the Brick Shapes
Now paint in your “bricks” within the grid using an angled sash brush. Hold the brush at a 45-degree angle as you apply the paint in each section to establish shadows and shape that replicates real bricks.
Add Grout Lines
Let the bricks dry completely, then tape off 1⁄4” to 1⁄2” wide grout lines between each brick shape. Apply two coats of white paint for the grout effect. Immediately pull off the tape after the final coat to reveal straight edges.
Distress the Brick
Once the grout has dried, use a rag or stiff bristle brush to lightly wipe and tap on the edges of the bricks. This removes paint and mimics nicks and worn areas for added realism. Apply selectively, not over the entire surface.
Seal the Paint
Lastly, apply a protective sealer like Polyacrylic over the finished faux brick design. This locks in the paint and protects your wall from scrapes, stains, and scuffs. Allow sealer to dry fully before enjoying your new faux brick accent wall!
Faux Brick Wall Design Inspiration
Part of the fun of faux brick is deciding on a brick pattern and color scheme that fits your style. Here are some inspiring examples to spark ideas:
Herringbone Faux Brick
The zig-zag herringbone pattern provides visual interest and dimension. Opt for contrasting brick and grout colors for greater definition.
Stacked Faux Brick
Stacking faux bricks in a running bond pattern is a classic look. Tip: Use extra thick grout lines around 1⁄2” wide for a dramatic effect.
Subway Tile Faux Brick
Long rectangular bricks in soft shades evoke subway tiles for a modern, clean-lined twist on faux brickwork.
Aged Faux Brick
Paint damaged, uneven bricks in antique hues for a timeworn, weathered vibe. Increase distressing and eliminate grout lines in areas to emulate crumbling ruins.
White Washed Faux Brick
Gently dragging white paint over red brick reproduces the distressed white wash technique popular in vintage homes.
Tips for the Most Realistic Faux Brick Finish
Follow these handy tips and troubleshooting tricks to help your hand painted brick wall rival the real thing:
Add Physical Texture
For added realism, mix brick texturing powder or small pebbles into the paint to replicate bumps and grooves. Apply in random patterns, not uniformly.
Vary Brick Colors
Custom mix a few shades of brick paint that are slightly different. Subtly alternating the colors makes the wall more convincing.
Avoid Perfectly Straight Lines
Hand draw the lines rather than using tape. Slight unsteadiness enhances the handmade look. Also distress the edges after removing tape.
Apply Darker Mortar in Corners
Look at real brick walls—the grout is often darker in corners and protected areas. Replicate this effect.
Seal Properly
Don’t skip sealing! Unsealed faux brick easily stains and scratches. Apply 2-3 coats of sealer and let dry fully.
Step Back Frequently
It’s easy to get caught up in details when painting. Take a step back occasionally to check the overall look. Make sure highlights and shadows are realistic.
Where to Paint Faux Brick Accent Walls
Once you’ve mastered the faux brick painting technique, you’ll find endless possibilities for where to apply it in your home:
Living Room Accent Wall
Warm up a formal living space by painting one wall with brick. Position furniture in front so the brick wall is a focal backdrop.
Fireplace Surround
Turn basic drywall around a fireplace into a stunning exposed brick design for visual interest.
Kitchen Backsplash
Skip tedious tile and use faux brick painting to transform the backsplash. Great behind stoves or open shelving.
Bathroom Accent Wall
Faux brick lends a trendy loft-like look to modern bathrooms. Contrast crisp white subway tile.
Bedroom Feature Wall
Create a cozy sleeping space with faux brick behind the bed or on one wall. Looks wonderful with wood tones.
Faux Brick Floor
You can even paint faux brick patterns on floors! Looks especially convincing on concrete in basements.
Faux Brick Wall Maintenance
While far easier than real brick, faux brick walls do require some periodic maintenance to keep them looking their best:
Touch Up Paint Chips
Refill any nicks in the paint to avoid damage worsening. Match the original colors as closely as possible.
Clean Stains
Wipe up spills immediately before they have time to set. Use a mild detergent and soft cloth. Avoid abrasive cleaners.
Remove Scuffs
Scuff marks on the sealer can often be cleaned off with some mild soap and water. Rinse thoroughly.
Reapply Sealer
Plan to reseal the faux brick every 2-3 years to maintain the protective barrier against moisture and grime.
Consider Retouching
If the wall develops stains or damage that normal cleaning can’t fix, a fresh coat of paint may be needed.
Conclusion
The beauty of faux brick is that anyone can achieve the textured, aged look of authentic brickwork without big demolition or renovation costs. With some careful planning upfront to gather the right supplies and envision your design, the painting process itself is surprisingly straightforward. Just take your time laying out the brick pattern, establish realistic shadows and dimensions, and distress the finish for added character. Sealing properly ensures your handiwork withstands everyday wear. In a weekend’s time, you can complete an eye-catching faux brick accent wall that convincingly mimics the real thing. Let your creativity run wild and transform ordinary spaces throughout your home with this easy faux painting technique.
| Brick Type | Length | Height |
|---|---|---|
| Standard Brick | 8 inches | 2 1/4 inches |
| Queen Brick | 7 1/2 inches | 2 1/2 inches |
| Utility Brick | 3 1/2 inches | 2 1/4 inches |
| Jumbo Brick | 12 inches | 2 1/2 – 3 inches |
Supply Checklist
- Flat masonry paint in brick colors
- Textured paint additive (optional)
- Paintbrushes in various sizes
- Paint roller and roller cover
- Pencil and ruler
- Chalk line
- Masking tape
- Paint tray, rags, sandpaper
- Polyacrylic sealer
How to Paint Faux Brick
- Clean and prepare the wall
- Map out a grid for the brick pattern
- Base coat the wall
- Paint in the brick shapes
- Tape off grout lines and paint
- Distress the bricks
- Seal the finished design
Here are a few tips for troubleshooting faux brick painting issues:
Problem: Brush strokes are visible
Solution: Ensure you are using a high-quality nylon or polyester bristle brush made for painting. Dip the brush in paint then tap off excess on the rim of the can before applying even coats.
Problem: Brick edges look fuzzy
Solution: Wait for each coat of paint to dry fully before applying tape for grout lines. Remove tape immediately after painting the grout and distress edges gently with a rag.
Problem: Paint isn’t adhering well
Solution: Always properly prep the surface by cleaning, sanding, and priming before applying faux brick paint. Ensure the base wall paint is matte, not glossy.
Problem: Grout lines don’t look straight
Solution: Use a level and chalk line to mark perfectly straight guidelines. Apply masking tape along the lines to paint sharp grout edges.
Problem: Brick looks too uniform
Solution: Hand draw lines instead of using tape. Gently distress edges after removing tape. Vary brick colors slightly for a natural look.
Faux brick painting is an easy, budget-friendly way to transform your home with beautiful, textured accent walls. With the right supplies and techniques, you can create brick effects with realistic shadows, grout lines, and variations. Avoid common pitfalls like brush strokes, fuzzy lines, and uniform bricks by following the tips above. Roll up your sleeves, mix some paint, and enjoy your newfound bricklaying skills without the backbreaking labor!