Painting with a roller is a great way to quickly coat large, flat surfaces like walls and ceilings. However, it can be tricky to avoid leaving unsightly roller lines and marks in the paint. The key is using the right techniques and tools to apply the paint smoothly and evenly. In this article, we will walk through the whole process step-by-step, from choosing the right roller and prep work to techniques for cutting in and applying the paint. Follow these tips and you will get professional-looking results free of roller marks every time.
Page Contents
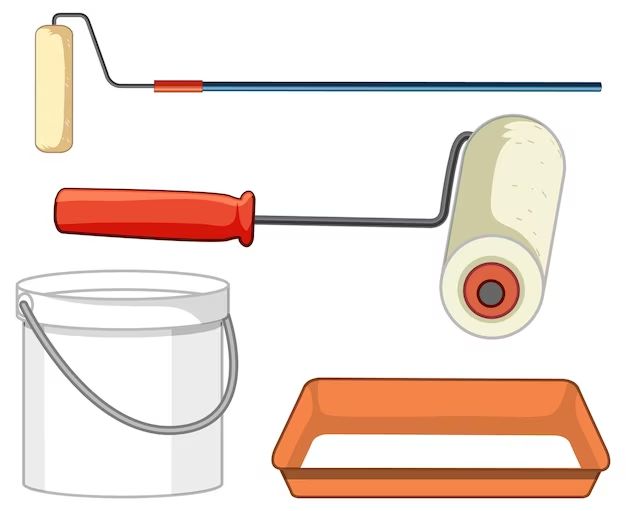
- 1 Choosing the Right Roller
- 2 Preparing the Surface
- 3 Choosing the Right Paint
- 4 Setting up Your Paint Tray
- 5 Cutting In Edges and Corners
- 6 Applying Paint with Roller
- 6.1 1. Fully Load Roller in Paint Tray Well
- 6.2 2. Roll Off Excess Paint On Ramp Again
- 6.3 3. Start 1-2 Feet From Corner or Edge
- 6.4 4. Apply Light, Even Pressure
- 6.5 5. Roll In “W” or “M” Shapes
- 6.6 6. Maintain Wet Edge and Work Quickly
- 6.7 7. Feather Edges When Joining Sections
- 6.8 8. Rinse Roller Frequently
- 6.9 9. Finish Section with Vertical Strokes
- 6.10 10. Work From Top To Bottom of Wall
- 7 Common Roller Mistakes To Avoid
- 8 When to Use Paint Brush vs. Roller
- 9 Conclusion
Choosing the Right Roller
The first key to avoiding roller lines is using the right roller for the job. The main factors to consider are nap length, roller width, and material:
Nap Length
The nap refers to the fuzzy fibers on the roller. Longer naps provide more texture, while shorter naps create a smoother finish. For smooth surfaces like drywall, choose a roller with a 1/4″ or 3/8″ nap. For semi-rough surfaces like plaster, go for 1/2″ nap. Rough surfaces like concrete require a longer 3/4″ nap.
Roller Width
Standard roller widths are 9″ and 18″. Wider rollers allow you to cover more surface area more quickly. But they can be trickier to control and often leave more visible lines. Narrower rollers give you more precision for cutting in tight spaces. In most cases, a 9″ roller is ideal for balancing speed and control.
Material
Rollers are made from synthetic fibers like polyester or natural fibers like lamb’s wool. In general, lamb’s wool is best for applying oil-based paints, while polyester works for both oil and latex paints. Look for a high-density roller with tightly bound fibers that will hold more paint and provide smooth application.
Preparing the Surface
Proper prep work is essential for getting flawless results with a roller. Here are some key steps:
1. Repair Any Imperfections
Fill holes, cracks and any other flaws with spackle or joint compound. Sand smooth once dry. This provides the roller with an even surface to glide across.
2. Clean the Surface
Wipe away any dirt, grease or old flaking paint with a degreasing cleaner. Rinse and let dry completely.
3. Sand Glossy Surfaces
For shiny surfaces, lightly sand to dull the sheen so paint adheres better. Wipe away dust.
4. Apply Primer
Prime bare drywall, plaster, wood, metal and masonry surfaces before painting. This allows the topcoat to go on smoothly.
5. Caulk Gaps and Seams
Fill any cracks around trim, corners, windows, etc. with caulk. This prevents paint bleeding. Let dry completely.
6. Cover Floors and Furniture
Use tarps or drop cloths to protect surrounding surfaces from paint drips and splatters.
Choosing the Right Paint
Picking the best type of paint for your roller application will also prevent visible roller marks:
– Latex Paint
Water-based latex paint levels out well and dries to a smooth, uniform finish. It’s ideal for minimizing roller lines on walls and ceilings.
– Flat or Eggshell Finish
Flat or eggshell paints have less sheen which helps hide roller marks better than glossy finishes. Satin or semi-gloss are also fine.
– High-Quality Paint
Higher end paints flow and spread evenly off the roller. Budget paints tend to be thinner and prone to uneven coating.
– Same Lot Number
When doing a large job, ensure all paint cans have the same batch number. Batches can vary slightly in color and finish.
Setting up Your Paint Tray
A quality paint tray is essential for proper roller loading and application. Look for sturdy plastic trays with angular corners to fit your roller. Make sure the well is deep enough to hold plenty of paint. Here’s how to set up your tray:
1. Pour Roughly 1/4 Inch of Paint Into Well
Too little paint requires constant reloading. Too much can be messy and waste paint. 1/4 inch depth is ideal.
2. Place Roller in Paint and Roll Back and Forth
Fully saturate the entire surface of the roller with paint to prevent uneven coating.
3. Roll Off Excess Paint on Ramp
This ensures you don’t overload the roller and drip paint everywhere. The roller should be wet but not dripping.
4. Refill When Paint Gets Below 1/8 Inch
Refill the well before it runs dry so the roller stays consistently loaded.
Cutting In Edges and Corners
Cutting in with a brush along edges, corners, moldings and ceilings is crucial for avoiding roller lines in those areas:
1. Use High-Quality Brush
Look for angled sash brushes with smooth, tapered bristles. These make clean, precise cuts.
2. Keep Brush Moving and Flow Paint On
Hold at slight angle and keep steady brush pressure. Avoid excessive brushing which creates visible strokes.
3. Make Long, Continuous Strokes
Cut in sections up to 2-3 feet at a time. Minimize stopping mid-wall – this leaves marks.
4. Blend Sections Together
Lightly feather out edges where sections meet to create seamless transitions.
5. Paint Ceiling Edges First
Cut along ceiling line before walls to avoid getting paint on ceiling when doing walls.
6. Do Wall Edges Before Main Wall
Similarly, cut in along trim, corners, windows etc. before rolling wall to prevent overlapping.
Applying Paint with Roller
Here are some key techniques for using a roller to apply paint smoothly and evenly:
1. Fully Load Roller in Paint Tray Well
Cover roller surface completely with fresh paint right before starting.
2. Roll Off Excess Paint On Ramp Again
Prevent drips by ensuring roller is saturated but not overloaded before touching wall.
3. Start 1-2 Feet From Corner or Edge
Position roller away from edges cut in with brush to minimize overlapping.
4. Apply Light, Even Pressure
Press down gently to flatten roller fibers. Heavier pressure squeezes paint unevenly.
5. Roll In “W” or “M” Shapes
Overlap these patterns as you work across and down the wall to ensure full, uniform coverage.
6. Maintain Wet Edge and Work Quickly
Avoid letting edges dry before rolling or you’ll see overlaps. Work in manageable sections.
7. Feather Edges When Joining Sections
Lightly roll where freshly painted areas meet to blend seamlessly.
8. Rinse Roller Frequently
Rinse in water while painting to prevent paint buildup on fibers. Spin dry before reloading with paint.
9. Finish Section with Vertical Strokes
Final downward strokes minimize drips, provide consistency, and properly align nap.
10. Work From Top To Bottom of Wall
Paint ceilings first, then upper walls, finishing with bottom walls to avoid drips messing up finished work.
Common Roller Mistakes To Avoid
Following proper roller techniques is crucial, but just as important is avoiding these common mistakes that lead to visible roller marks:
– Overloading Roller with Paint
Too much paint makes it impossible to apply evenly. Always roll off excess before starting.
– Insufficient Paint on Roller
If paint coverage is spotty, don’t just keep rolling. Fully reload the roller with more paint.
– Pressing Too Hard
Heavy pressure forces paint unevenly through the nap, creating heavy and light spots.
– Rolling Over Same Spot Repeatedly
Going over the same area builds up paint and leaves track marks. Move steadily across each section.
– Incorrect Roller Nap for Surface
Using too long of a nap leaves obvious texture. Too short of a nap doesn’t hold enough paint.
– Letting Edges Dry Before Rolling
This makes overlaps very obvious. Maintain a wet edge and work in manageable sections.
– Not Feathering Edges
Blending where sections meet keeps transitions smooth and concealed.
– Painting Over Wall Imperfections
Bumps and flaws will show through the paint. Properly prep and repair surfaces first.
When to Use Paint Brush vs. Roller
While rollers work well for large, open areas, paint brushes are better suited for certain spaces and situations:
| Use Paint Brush | Use Paint Roller |
|---|---|
| Intricate trimwork | Large open walls |
| Spindles, balusters | Ceilings |
| Inside cabinetry | Doors |
| Around hinges, handles | Baseboards |
| Small touch up spots | Stud walls |
Tips for Paint Brushes:
– Use high-quality natural bristle brushes
– Select tapered brush for trim; angled sash brush for cutting in
– Keep brush moving and don’t overbrush
– Gently remove excess paint before starting
– Use vertical strokes on trim; horizontal on siding
Tips for Paint Rollers:
– Prepare surface thoroughly – patch flaws, caulk gaps, sand, clean
– Use roller nap length suited for surface texture
– Load roller evenly and remove excess paint
– Apply gentle pressure and roll in consistent patterns
– Maintain wet edge and blend overlaps
Conclusion
The key to painting smoothly with a roller is using the proper prep work, techniques, and high quality application tools. This includes sanding and cleaning surfaces thoroughly, selecting the ideal roller nap and width, cutting in edges neatly with a quality brush, loading the roller properly, applying minimal pressure, feathering overlaps, and maintaining a wet edge. Avoid common mistakes like overloading the roller, letting paint dry between sections, and rolling over the same spot repeatedly. Follow these best practices for applying paint with a roller and you’ll get beautiful, professional-looking finishes free of unsightly roller marks every time.