Page Contents
Quick Answers
Plugging holes in hardwood floors can be tricky, but it is doable with the right materials and techniques. The key is to fill the hole with a material that matches the color and texture of the surrounding floor as closely as possible. Some quick answers to common questions:
– The best fillers are wood plugs, color-matched wood filler, or epoxy filler. Avoid regular wall spackle as it doesn’t match wood.
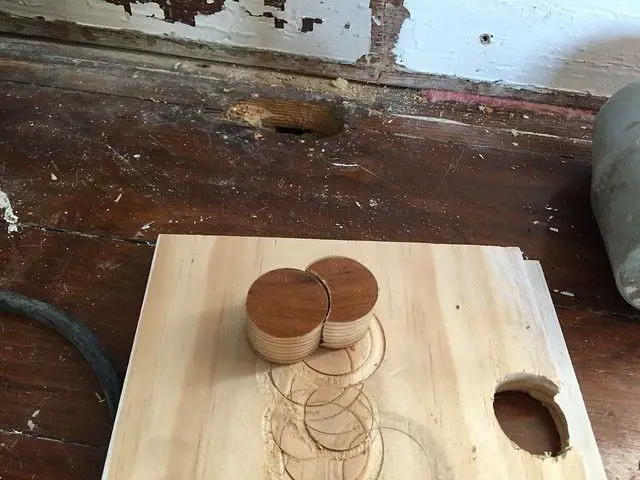
– Cut a plug slightly larger than the hole from a scrap piece of flooring. Glue and tap it in place. Or use a store-bought wood plug.
– Tint wood filler to match floor color. Test on a scrap first.
– Fill deep holes in layers, allowing each layer to dry before adding more. Sand flush when dry.
– Consider using clear epoxy designed for wood repairs for holes wider than 3/4 inch.
– Always refinish floor in the entire room so repair blends in. Stain and polyurethane may be needed.
Assessing the Damage and Planning the Repair
The first step is to examine the hole carefully. Look at the size, depth, and cause of damage. This will determine the best filling materials and repair technique.
Small nail holes less than 1/4 inch wide can often be repaired with regular wood filler. For larger holes up to 3/4 inch wide, use a wood filler designed for floors. Deep holes or those over 3/4 inch across will require a two-part wood epoxy filler.
If the hole goes all the way through the floor to the subfloor, the repair will need to be done in layers. Plug the bottom first with epoxy, then fill the top once the bottom layer has hardened.
It’s also important to identify what caused the damage. Pet urine or water damage may require sealing or treating the subfloor before filling the surface hole. Insect damage or dry rot will need the damaged wood removed and replaced.
Always check for matching scrap flooring pieces that can be used for repairs. The best solution is cutting a plug from leftover flooring that will match the existing floor perfectly.
Preparing the Hole
Proper prep is vital for the filler to adhere and blend in seamlessly. Follow these steps:
1. Sand the inside of the hole lightly to rough up the surface. This gives the filler something to grip.
2. Clean out debris, wax or grime from the hole with a vacuum, tack cloth and mineral spirits.
3. Tape around the hole to avoid getting filler on the surrounding finish.
4. Cut a wood plug if using this method. Make it slightly larger than the hole.
5. Mix two-part epoxy filler according to package directions if using for large holes.
Filling the Hole
Here are the basic steps for filling a round hole, depending on the method:
Wood plug:
1. Apply carpenter’s wood glue around the hole and on the plug.
2. Insert the plug and tap it gently with a hammer until flush.
3. Allow glue to dry completely.
4. Sand the plug flush with the floor.
Wood filler:
1. Press filler firmly into the hole, overfilling slightly.
2. Allow to dry completely per label directions.
3. Sand flush with floor using 120-150 grit sandpaper.
Epoxy:
1. Fill hole about 2/3 full with epoxy filler.
2. Let cure completely according to package directions.
3. Apply second layer if needed to fill completely flush.
4. Allow to fully cure, then sand flush.
Color Matching and Refinishing
Once sanded smooth, the filler likely will not match the surrounding floor color. Staining and refinishing is usually required.
For wood plugs, apply wood stain in layers until it blends into the floor. Add filler or epoxy on top if needed.
For filler, mix stain into the product until color matches the floor. Test on scraps first. You may also need to apply stains to the dried filler.
Always refinish the entire room, not just the repair area. This allows for uniform stain absorption and an even finish.
Follow these refinishing steps:
1. Sand floor with 120 grit sandpaper to rough up finish.
2. Clean floor and remove dust.
3. Apply stain in 2-3 coats, allowing drying in between.
4. Apply 2-3 coats of polyurethane, lightly sanding between coats.
5. Clean floor and put furniture back in place. Avoid area for 24 hours.
Preventing Future Damage
To prevent more holes in your hardwood floors:
– Install felt floor protectors under furniture legs.
– Keep pet nails trimmed.
– Remove shoes with spikes, cleats or damaged heels.
– Lift heavy furniture or appliances, don’t slide them.
– Remove small area rugs or mats that can trap moisture.
– Place drip pans under potted plants.
– Clean up spills immediately to avoid moisture damage.
With proper filling techniques and refinishing, holes in hardwood floors can be repaired to blend back in seamlessly. Pay attention to the details like color matching, proper sanding, and refinishing the entire room for best results.
Conclusion
Plugging a round hole in a hardwood floor requires careful preparation, the right filling material, coloring to match the surrounding floor, and refinishing to make the repair blend in. Small holes under 1/4 inch can be filled with regular wood filler. For larger holes up to 3/4 inch, use wood filler made for floors. Holes wider than 3/4 inch will need a two-part epoxy filler designed for wood repairs.
Cutting a plug from a scrap piece of the flooring is ideal if available. If not, tinting wood filler or epoxy with stain before filling will help with color matching. Always refinish the entire floor, not just the repair spot, for uniform staining and an even finish. Take steps to prevent future damage by using furniture protectors, keeping pet nails trimmed, and promptly cleaning up spills. With some patience and the proper materials and process, those round holes can disappear into your beautiful hardwood floors.