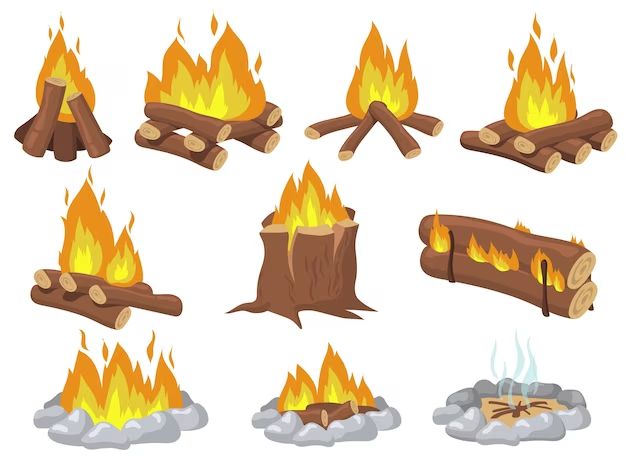
Building a fire in a fire pit is a fun activity that can provide warmth and ambiance for gatherings with family and friends. However, simply tossing logs into the pit haphazardly is not the best approach for starting and maintaining an efficient fire. Properly positioning the logs is crucial for allowing oxygen flow, enabling the fire to burn consistently and avoid smoldering. This article will provide key tips and considerations for optimal log placement when building a fire in a pit.
Page Contents
- 1 Choose Appropriately Sized Logs
- 2 Start With Kindling and Smaller Logs
- 3 Lean Logs Against Each Other
- 4 Leave Spaces Between Logs
- 5 Build a Log Cabin Shape
- 6 Use a Fire Starter Log
- 7 Add a Log Grate
- 8 Avoid Log Overhang
- 9 Check Log Moisture Content
- 10 Utilize a Fire Pit Cover
- 11 Elevate and Circulate Smaller Logs
- 12 Add Fire Starters Between Layers
- 13 Keep an Eye on Curling Bark
- 14 Add New Logs Carefully
- 15 Rotate the Logs Periodically
- 16 Avoid Log Collapse
- 17 Conclusion
Choose Appropriately Sized Logs
When selecting logs for your fire pit, bigger is not always better. Large logs can be difficult to position effectively and often lead to a smoldering fire. Instead, opt for logs approximately 3 to 5 inches in diameter. This smaller size allows you to more easily arrange them in the ideal configuration. The length of the logs can vary based on the size of your fire pit, but aim for logs around 12 to 16 inches long. This provides enough length to span the width of standard fire pits without overhanging excessively on the edges.
Start With Kindling and Smaller Logs
Before positioning the main logs, it is important to build up a starter base of kindling and smaller logs. Begin by placing balled up newspaper or fire starter cubes in the center of the pit. On top of this base, create a teepee structure with smaller sticks and logs no more than 1 to 2 inches in diameter. This initial foundation allows the kindling to catch easily when lit and provides a hot ember bed to ignite the larger logs you will add next.
Lean Logs Against Each Other
When you are ready to position the main fire logs, lean two logs side by side, angled slightly toward each other in the middle. Then lay another log horizontally across the two base logs, also angled slightly downward. Continue building up in this crisscross, leaned pattern with the remaining logs.
This configuration allows adequate airflow between the logs to feed the fire. Leaning the logs inward prevents them from rolling out as they burn. The slight downward angle of the horizontal pieces guides the flames downward into the fire bed.
| Log Position | Purpose |
|---|---|
| Leaned inward | Prevents rolling and aids airflow |
| Angled downward | Directs flames into fire bed |
Leave Spaces Between Logs
While you want the fire log structure to be stable and secure, it is important not to pack the logs too tightly. Leaving 1 to 2 inches of space between the logs allows for proper oxygen circulation. This brings in fresh air to feed the fire. If the logs are stacked too densely, the fire is deprived of oxygen and will be challenging to maintain.
Build a Log Cabin Shape
For an organized look and efficient fire burn, aim to build the overall log structure into a cabin shape. Start with two parallel base logs and layer horizontal logs at ascending angles on top of them. Continue layering in this compact log cabin configuration, leaving air gaps between the logs as previously mentioned. This orderly shape maximizes air intake and allows the fire to light easily and spread consistently across the log pile.
Use a Fire Starter Log
For an extra boost when lighting the logs, consider using one fire starter log in the stack. Fire starter logs are made of sawdust and wax that maintain a long, hot burn. Place the fire starter on the bottom layer of logs when building the pile. This provides an initial surge of concentrated heat to help the kindling and other logs ignite. Choose starter logs labeled as non-toxic and environmentally friendly when possible.
Add a Log Grate
Positioning a log grate inside the fire pit provides an effective foundation for structuring the logs. The grate raises the logs slightly above the fire pit floor to promote air intake from below. Look for durable log grates made from heavy-duty steel. Position the grate securely centered in the pit before placing and leaning the fire logs inside it. The grate’s sturdy base prevents shifting or collapse of the log pile.
Avoid Log Overhang
When positioning the logs, be careful to avoid excessive overhang beyond the edges of the fire pit. Logging hanging too far out over the open pit can lead to instability when the logs burn down. The goal is to keep the log structure compactly contained within the inner perimeter of the pit itself. Move and adjust any logs that protrude too far across the pit edges.
Check Log Moisture Content
Dry logs are crucial for a properly burning fire. Wet or green logs will dampen the fire, create more smoke, and lead to slow burning. Always check your logs for moisture before placing them. Hold the logs up to your cheek or nose. If you detect any moisture or the wood feels cold, it is still too wet or green to burn efficiently. Allow wet logs to dry out thoroughly before using them in your fire pit.
Utilize a Fire Pit Cover
Investing in a durable cover for your fire pit is highly recommended. Waterproof covers protect the firewood from getting wet when not in use. They also prevent excess ash buildup in the pit. Position the cover securely over the fire pit anytime logs will be left for extended periods between fires. Keeping the logs dry underneath enhances their readiness to ignite and burn.
Elevate and Circulate Smaller Logs
Do not just pile smaller logs in a heap at the base. Instead, evenly distribute and layer them throughout the larger log structure. Use the smaller pieces as separators between the big logs. This allows heat and air to circulate effectively around each portion of the log pile. The smaller logs will dry out and catch fire quickly to spread to the larger logs.
Add Fire Starters Between Layers
For an extra ignition boost, place commercial fire starters between some of the log layers as you build the stack. Usage of 1-2 starters between layers is generally sufficient. Avoid excessive starter use, as this can create overly intense flames. Place the starters strategically within the log pile to help initiate burning.
Keep an Eye on Curling Bark
As the fire begins burning, keep an eye out for any curling bark peeling off the logs. If bark detaches it can pop away from the fire, creating a safety hazard. Use a poker or tongs to frequently push any curling pieces of bark back into the fire as needed. Otherwise, remove the detached bark from the pit entirely.
Add New Logs Carefully
When it comes time to add fresh logs to a burning fire, exercise caution. Do not hastily toss logs into a roaring fire, as this can spread embers. Instead, gently place new logs on the edges of the existing fire. This allows them to ignite gradually. Pushing unburned logs directly into the flames causes excessive smoke and sparks.
Rotate the Logs Periodically
For the most even and complete burning, periodically rotate and shift the log structure. Use a poker or tongs to move the positions of logs that are fully charred. This brings any remaining unburned sections into the heat. Rotating the logs helps sustain the fire intensity and prevent premature smoldering. It maximizes consumption of the wood.
Avoid Log Collapse
Be careful that the stacked log structure does not collapse inward on itself, smothering the flames. If needed, temporarily remove logs and rearrange ones that begin slumping downward. Return the logs to a secure leaning position to maintain ample air circulation. Collapsed logs block oxygen and lead to reduced fire performance.
Conclusion
Properly positioning firewood logs takes some trial and error, but the right configuration results in a vibrant, lasting fire. Use appropriately sized logs and build them into a stable, well-spaced structure. Keep the airways between logs unobstructed and elevate smaller logs throughout. Employ fire starters strategically as aids when lighting the wood. With the right positioning techniques, your fire pit logs will provide cozy, smokeless fires to enjoy.