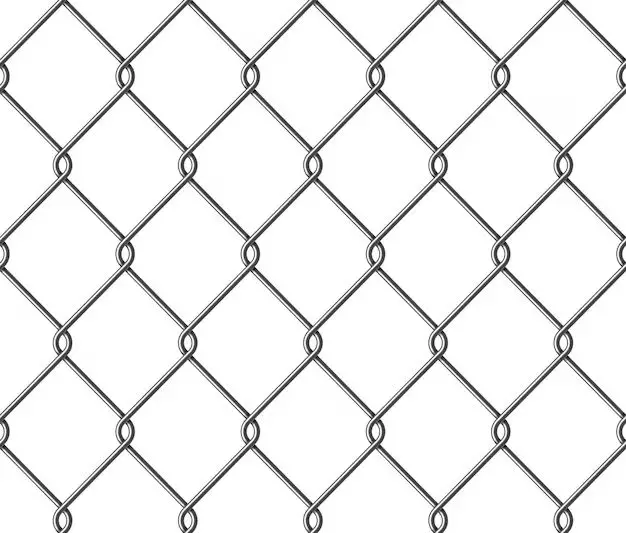
Painting a chain link fence can help protect it from the elements and make it more visually appealing. However, proper surface preparation is crucial for the paint to adhere correctly and provide maximum protection. There are several key steps involved in preparing a chain link fence for painting.
Page Contents
- 0.1 Assess the Current Condition of the Fence
- 0.2 Clean the Fence Thoroughly
- 0.3 Make Any Needed Repairs
- 0.4 Remove or Protect Nearby Plants and Objects
- 0.5 Sand and Spot Prime Rusted Areas
- 0.6 Mask Off Areas Not Being Painted
- 1 Choosing the Right Paint and Supplies
- 2 Applying the Paint
- 3 Safety Tips
- 4 Maintenance Tips for a Painted Fence
- 5 Common Painting Problems and Solutions
- 6 Conclusion
Assess the Current Condition of the Fence
Start by examining the current state of the fence. Look for areas of rust, chipping/peeling paint, corrosion, and other damage. Heavily rusted or corroded areas will need to be sanded and primed before painting. Make notes on any repairs needed so you can address them before painting.
Clean the Fence Thoroughly
Remove all dirt, mildew, oil, grease and other contaminants from the fence surface. A pressure washer is ideal for this, use a fan tip and keep the pressure below 1500 psi to avoid damaging the fence. Work systematically from the top down. For hard to reach areas, use a scrub brush and concentrated degreaser. Rinse thoroughly with clean water when finished.
Make Any Needed Repairs
Inspect closely for any loose wires, missing tension bands, damaged posts, and bent/broken links. Repair as needed so the fence is structurally sound before painting. Severely damaged links or sections may need replacement.
Remove or Protect Nearby Plants and Objects
Cover any nearby plants, structures, vehicles or other items that could get paint on them. You may need to temporarily remove vegetation growing on/near the fence. Use tarps or drop cloths to protect patios, sidewalks, etc.
Sand and Spot Prime Rusted Areas
For heavily rusted spots, scrub with sandpaper or steel wool to remove loose rust. Wipe clean, then spot prime with a rust-inhibiting metal primer. Allow primer to fully dry before painting.
Mask Off Areas Not Being Painted
Use painter’s tape, plastic sheeting, or cardboard to cover any areas you don’t want painted. This includes posts, gates, and any decorative details if not painting them. Remove masking materials quickly after painting before the paint has time to dry.
Choosing the Right Paint and Supplies
The right paint and tools will make prep and painting much easier. Consider the following:
Latex or Oil-Based Paint
Latex paints are easier to use and clean up. Oil-based provides a harder, more protective finish but requires mineral spirits for cleanup. For most DIYers, latex paint is the best choice.
Flat, Satin, or Gloss Sheen
Flat paint hides imperfections best. Satin or gloss have more sheen and are easier to clean. Consider how much “wear and tear” the fence will get.
Exterior Paint Formulated for Metal Surfaces
Be sure to choose an exterior paint specifically made for metal fences and gates. The label should indicate it’s formulated for metal, iron, steel or wrought iron.
Spray Paint, Roller or Brush?
Spray painting is the fastest method, but requires masking off a much larger area. Roller painting goes quickly once set up but can be messy. Brushing takes the longest but provides good control.
Other Helpful Materials
Paint tray, roller covers, disposable paint brushes, paint-specific cleaning solutions, Primer (as needed), rags, drop cloths, masking tape, plastic sheeting, sandpaper, etc.
Applying the Paint
Once you’ve prepped the surface and have your paint and supplies ready, follow these tips for a smooth painted finish:
Prime First If Needed
For new chain link or rusted areas that have been sanded, apply a coat of primer first. Allow to dry fully before painting.
Paint in Small Sections
Paint just a few pickets or links at a time, completing each section before moving on. This prevents drips and runs in the paint.
Work Systematically from Top to Bottom
Paint the upper railing and top cross-members first, then work your way down methodically section by section.
Apply Paint Generously and Evenly
Load the roller or brush well to allow maximum coverage in each stroke. Avoid skimping on paint. Apply evenly to avoid thin spots.
Work Both Sides at Once
Paint a section on both sides in one go before moving lower. This seals both sides while minimizing drips through the fence.
Allow Proper Dry Time Between Coats
Check the paint can label and allow sufficient dry time before applying a second coat. This prevents tackiness, imprints and other problems.
Apply Two Coats for Best Durability
After full drying of the first coat, apply a second coat for maximum protection and longevity. Allow to fully cure before exposing to weather and wear.
Safety Tips
Painting a chain link fence involves some common safety hazards. Keep these tips in mind:
Set Up Ladders Safely
Use sturdy, rubber-footed ladders. Have someone stead the ladder when working up high. Never lean a ladder against the fence.
Wear Gloves and Eye Protection
Paint can irritate skin and eyes. Wear appropriate gloves and eye coverings, especially if spraying paint.
Use Drop Cloths
Lay canvas drop cloths or tarps anywhere paint could drip or spill. Overspray can travel surprising distances.
Ventilate Well When Spraying Paint
Spray painting requires airborne paint particles. Ensure adequate airflow to prevent inhaling paint. Wear a mask if needed.
Dispose of Paint and Materials Properly
Allow paint cans to dry fully before disposal. Clean brushes and rollers thoroughly. Dispose of all materials according to local regulations.
Maintenance Tips for a Painted Fence
Regular maintenance will keep your freshly painted fence looking its best:
Allow Curing Time Before Cleaning
Give the paint at least 2 weeks before attempting to clean the surface. Test a small area first.
Clean Gently with Mild Cleaner and Soft Brush
Use a specially formulated paint cleaner and a soft brush to avoid damaging the painted surface. Avoid abrasive scouring pads. Rinse thoroughly.
Inspect Regularly for New Damage
Look for signs of new rust, nicks, scratches or other damage appearing through the paint so you can touch up quickly.
Plan to Re-Paint Every 3-5 Years
Depending on climate, expect to need repainting every 3-5 years. Follow all surface prep steps before reapplying paint.
Address Minor Cosmetic Issues Promptly
Don’t allow rust, mildew stains or damaged paint to worsen. Spot treat issues as soon as you notice them.
Common Painting Problems and Solutions
Despite proper preparation, you may encounter some painting problems. Here are some potential issues and how to avoid or correct them:
Problem: Paint Not Adhering to Surface
Solution:
- Ensure surface is free of all contaminants
- Allow sufficient drying time between coats
- Use proper primer if painting over slick or glossy surfaces
Problem: Drips, Runs and Sags
Solution:
- Avoid applying too much paint per stroke
- Brush out excess paint as you go
- Maintain wet edge and work systematically
- Hold sprayer closer to surface
Problem: Paint Peeling or Cracking
Solution:
- Scrape away all loose paint
- Sand edges smooth before repainting
- Use paint formulated for metal
- Allow proper dry time between coats
Problem: Uneven Coverage
Solution:
- Apply enough paint to fully saturate the surface
- Maintain a wet edge as you paint
- Use multi-directional strokes
- Finish with roller in one direction
Problem: Bubbling
Solution:
- Do not overbrush when applying paint
- Apply in cooler temperatures or shade
- Allow proper dry time between coats
- Gently re-brush bubbles smooth
Conclusion
While it takes some work, preparing and painting a chain link fence properly will provide great results. By following the steps here for cleaning, repairing, choosing the right paint, prepping the surface, applying carefully, and ongoing maintenance, you can get a durable, attractive painted finish that will last for years on your chain link fence.