Preparing walls for painting after removing old wallpaper can be a challenging process, but taking the proper steps will ensure your new paint job looks smooth and professional. There are several key things to keep in mind when prepping walls post-wallpaper removal, including cleaning the surface thoroughly, repairing any residual adhesive or damage, assessing the wall texture, and priming before painting.
Page Contents
- 1 Step 1: Remove any remaining wallpaper and adhesive
- 2 Step 2: Clean and sand the walls
- 3 Step 3: Spot repair any holes, cracks, or damage
- 4 Step 4: Evaluate and repair wall texture
- 5 Step 5: Seal stains, smoke damage, or paneling glue
- 6 Step 6: Fill seams between drywall sheets
- 7 Step 7: Apply primer to the wall
- 8 Step 8: Caulk along trim, moldings, and ceilings
- 9 Conclusion
Step 1: Remove any remaining wallpaper and adhesive
Once you’ve removed the top layers of wallpaper, take a close look at the wall to check for any scraps of paper or leftover adhesive. Any remaining material can cause lumps or uneven surfaces when you repaint, so it’s important to fully strip the wall down to the bare surface.
Use a wallpaper scoring tool, putty knife, or scraper to get into corners and crevices to remove all traces of adhesive. Take your time with this step—rushing can leave adhesive residue behind. As you work, keep a bucket of hot, soapy water nearby to clean your tools and keep the area lubricated.
If there are thick clumps of old wallpaper paste left behind, try using adhesive remover or vinegar to break the paste down. Spray or wipe liquid adhesive remover onto the paste, let it soak for 5-10 minutes, then scrape off. Distilled white vinegar also helps dissolve adhesive—wet the area, let it sit for several minutes, then scrub with a stiff brush.
Be patient and methodical to get the walls completely clean. Any leftover material will show through the new paint if not properly removed.
Step 2: Clean and sand the walls
Once all remnants of the old wallpaper are gone, give the walls a thorough scrubbing with TSP (trisodium phosphate) cleaner. This heavy-duty product helps remove additional adhesive residue, grease, and other grime.
Mix the TSP powder with warm water according to package directions and apply to walls using a sponge or rag. Let it sit for about 10 minutes before scrubbing. Rinse well with clean water afterward.
Allow the walls to fully dry, then sand them lightly using 150-220 grit sandpaper. This helps smooth any remaining bumps, scratches, or uneven areas for the best painting surface.
Vacuum the walls thoroughly after sanding to remove all dust and debris. The wall needs to be completely clean before priming and painting.
Step 3: Spot repair any holes, cracks, or damage
With the wallpaper gone, you may notice holes, divots, cracks, or other surface damage that were previously hidden. Take time to spot fill any imperfections with spackling paste using a putty knife.
Look closely across the entire surface and gently run your hand over the wall to find any flaws. Apply spackling paste, let dry completely, then sand smooth.
For larger holes or widespread cracking or damage, you may need to skim coat the entire wall surface with joint compound. Use a putty knife to fill any holes and spread a thin, smooth layer over the entire wall.
Let the joint compound fully dry, then sand to create an even surface. This helps level the wall for a seamless painted finish.
Step 4: Evaluate and repair wall texture
Underneath that old wallpaper, you may find a perfectly smooth surface ready for painting. But it’s more likely you’ll need to recreate some of the original wall texture before painting over it.
If the drywall underneath is completely smooth, you’ll want to add some texture back before painting. This helps the new paint adhere properly and avoids seeing every little imperfection underneath.
There are a few options for matching existing wall texture:
- Knockdown texture – Mix joint compound with water to a thin consistency. Apply to the wall with a trowel, then knock off the high points with the trowel. This leaves a bumpy texture when dry.
- Orange peel texture – Similar to knockdown but created by stippling the wet joint compound with a brush. Leaves a mottled texture when dry.
- Popcorn texture – Applied using a pressurized sprayer and popcorn ceiling texture mix. Gives a bumpy, cottage cheese-like finish.
Take note of the surrounding wall texture and experiment on scrap drywall to match it as closely as possible. Allow your texture material to fully dry before priming or painting.
Step 5: Seal stains, smoke damage, or paneling glue
In addition to wallpaper adhesive, you may run into other pre-existing issues like water stains, smoke damage, or glue from removed paneling.
For water stains or smoke damage, use a stain-blocking primer to seal these issues before painting. Oil-based primers work best for blocking stains and odors.
If you’ve removed paneling glued directly to the wall, there will likely be a glue residue left behind even after cleaning. Seal this with an oil-based primer as well.
Applying primer over stains, smoke residue, and paneling glue prevents them from bleeding through or discoloring the new paint job.
Step 6: Fill seams between drywall sheets
With the wallpaper down, you may notice the seams between sheets of drywall for the first time. Any gaps or uneven areas around drywall seams can telegraph through the new paint.
Use seam sealer and a drywall knife to fill any spaces between sheets of drywall. Apply seam sealer over each joint and feather out the edges about 8 inches wide. Let it dry completely, then sand for a smooth surface.
On freshly finished drywall, you may want to “pre-fill” the seams before priming and painting. This prevents cracks from opening up later as the home settles.
Step 7: Apply primer to the wall
Once all repairs are complete and the wall is clean and smooth, apply a coat of high-quality primer over the entire surface. Priming creates a fresh base that helps new paint adhere evenly.
For previously painted walls, a standard all-purpose primer is usually sufficient. But if you’ve done extensive drywall repairs or added texture, use a drywall primer to seal the porous surface.
Use a roller with a 1/4-inch nap and fully coat the walls from top to bottom. Make sure to get into inside corners and edges. Allow the primer to dry fully before painting.
Priming post-wallpaper removal not only ensures proper paint adhesion but also helps conceal any remaining imperfections for a flawless painted finish.
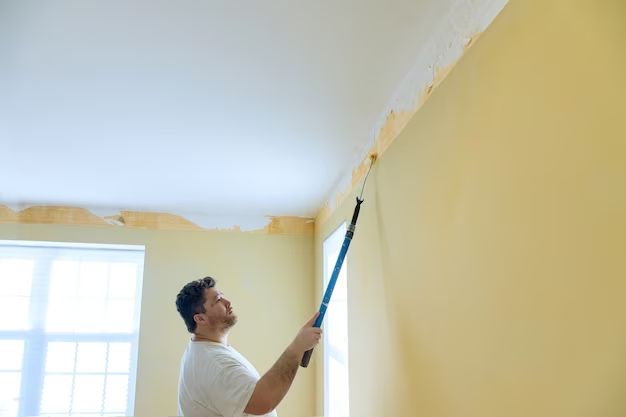
Step 8: Caulk along trim, moldings, and ceilings
While the primer dries, run a bead of paintable latex caulk along the joints and edges where the wall meets trim, baseboards, crown molding, and the ceiling. This helps create clean, defined painted edges with no gaps or overlap.
Use a caulk gun or squeezable caulk tube to neatly fill these joints. Wet your finger and smooth the caulk into a thin bead, wiping away any excess.
Let the caulk dry completely before painting. Caulking these areas results in noticeably crisper paint lines.
Conclusion
Prepping walls for painting after removing wallpaper is labor-intensive but worth the effort. Taking time to properly clean, repair, prime, and caulk the surface will ensure your fresh paint job looks clean, smooth, and professional.
Be patient and don’t rush the process. Address any underlying issues like residual adhesive, stains, or texture irregularities before painting. Use high-quality primer and caulk and allow proper drying time between steps.
With the right prep work, you can end up with walls that look better than new and are ready to decorate however you choose.