Reclaimed wood flooring is a popular trend in home decor, providing rustic charm and eco-friendly appeal. However, before reclaimed wood can be installed as flooring, it requires proper preparation to ensure it is structurally sound and visually appealing. The preparation process involves cleaning, sanding, repairing, and finishing the wood. With the right techniques and tools, you can transform weathered barn boards, wine barrel staves or other salvaged wood into beautiful, durable flooring.
Page Contents
What is reclaimed wood?
Reclaimed wood is lumber that has been previously used for another purpose and rescued from places like old barns, factories, or homes. Unlike fresh-cut wood, reclaimed wood has a rich patina and history that adds character. Using reclaimed wood for flooring gives it a new life, prevents useful materials from ending up in landfills, and reduces demand for new lumber. Types of wood commonly used include oak, pine, hickory, chestnut, and maple. The age, source, and former use of the wood impacts its look and structural integrity.
Assessing the wood
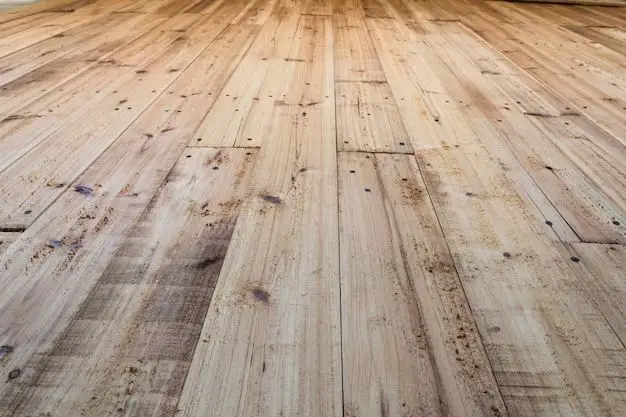
Once you have acquired reclaimed wood, lay it out and assess each board. Check for:
- Rot or insect damage: Any boards with advanced rot or insect burrows should be discarded or used for another purpose.
- Nails, screws or metal: Remove protruding nails, screws, and other metal hardware.
- Warping and cupping: Slightly warped boards can be used, but anything extremely warped or cupped should be set aside.
- Cracks and holes: Small surface cracks and knotholes can add character, but large splits or gaps will need repairing.
- Wood species and grade: Sort boards by species and grade out the best boards for the most visible areas.
Set aside any unusable boards to use for a different project.
Cleaning the wood
Before sanding, the boards need to be deeply cleaned:
- Use a pry bar to remove any remaining nails, screws or staples.
- Sweep away dirt and debris with a stiff broom.
- Scrub planks with a deck brush or belt sander using a detergent solution.
- Rinse thoroughly and allow to fully dry.
For boards with a glossy finish or thick paint, you may need to use a chemical stripper first to remove old varnish, polyurethane, or paint. Follow the product directions closely.
Sanding the wood
Sanding accomplishes several goals:
- Smooths rough-sawn surfaces
- Removes remaining dirt, stain, and paint
- Evens out minor scratches and wear
Work through progressively finer grits of sandpaper, starting with 60-80 grit to aggressively remove material, then progressing to 100, 120, and 150 grit for smoothing. An orbital sander makes quick work of sanding boards. Be sure to sand with the wood grain, not against it. Sand both faces and edges of each board.
Vacuum after each pass to remove dusty debris. This helps keep sandpaper from clogging. Continue sanding until the boards feel smooth and look even.
Repairing damage
There are a few options for repairing cracks, holes, and other defects:
Fill small holes and cracks with epoxy
Mix colored epoxy filler and work it into cracks or knotholes with a putty knife. Allow to dry completely, then sand smooth. Select a color that matches the wood tone.
Plug larger holes and gouges
Cut plugs from a matching piece of wood in the same species and grain orientation. Glue the plugs into holes and sand flush after drying.
Use wood filler for minor defects
Tint wood filler to match the color of the boards. Fill any gouges, scrapes or small holes. Sand smooth after hardening completely.
Epoxy consolidation for checking or splits
For wood with deeper cracking or split ends, use a thin epoxy designed for stabilization. This helps strengthen the wood.
Wood butter uneven surfaces
Rub a wood butter product over areas of uneven wear to even the appearance. Wipe away excess after it penetrates.
Finishing reclaimed wood
The right finish protects the wood from wear while enhancing its natural beauty:
Choose a clear, matte finish
A clear, matte finish allows the varied tones and texture of the wood to show through while providing protection from scratches and spills. Satin polyurethane is a good choice.
Stain to even tone, if desired
For a more uniform appearance, apply a stain matching the darkest tones in the wood before applying a protective coat. Test on an inconspicuous spot first.
Apply 2-3 coats
Use a high quality brush or lambswool applicator to apply polyurethane or other water-based finish. Allow each coat to fully dry 24 hours before applying the next.
Lightly sand between coats
Use 220 grit sandpaper between coats to smooth dust nibs or fibers for an ultra smooth final result. Remove dust before applying the next coat.
Consider a sealant for extra protection
In high traffic areas, add a layer of water-based sealant like polycrylic as a final step. This adds spill resistance.
Installing reclaimed wood flooring
Once the boards are prepped, you’re ready to install them as flooring. There are a few approaches:
Glue-down installation
This involves spreading adhesive on the subfloor and setting boards in place row by row. Offsets and tight seams create the visual appeal.
Nail-down installation
Boards are nailed to the subfloor through the tongues at angles. This is a traditional approach suitable for wider plank floors.
Floating installation
Boards are glued together utilizing the tongue and groove design and laid as a floating floor. The floor is not attached to the subfloor.
See the NWFA guidelines for specifics on installing reclaimed wood flooring over concrete vs. wood subfloors. Always use proper safety gear like goggles, masks, and knee pads during installation. Take care to set consistent gaps and create neat cutouts as needed.
Conclusion
Installing a reclaimed wood floor is an intermediate level DIY project that’s very achievable for a committed do-it-yourselfer. With the right preparation and protection, you can turn salvaged lumber into a stunning, eco-friendly floor that wears beautifully for decades. Pay close attention to cleaning, sanding, and finishing techniques for best results. And be sure to assess all boards and repair or replace any that are structurally unfit. With patience and care, you can create a unique, welcoming floor that shares the stories and charm of wood’s history.
| Reclaimed Wood Preparation Step | Supplies Needed |
|---|---|
| Assessing boards | Tape measure, pry bar, hammer |
| Cleaning wood | Broom, scrub brush, deck cleaner, hose |
| Sanding | Orbital sander, sandpaper (60-150 grit), vacuum |
| Repairs | Wood filler, epoxy, wood plugs, wood butter |
| Finishing | Polyurethane, stain, applicators, 220 grit sandpaper |
| Type of Damage | Best Repair Method |
|---|---|
| Small holes and cracks | Colored epoxy filler |
| Larger holes | Wood plugs |
| Minor defects | Wood filler |
| Deep cracks | Epoxy consolidation |
| Uneven surfaces | Wood butter |