Putting a light switch on a cord can allow you to control a lamp or other electrical device remotely, without having to walk over to a wall switch. This can be convenient in many situations, like controlling a reading lamp from your bed or operating holiday lights from across the room. Installing a light switch on a cord is a relatively simple project for a home DIYer with basic electrical knowledge.
Page Contents
Materials Needed
To install a light switch on a cord, you will need the following materials:
- Light switch and cover plate
- Short length of electrical cord with plug
- Wire strippers/cutters
- Wire nuts
- Electrical tape
- Screwdriver
Make sure to get a switch rated for the amperage of the device you want to control. Standard light switches are typically rated for 15 amps, which is sufficient for most table lamps and holiday lights. For larger loads you may need a heavy duty switch.
Steps to Install
Follow these steps to safely install a light switch on a cord:
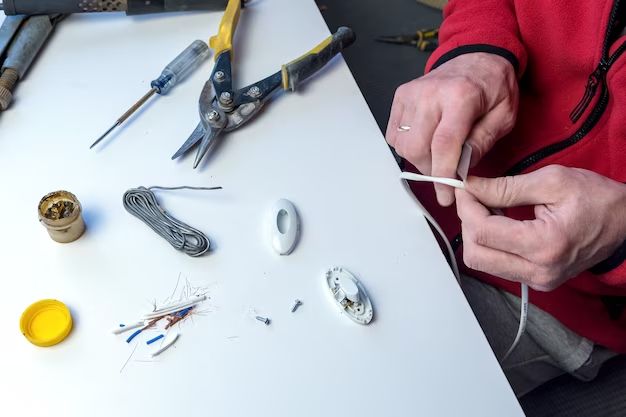
- Unplug the cord you are installing the switch on and cut it about 2 feet from the plug.
- Strip back a few inches of the outer insulation on both cut ends of the cord.
- Inside there will be two or three inner insulated wires – a black (hot), white (neutral) and sometimes green (ground). Strip about 1/2″ of insulation off each inner wire.
- On the plug end, connect the black wire to one of the screw terminals on the light switch using a wire nut. Connect the white wire to the other switch terminal.
- At the cut end with the device/lamp, connect the black wire to the opposite switch terminal from the black on the plug end. Attach the white to the remaining terminal.
- Twist the wire nut connections tightly and wrap each one with electrical tape for a secure connection.
- Mount the light switch in its cover plate and secure with the screw.
- Carefully tuck all the connected wires into the electrical box.
- Attach the cover plate to the box to complete the installation.
Make sure all wire connections are secure and insulated properly. Turn the lamp/device on to test the switch and make any adjustments if needed. Now you can control the light from anywhere along the extension cord!
Safety Tips
When working with electrical wiring, be sure to follow these safety precautions:
- Turn off power at the circuit breaker before starting work.
- Use caution when working inside electrical boxes – never touch bare wires.
- Make sure your hands are dry and you are not standing in water when making connections.
- Double check that all wire connections are tight and insulated with tape.
- If you are uncomfortable working with household electrical, consider hiring an electrician.
Choosing a Cord
When selecting a cord to install your light switch on, consider these factors:
- Length – Measure how long the cord needs to be to reach from the outlet to the lamp location.
- Thickness – Use a thicker gauge cord for high wattage lamps to avoid overheating.
- Indoor vs. Outdoor – Outdoor cords are more durable for outdoor holiday lighting.
- Grounded – Choose a grounded cord for safety and noise reduction.
Here are some recommended cords for light switches:
| Load | Cord Type |
|---|---|
| Table lamp <100W | 18 gauge indoor grounded cord |
| Clamp work light <150W | 16 gauge indoor grounded cord |
| Outdoor holiday lighting | 16 gauge outdoor grounded cord |
Alternative Options
While installing a light switch on a cord is one option, there are also some other ways to be able to control a light remotely:
Smart Light Bulbs
Smart bulbs like Philips Hue can be controlled from an app on your phone or by voice assistants like Alexa. No need to install switches.
Remote Control Outlets
Outlets like Oittm allow you to plug in lamps and control them via remote control from across the room.
Wireless Light Switches
Wireless switches adhere to a wall but don’t require wiring. A battery powered remote pairs with a wireless outlet adapter.
Conclusion
Installing a light switch on a cord provides a simple way to control lamps and other devices remotely from anywhere in a room. With some basic DIY electrical knowledge and the right materials, it can be a relatively easy project. Just be sure to always put safety first by turning off power, making secure connections, and testing properly. Follow the steps outlined above and you’ll be able to enjoy the convenience of controlling your lighting from your bedside or across the room.