Puttying corners on a wall is an important step when painting or fixing up a room. It creates a smooth, continuous surface and prevents cracks from forming. Properly puttied corners make your paint job look clean and professional.
Page Contents
What is putty?
Putty is a thick, doughy substance used to fill holes and cracks in walls before painting. There are a few different types of putty:
- Drywall joint compound – This is a pasty material used for taping and finishing drywall seams and corners. It comes as a powder you mix with water.
- Spackling – Made from plaster of Paris and glue. It comes pre-mixed in a tub or tube.
- Wood filler – Used to fill knots, cracks, and holes in wood before staining or painting.
For puttying drywall corners, you’ll want to use drywall joint compound or spackling. These are designed to go on smoothly and provide a seamless finish.
Why putty corners?
There are a few reasons to putty corners before painting:
- Creates a smooth surface – Putty helps hide any unevenness or gaps, leaving you with a smooth, uniform foundation for paint.
- Prevents cracking – As a house settles over time, corners are prone to cracking. Putty helps strengthen corners and prevent cracks.
- Looks professional – Well-puttied corners give your paint job a seamless, finished look.
If you don’t putty, you risk having uneven corners with ridges and gaps that will show through the new paint. Taking the time to putty first leads to much better results.
What you need
Here are the supplies you’ll need to putty drywall corners:
- Putty knife – A 4-6 inch flexible blade is ideal for smoothing putty on corners.
- Sandpaper – 120-150 grit sandpaper for sanding corners smooth.
- Joint compound or spackling
- Paintbrush and water – For wetting knife and smoothing putty.
- Drop cloth – For protecting floors from drips and spills.
- Sanding sponge – Helpful for final pass sanding corners.
How to Putty
Here is a step-by-step guide on how to properly putty drywall corners:
- Prepare the area – Clear the room and lay down a drop cloth. Scrub corners with a wire brush to remove any loose material or dust.
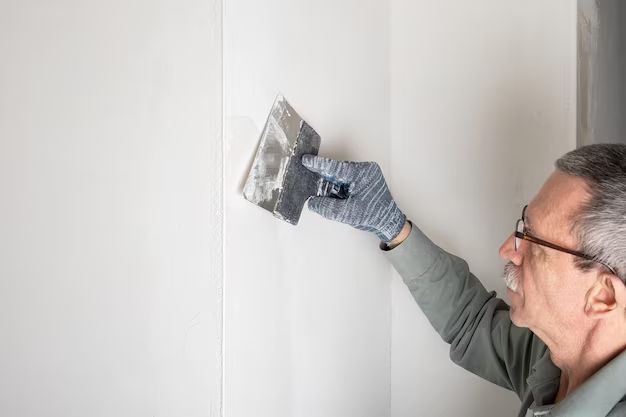
- Apply first coat – Use a 4-6 inch taping knife to apply a thin layer of joint compound or spackle to the corner. Spread it slightly wider than the corner angle. Go over the area 2-3 times to fill any gaps or cracks.
- Let dry – Allow first coat to fully dry as directed on product packaging. This may take 4-24 hours.
- Sand – Lightly sand the puttied corner with 150 grit sandpaper to smooth out bumps or ridges.
- Apply second coat – Apply a second thin coat of compound to the corner, feathering the edges where it meets the wall. Let dry completely.
- Final sanding – Use 120-150 grit sandpaper or a sanding sponge for final smoothing. Carefully sand ridges down until the corner is smooth and even with the wall surface.
- Fill any remaining voids – If there are any pits, cracks or uneven areas, fill them in with a final skim coat of putty. Let dry and sand smooth.
- Clean area – Carefully vacuum up all dust. Use a damp rag to wipe corner and remove leftover putty residue.
Be sure to take your time with each coat and allow ample drying time. Rushing through puttying corners will leave you with poor results. The key is applying thin, even layers and fully sanding between coats for a seamless finish.
Tips for Puttying Corners
Follow these tips to make your corner puttying go smoothly:
- Wipe a damp rag over corners first to remove dust and improve adhesion.
- Apply thin coats. Thick putty is more prone to cracking and takes longer to dry.
- Keep putty knife clean by periodically wiping it with a wet rag.
- Lightly sand between coats. This helps the next layer adhere.
- Feather out edges of putty to blend seamlessly with wall surface.
- Maintain a two foot radius when smoothing putty for best results.
- Work in adequate ventilation to help putty dry properly.
Common Problems and Solutions
Here are some common issues that arise with corner puttying and how to fix them:
Cracking
If puttied corners develop cracks, the putty was applied too thick. Carefully sand crack and surrounding area to remove putty. Reapply in thinner coats.
Uneven texture
Rough, uneven putty indicates the area wasn’t sanded smooth between coats. Sand until uniform and skim with additional thin layers of putty.
Gaps
If gaps are visible after puttying, the putty didn’t make full contact with the corner. Fill in gaps with additional putty. Consider using paper drywall tape for reinforcement.
Ridges
Ridges often occur when putty builds up too much in the corner. Carefully sand ridges down flat with the surrounding wall area.
Flaking
If putty flakes off, the area wasn’t properly cleaned and prepared first. Remove all loose material and thoroughly wipe dust before reapplying putty.
How Long Does Putty Take to Dry?
Drying times vary by product, temperature, and humidity. Here are some approximate drying times:
- Joint compound: 4-24 hours
- Spackling: 30-60 minutes
- Wood filler: 30 minutes to 4 hours
Always follow manufacturer’s instructions for recommended drying times. Allow extra time for thicker applications. Test dryness by touching the surface gently – putty is ready when firm, not tacky.
Can You Paint Over Putty?
Yes, you can paint directly over cured putty. Once it is fully dry, the puttied corners provide the ideal base coat for your new paint. No need for priming first.
Be sure the putty has dried for the full recommended time before painting. Test dryness by gently pressing on the surface – it should be rock solid, not indented. Painting over putty before it has fully cured can lead to bubbling and cracking issues.
How Long Does Puttied Corners Last?
With proper preparation and application, puttied corners should last indefinitely without needing repairs. The putty becomes fully integrated as part of the wall surface once painted over.
That said, if the underlying corner has any structural issues or weaknesses, cracks may eventually form. Spot repair any new cracks as needed. In most cases, your original putty job will still be in great shape.
Can You Use Spackle Instead of Putty?
Yes, spackle can be used interchangeably with drywall joint compound for puttying corners. Spackle and joint compound have a very similar consistency and drying time.
Spackle comes premixed and ready to use right out of the tub. Joint compound requires mixing powder with water first. So spackle can be a little more convenient for small putty jobs. Either works well for corner puttying.
Conclusion
With the right supplies and technique, it’s easy to achieve flawless, professional-looking corners. Taking your time to apply thin coats of putty and fully sanding between layers is key. Well-puttied corners will make your paint job smooth and seamless. Just be sure to allow plenty of drying time before breaking out the paint.