Removing a bathtub faucet stem can seem daunting, but it’s actually a pretty straightforward process if you know what you’re doing. In this comprehensive guide, we’ll walk you through the entire process step-by-step, from gathering the right tools and materials to removing the faucet handle, stem, and cartridge. We’ll also provide plenty of tips and advice to make the job as smooth and hassle-free as possible.
Page Contents
What You’ll Need
Before tackling a bathtub faucet stem removal, make sure you have the following tools and materials on hand:
- Adjustable wrench
- Channel lock pliers
- Hex wrench/Allen key set
- Putty knife or flat head screwdriver
- Replacement washers and O-rings
- Silicon grease or plumber’s grease
- Replacement faucet stem and cartridge (if needed)
- Towels
- Flashlight
- Eye protection
It’s a good idea to have all of these items readily available before getting started. The last thing you want is to be knee-deep in the project only to realize you’re missing a critical tool or part.
Shutting Off the Water Supply
Before doing anything else, the first step is always to shut off the water supply to the bathtub faucet. There are a few ways to accomplish this:
- Turn off the hot and cold shut-off valves below the tub. These valve knobs are usually located behind an access panel near the tub.
- Shut off the main water supply to your home. There is typically a shut-off valve near the main inlet where the water line comes into your house.
- Turn off the water at the street if you can’t find the house shut-off. Use a special water key to close the valve on the main water line where it connects to the water main.
Shutting off the water at the lowest point possible allows the pipes to completely drain. This prevents water from gushing out when you remove faucet parts. Be sure the water is fully shut off by turning on the tub faucet briefly to check that no water comes out.
Removing the Faucet Handle
With the water supply completely shut off, you can now remove the faucet handle:
- Pry off the faucet handle cap with a flat head screwdriver or putty knife. The cap may be threaded, friction-fit, or snapped into place.
- Use an adjustable wrench to loosen and remove the screw that holds the handle in place. This screw may be recessed into a threaded hole or mounted externally.
- Wiggle and pull the handle up and off the faucet stem.
Be careful not to damage the finish on the faucet handle. Place a towel beneath it to prevent scratches. Also, take note of the position of the handle before removing. You’ll need to reinstall it in the exact same orientation later on.
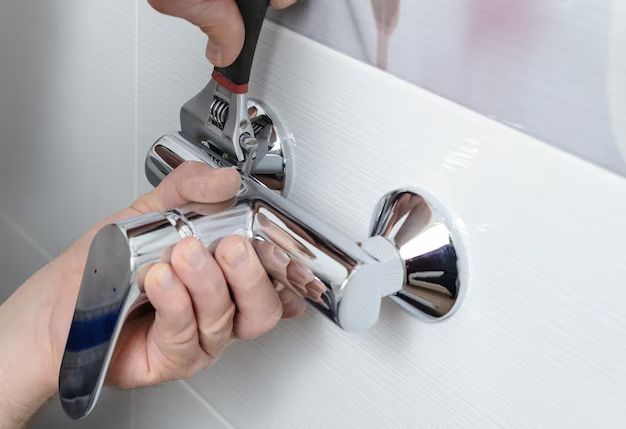
Removing the Faucet Stem
With the handle removed, you now have access to the bathtub faucet stem:
- Spray penetrating oil or rust penetrant on the stem and allow it to soak in for 5-10 minutes. This helps loosen any corrosion.
- Use channel lock pliers or an adjustable wrench to unscrew the stem counterclockwise. It likely has a square or hex base you can grip with the pliers.
- Twist the stem back and forth as you pull up to work it free. It may take quite a bit of force if it’s stuck due to mineral deposits.
- Once removed, clean off the stem thoroughly with a wire brush to remove any gunk and buildup.
Be very careful not to damage the faucet body threads when removing the old stem. You may need to use penetrating oil and let it soak multiple times to break things loose.
Inspecting & Replacing Internal Components
With the faucet stem out, you can now see into the faucet body and inspect the internal components:
- Check for any cracks or damage inside the faucet body. The threads should be intact with no stripping or wear.
- Examine the rubber seats and springs. Replace any worn out or flattened seats and broken springs.
- Look for ceramic disks, cartridges, or other internal parts. Replace any damaged or overly worn components.
- Make sure the faucet body is clean. Use a wire brush or steel wool to scrub off scale and debris.
Many hardware stores sell faucet repair kits with all the small washers, O-rings, seats, and springs you’ll need. Only replace the obviously damaged parts to avoid creating new leaks.
Installing the New Faucet Stem
Once any necessary internal repairs are complete, you can install the replacement faucet stem:
- Lightly coat the new faucet stem O-rings with silicon grease or plumber’s grease.
- Carefully insert the new stem into the faucet body and press it down firmly into place.
- Thread the stem clockwise by hand until tight.
- Finish tightening with pliers or a wrench, being careful not to over-tighten.
- Reinstall the faucet handle in the correct orientation.
- Secure the handle with the retaining screw and replace the decorative cap.
Turn the water supply back on slowly and check for leaks. Tighten any connections or replace components if necessary to stop leaks. Open and close the faucet multiple times to flush out any debris.
Tips for an Easier Faucet Stem Removal
Here are some additional pointers to make bathtub faucet stem removal as quick and hassle-free as possible:
- Use penetrating oil liberally and let it soak in for as long as possible before trying to remove the stem.
- Clamp locking pliers on the stem as tightly as possible without cracking it to break the seal.
- Clean all parts thoroughly. Debris can prevent proper sealing and lead to leaks.
- Check for cracks or damage before reusing old parts. It’s often better to replace.
- Make sure all seals and washers are properly seated when reassembling.
- Go slowly turning the water on to check for leaks before completely restoring water flow.
- Replace the stems, seals, and washers on both hot and cold fixtures for optimal performance.
Taking your time and having the right tools on hand makes all the difference during this kind of faucet repair project. Don’t force anything – penetrating oil is your friend when loosening corroded faucet parts.
Troubleshooting Common Problems
Here are some issues that may come up during or after replacing a bathtub faucet stem and how to fix them:
| Issue | Solution |
|---|---|
| Dripping faucet after replacement | Ensure seals and washers are properly seated. Replace any damaged washers. Tighten connections. |
| Leak between faucet and tub | Apply plumber’s putty around the faucet base before mounting. Tighten faucet nuts. |
| Low water flow | Check for obstructions or clogs in supply lines. Descale faucet aerator. |
| Faucet handle hard to turn | Replace rubber seats and springs. Grease stem components. |
| Handle movement feels loose | Tighten handle retaining screw. Replace stem if damage. |
Don’t hesitate to call in a plumber if you can’t resolve the issue. Leaking or dripping faucets usually indicate worn out parts that need replacement.
When to Call a Professional
While do-it-yourself tub faucet repairs are possible in many cases, there are a few instances when it’s best to call in a professional plumber:
- You can’t isolate and shut off the water supply valves.
- The faucet body or supply lines are severely corroded.
- There are leaks in the supply line piping.
- You need to replace the entire tub faucet.
- There are issues with low water pressure and flow.
- Mineral deposits have damaged faucet components.
- You don’t have the right tools for the job.
Plumbers have specialized tools like basin wrenches that make it much easier to gain access and remove old tub faucets. They also have the expertise to correctly diagnose issues and ensure all repairs meet local plumbing codes.
Conclusion
Removing a bathtub faucet stem is a common DIY plumbing task that you can tackle with the right tools and preparation. The basic process involves shutting off water, removing components, cleaning, replacing worn parts, and reassembling. Go slowly, use penetrating oil, and make sure all seals are leak-free. Call a professional plumber if repairs are beyond your skill level. With some patience and care, you can give an old tub faucet new life and save the cost of complete faucet replacement.