Removing a power antenna mast can seem daunting, but with the right tools and patience, it can be done relatively easily. Here is a step-by-step guide on how to remove a power antenna mast from your vehicle.
Page Contents
- 1 What You’ll Need
- 2 Step 1: Disconnect the Power
- 3 Step 2: Remove Interior Trim Pieces
- 4 Step 3: Loosen the Antenna Nut
- 5 Step 4: Lower the Antenna
- 6 Step 5: Cut Electrical Wires
- 7 Step 6: Remove Antenna Motor
- 8 Step 7: Pull Out the Antenna
- 9 Step 8: Install New Antenna (Optional)
- 10 Step 9: Reinstall Interior Trim
- 11 Step 10: Test and Finish Up
- 12 Frequently Asked Questions
- 13 Helpful Removal Tips
- 14 Conclusion
What You’ll Need
Before getting started, make sure you have the following tools and supplies on hand:
- Socket wrench set
- Box end wrenches
- Needle nose pliers
- Flat head screwdriver
- Philips head screwdriver
- Wire cutters/strippers
- Electrical tape
- Replacement mast (optional)
Step 1: Disconnect the Power
The first step is to disconnect the power to the antenna. This prevents electric shock while working on the mast. There are a couple ways to do this:
- Locate the antenna power wire where it connects to the radio/amplifier. Unplug this connection.
- Find the antenna power fuse in the fuse box and remove it.
Consult your vehicle repair manual to find the exact location of the antenna power wiring and fuse. Once disconnected, test the mast to make sure it no longer goes up and down when operated.
Step 2: Remove Interior Trim Pieces
In most vehicles, your antenna mast runs from the fender up through the firewall and into the passenger compartment. You will need to remove some interior trim panels to access where the mast comes through.
Use your flat head screwdriver to gently pry up and remove any trim pieces around the area where the antenna enters the cabin. In many cars, this is around the lower corner of the front windshield on the passenger side. Set the trim panels aside carefully to reinstall later.
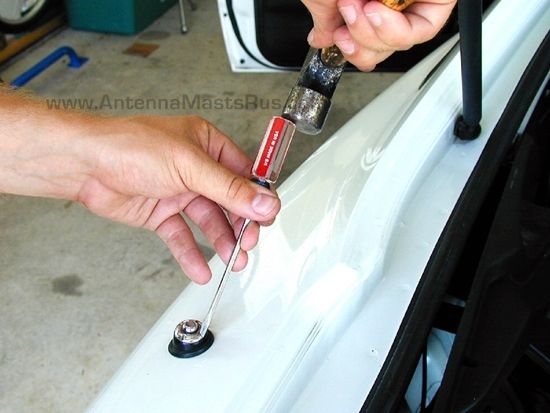
Step 3: Loosen the Antenna Nut
Once you have access to the base of the antenna mast, you should see a plastic or metal antenna nut where it comes through the body into the interior. Use your socket wrench or box end wrench to loosen this nut several turns. Don’t try to completely remove it just yet.
Step 4: Lower the Antenna
With the nut loosened, you should be able to firmly push down on the mast from inside the car and lower it all the way down into the fender area. This gets it out of the way for the next steps.
Step 5: Cut Electrical Wires
Inside the fender well, locate the two electrical wires running to the antenna motor. Cut these wires about 6 inches from the motor housing using wire cutters. These allow the motor to raise and lower the mast. You can now fully unscrew the antenna nut from inside the vehicle.
Step 6: Remove Antenna Motor
Under the hood, find the antenna motor mounted to the top of the front fender. There will be three bolts securing the motor assembly. Support the motor housing while removing the bolts with a socket wrench. Once detached, slide the entire motor straight off the mast.
Step 7: Pull Out the Antenna
With the mast lowered and motor removed, grab the base of the antenna from under the hood. Wiggle it back and forth while firmly pulling straight up through the firewall grommet. The antenna should slide out completely. Make sure to also remove any plastic sleeve pieces left behind.
Step 8: Install New Antenna (Optional)
If you’re replacing the power antenna mast, now is the time to install the new one. Lubricate the new mast with silicone spray or liquid soap. Then feed it down through the firewall opening until fully seated.
Reinstall the antenna motor and electrical connections in reverse order of disassembly.
If not installing a new mast, use silicone or rubber cement to seal the hole after removing the old antenna.
Step 9: Reinstall Interior Trim
With the antenna removed, you can now reinstall any interior trim panels that were taken off during Step 2. Snap them back into place securely.
Step 10: Test and Finish Up
If you installed a new power antenna, test it by reconnecting the power fuse and wiring. Make sure it extends up and down properly. Then replace any remaining trim pieces.
That covers the entire antenna removal process from start to finish. Just be patient, take it slow, and refer to your vehicle repair manual for model-specific instructions. Let me know if you have any other questions!
Frequently Asked Questions
Is it hard to remove a power antenna mast?
Removing an antenna mast may seem intimidating, but it’s actually a pretty straightforward process. The key steps of disconnecting power, lowering the mast, removing the motor, and pulling out the antenna shaft are all relatively simple. Just work slowly and follow the proper steps.
What tools do I need to remove a power antenna?
Here are the basic tools needed:
- Socket wrench set
- Box end wrenches
- Needle nose pliers
- Flat and Philips screwdrivers
- Wire cutters
- Electrical tape
Having an auto repair manual for your specific vehicle is also highly recommended.
Can I reuse the old power antenna mast?
You can reuse the original mast if it’s still in good condition. Just be sure to lubricate it well and reinstall properly so it moves smoothly. However, after 10-15 years, replacing it is recommended since the plastic wears out over time.
Where is the antenna motor located?
The antenna motor is mounted right to the top area of the front fender, under the hood. There will be several screws or bolts securing it in place. Consulting the repair manual will show the exact position.
What if the antenna mast breaks during removal?
If the mast snaps or gets stuck, stop and assess. You may need to drill out rivets or remove additional trim panels to get better access. Work slowly and carefully. If the base of the mast is still functional, you may be able to pull it out from the other end.
How do I seal the hole after removing the antenna?
Use silicone sealant or rubber grommet cement to plug the antenna hole after removal. For a more finished look, you can also use an antenna hole cover plate. This screws into place and provides a smooth finish.
Helpful Removal Tips
Here are some additional tips to help make your power antenna removal go smoothly:
- Check for antenna wire routing diagrams in your repair manual if needed.
- Take pictures before disassembly to help with reinstallation.
- Spray lubricant on mast and vinagre around base to help loosen.
- Grip mast firmly with pliers if it starts to slip during removal.
- Work slowly and patiently to avoid breaking plastic pieces.
- Wear safety glasses when working under the hood.
- Cover antenna hole right away to prevent water leaks.
Conclusion
Removing a power antenna mast requires proper tools, patience, and following the correct step-by-step process. By disconnecting the power, removing interior trim, detaching the motor, lowering the mast, and pulling it through the firewall hole, you can remove it successfully. Just work slowly and refer to your vehicle repair manual often. Let me know if you run into any other issues during your antenna removal project!
