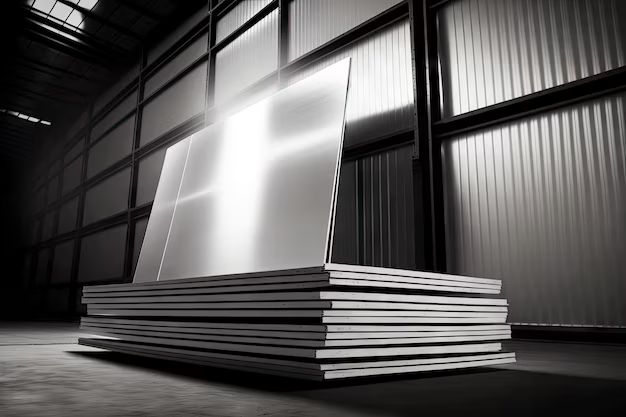
Aluminum panels are a popular siding choice for many homes and buildings. They are lightweight, durable, and low maintenance. However, there may come a time when you need to remove aluminum panels, such as when making repairs or replacing old panels. Removing aluminum siding can be a big job, but it’s doable with the right tools and techniques. Here’s a step-by-step guide on how to remove aluminum panels safely and efficiently.
Page Contents
- 1 When You May Need to Remove Aluminum Panels
- 2 Safety Tips
- 3 Tools and Materials Needed
- 4 Steps to Removing Aluminum Siding
- 4.1 1. Prepare the Work Area
- 4.2 2. Remove Siding Accessories
- 4.3 3. Take Off Bottom Panel Rows
- 4.4 4. Loosen Panels with Backward Motion
- 4.5 5. Remove Panels and Nails
- 4.6 6. Stack and Organize Panels
- 4.7 7. Remove Siding Under Windows
- 4.8 8. Remove Trim Pieces and Corner Caps
- 4.9 9. Patch Exterior Sheathing
- 4.10 10. Discard Debris
- 5 Tips for Easier Removal
- 6 Hiring a Professional
- 7 Cost to Remove Aluminum Siding
- 8 Conclusion
When You May Need to Remove Aluminum Panels
There are several reasons why you may need to remove aluminum siding panels:
Replacing Damaged Panels
Over time, aluminum panels can become dented, warped, or damaged from impacts. If the damage is minor, you may be able to repair it. But if panels are severely damaged, it’s best to fully replace them for proper fit and appearance.
Upgrading Old Panels
If your aluminum siding is outdated or you want to change designs, you’ll need to take down the old panels before installing new ones. Newer aluminum panel profiles are more dent-resistant and mimic wood or stone looks.
Repairing Wall Damage
Sometimes moisture gets behind aluminum siding, causing rot or mold on the walls. You’ll need to remove siding to access and repair any wall damage. Properly sealing the panels during reinstallation can help prevent this issue.
Adding Insulation
Improving your home’s energy efficiency may require taking down aluminum siding to add extra insulation in the walls before re-siding. This greatly cuts energy costs.
Preparing Surfaces for New Sidings
If you decide to install a new siding material like vinyl, wood, or fiber cement, the old aluminum panels will need removal prior to the new siding going up.
Safety Tips
Removing aluminum siding involves working at heights, power tools, and heavy materials. Follow these tips to stay safe:
– Use ladders and scaffolds properly to avoid falls. Make sure they are on level ground and never lean ladders against siding.
– Wear protective eyewear and gloves when cutting panels or materials could fall.
– Prevent puncture wounds by wearing thick work gloves when handling panels. Watch for sharp edges.
– Use extra caution when working on windy days, as panels could catch gusts of wind. Consider postponing work if it’s overly windy.
– Follow the proper safety guidance for each power tool you use, such as circular saws, drills, nail guns, etc. Unplug tools when not in use.
– Get help lifting heavy stacks of panels. Bend knees when lifting and carry close to your body.
Tools and Materials Needed
Here are the common tools and materials required to remove aluminum siding:
Tools
– Ladder or scaffolding
– Utility knife or oscillating multi-tool
– Pry bar
– Zip tool (for removing bottom starter strips)
– Hammer
– Power drill
– Circular saw with fine-tooth blade
– Aviation snips
– Shovel (for removing old nails and debris)
Materials
– Drop cloths
– Trash bags
– Gloves
– Safety goggles
– New siding panels and starter strips (if re-siding)
– Wood filler or sealant (for patching nail holes)
Steps to Removing Aluminum Siding
Once you’re equipped with proper tools and safety gear, follow these key steps to take down aluminum siding:
1. Prepare the Work Area
Clear plants, furnishings, or other obstructions from the wall area. Lay down drop cloths to collect fallen debris and scrap pieces. Have trash bags on hand. Make sure you have secure ladder access to the full height of the walls.
2. Remove Siding Accessories
Use a flat pry bar to remove any accessories on the siding, like light fixtures, electrical boxes, air conditioner brackets, and receptacle covers. Set screws aside for reinstallation later.
3. Take Off Bottom Panel Rows
Start by taking off the bottom row of panels first. This is usually a starter strip that wraps around the bottom. Slide a zip tool behind it to cut the nail heads. Pry it off gently with a flat bar.
4. Loosen Panels with Backward Motion
Work your way up the wall, loosening one panel at a time. Slide the utility knife blade backwards to cut through the nail heads without gouging the panels. Apply pressure as you slide to sever nails.
5. Remove Panels and Nails
Once nails are freed, use a pry bar to gently work the panel loose. Start on one side and work sideways to pop it off. Be careful not to bend or damage panels intended for reuse. Pull any remaining nails from the wall.
6. Stack and Organize Panels
Carefully stack panels on the ground as you remove them. Keep them organized by section if reusing. This ensures proper fit when reinstalling. Place damaged pieces in a trash pile.
7. Remove Siding Under Windows
For panels under windows, score them with a knife then use aviation snips for precise cutting. Remove remaining nails. Save cut out pieces to use later as filler.
8. Remove Trim Pieces and Corner Caps
Take down associated trim, fascia boards, and corner pieces by cutting nail heads and prying off. Avoid bending for reuse.
9. Patch Exterior Sheathing
Examine exposed exterior sheathing for any damage. Use wood filler or sealant to patch small holes or gaps if present before installing new siding.
10. Discard Debris
Sweep away any fallen nails, shards, or other debris. Bag everything up and dispose of properly. Now the wall is prepped and ready for new siding installation.
Tips for Easier Removal
Here are some handy tips to make aluminum siding removal faster and easier:
– Perform work on cool days when the metal contracts and is less flexible
– Apply painter’s tape along cut lines to prevent scratching good panels
– Cut panels into manageable 2-3 foot sections for safer handling
– Lubricate zip tool blades and pry bar ends with WD-40 to prevent binding
– Drive new nails near old holes when reinstalling to avoid extra patching
Hiring a Professional
Removing aluminum siding is labor intensive. For larger homes, it’s often wise to hire professional siding contractors to take down panels. Pros have the right tools, move quickly, and take safety precautions. Here are benefits of hiring experts:
Proper Equipment
Contractors have commercial-grade tools like extra-wide zip tools, hydraulic lifts, and pneumatic nail guns to remove panels faster. This greatly speeds up the process.
No Damage to Panels
Professional crews are trained to remove siding without damaging it for reuse or resale. Less waste saves you money.
Safe Work Methods
Licensed contractors use harnesses, tie-offs, and other safety gear when working at heights. This prevents dangerous falls.
Fewer Aches and Pains
Removing dozens of heavy, awkward panels takes a major toll on your body without proper techniques. Save your back and energy for other projects.
Proper Disposal
Contractors haul away debris and dispose of it legally. No need to make numerous trips to the dump.
While hiring out adds cost, it saves time and prevents injuries when taking down full houses worth of aluminum siding.
Cost to Remove Aluminum Siding
If you do want to hire a siding removal pro, costs typically range from:
– $2-$4 per sq. ft. for simple panel removal only
– $4-$6 per sq. ft. for removal and disposal of panels
– $6-$10 per sq. ft. for removal, disposal, and replacement with new siding
Here are some factors that affect overall costs:
| Type | Cost Factors |
| Labor | Number of panels, height/accessibility of walls, whether siding is stripped only or a full tear-off and replacement job |
| Materials | Whether new siding is being installed, disposal fees |
| Home Size | Total square footage of siding being removed/replaced |
| Damage | Costs increase if there is damage beneath the siding that needs structural repairs |
| Region | Labor rates are higher in some parts of the country |
Get free estimates from local siding companies to compare rates.
Conclusion
Removing aluminum siding is a big endeavor, but absolutely doable as a DIY project if you have the right tools and take safety measures. For large homes or siding replacement jobs, professional help can save time and prevent injury. With some strategic prying and cutting, you can clear aluminum panels off a wall surface and have it prepped for new siding in no time. Just be methodical, work carefully, and disposal of debris properly.