Hollow wall screws, also known as drywall screws or plasterboard screws, are a common fastener used to hang pictures, shelves, and other items on walls. While hollow walls are easy to install screws into, removing them can be tricky if you don’t have the right tools and technique.
In this comprehensive guide, we will walk through the steps and tools needed to safely and effectively remove hollow wall screws. We will cover how to determine if you have hollow walls, the correct tools to use, techniques to extract stubborn screws, filling holes, and tips to prevent damage.
Whether you are removing a screw to reposition a shelf, take down old decor, or doing some renovation, this guide will equip you with the knowledge to tackle this task with confidence. Let’s get started!
Page Contents
What are Hollow Walls?
Hollow walls, as the name implies, have an empty space between the wall surfaces. This hollow space is sometimes filled with insulation material but there is no solid mass inside.
Drywall and plasterboard are the most common hollow wall materials. They consist of a paper-faced sheet rock material usually installed over a wood or metal stud frame. The wall is hollow between each stud.
Identifying if you have hollow walls is an important first step. Here are some ways to tell:
– Tap on the wall and listen for a hollow, less dense sound
– Look for drywall or plasterboard seams
– Check if the wall is lighter than solid walls when pushed
– Examine outlets and switch plates for drywall screws
– Look for studs spaced 16-24 inches apart
– Test with a small nail, screw, or drill which will penetrate easily
If you determine your wall is solid, refer to guides for removing solid wall screws instead.
Tools Needed for Removing Hollow Wall Screws
Removing hollow wall screws is quite simple with the right tools on hand. The basic tools you will need include:
Screwdriver
A regular flat head or Phillips head screwdriver can remove a variety of loose hollow wall screws. Match the head to the screw you are removing.
Screw extractor
A screw extractor is a specialty tool that grips and backs screws out when regular methods fail. They come in different sizes and are extremely useful for removing stripped screws.
Hammer
A hammer can be used to lightly tap a screwdriver to help loosen a stuck screw. Use gentle taps to avoid damage.
Utility knife
For screws with severely damaged heads, a utility knife can cut a slit into the screw head to fit a flat head screwdriver.
Pliers
Locking pliers or regular pliers may be needed to grasp and turn damaged screw heads.
Cordless drill/drivers
A cordless drill with screwdriver bits makes quick work of removing multiple screws. Adjust torque settings to prevent damage.
Wallboard saw
A drywall saw’s fine teeth can cut away drywall around badly damaged screws for removal.
Having the right tools on hand will make hollow wall screw removal much easier. Now let’s look at techniques.
Techniques for Removing Hollow Wall Screws
Here are step-by-step instructions to remove hollow drywall screws using various methods:
Method 1 – Regular Removal
1. Identify and match the screw head – flat, Phillips, hex etc.
2. Select a screwdriver that fits the head properly. An improper fit can strip the screw.
3. Insert the screwdriver tip into the screw head and turn counterclockwise to loosen.
4. Apply firm pressure as you turn but do not over tighten or strip the head.
5. Turn slowly to back the screw completely out of the wall.
Method 2 – Stubborn Screws
For screws that resist regular removal:
1. Try tightening the screw slightly clockwise first to break any painted or stuck threads.
2. Spray lubricant like WD-40 into the screw head to loosen rusted or stuck screws.
3. Use a hammer to gently tap the screwdriver to help loosen the screw.
4. Push hard into the screwdriver as you turn to apply more force.
Method 3 – Stripped Screw Head
For screws with a damaged head that a screwdriver cannot grip:
1. Attempt to remove by tightly gripping the stripped head with locking pliers.
2. Use a utility knife to cut a straight slit into the screw head and use a flat head screwdriver.
3. Carefully file/grind two flat edges on the screw head to fit a wrench.
4. Extract the screw with screw extracting pliers made for damaged screws.
Method 4 – Severely Damaged Head
If no head is left to grip at all:
1. Attempt to grip the screw shaft with locking pliers and turn to remove.
2. Use a Dremel or hacksaw to cut a slit into the screw shaft to fit a flathead driver.
3. Drill into the center of the screw just deep enough to fit a specialty screw extractor, then reverse the drill to back out.
4. Cut away the drywall around the screw with a wallboard saw and pry out screw and drywall section.
5. Use a rotary tool multilayered bit to grind away the top of screw in order to back out the remaining shaft.
With patience and care, even severely stubborn or damaged screws can be removed from hollow drywall successfully.
Filling Holes after Screw Removal
Once the screw is extracted, you will need to fill the hole it leaves behind. Here are a few filling tips:
– For small holes under 1/4 inch, spackling compound can fill and patch it.
– Larger holes will need layered drywall joint compound built up in thin coats.
– Mesh drywall tape can reinforce cracked edges or large holes before patching compound.
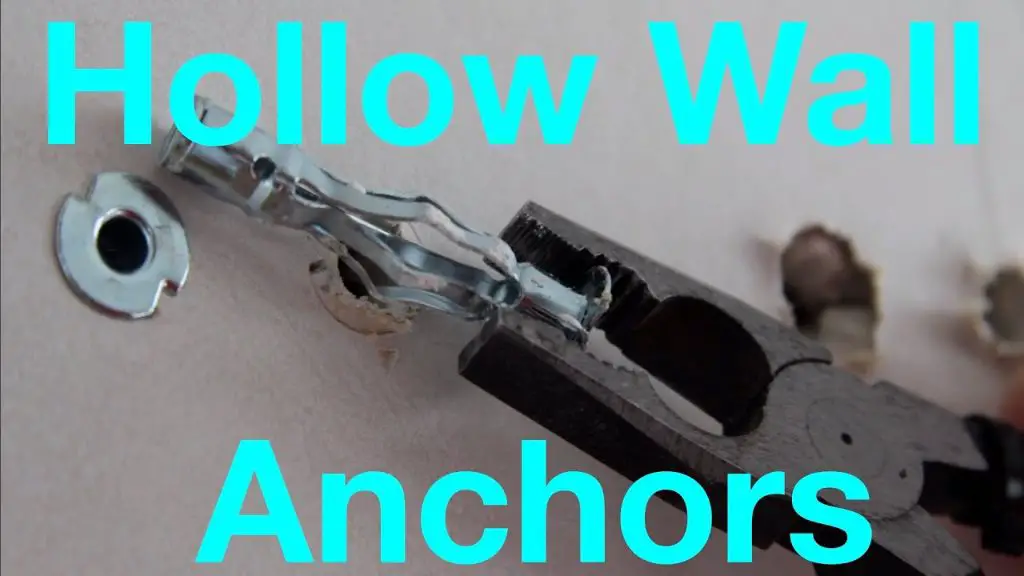
– A hollow wall anchor inserted into the old screw hole can serve as an instant patch to hang items again.
– Consider using a drywall repair patch kit for holes larger than 1 inch or in high wear areas.
– Sand patches smooth once dry then prime/paint for best results.
Properly filling holes preserves the wall integrity and leaves no visible damage.
Preventing Screw Damage
Prevent screw removal headaches by following these tips when originally installing them:
– Drill pilot holes in drywall to prevent cracking around screws.
– Use wall anchors for heavy items to distribute weight.
– Tighten screws just until snug, not over-torqued.
– Periodically check for loose screws that need re-tightening.
– Dip screw threads in bar soap to make driving easier and prevent sticking.
– Consider using toggle bolts which are easy to remove instead of standard screws.
A little care when installing screws makes future removal quicker and less destructive.
Conclusion
Removing hollow drywall screws is straightforward when you use the proper methods and tools. Determine if your walls are hollow before starting. Have screwdrivers, pliers, lubricant, extractors, and drywall saws available to tackle stuck screws. Carefully match the screwdriver to the screw head and back it out slowly. For damaged screws, use extractors, slit methods, or cut away drywall as needed. Fill holes smoothly and prevent issues by pre-drilling holes and not over tightening. Follow these steps and you can take out those annoying hollow wall screws quickly and restore your walls to their original condition.