Removing internal window trim can be a daunting task for homeowners who have never done it before. However, with the right tools and techniques, it can be made much easier. In this comprehensive guide, we will walk you through the entire process step-by-step.
Page Contents
What is Internal Window Trim?
Internal window trim refers to the decorative molding installed around the interior sides of window frames. It serves both functional and aesthetic purposes:
- Covers up unsightly gaps and spaces between the window frame and wall
- Creates a finished look around the window opening
- Enhances the style and character of a room
Internal window trim is typically constructed from wood materials like pine, oak, poplar, or MDF. It can consist of simple, minimal trims or elaborate moldings depending on the desired look.
Why Would You Need to Remove It?
There are several reasons why you may need to remove existing internal window trim in your home:
- Replacing damaged or deteriorating trim
- Updating the style or look of trim to match a new interior design
- Painting or refinishing window frames and trim
- Making repairs to surrounding walls or window frames
- Replacing windows and installing new trim
- Increasing natural light by removing bulky trim
Removing window trim opens up access and allows you to properly address underlying issues. It also gives you a blank slate to install new trim that suits your home’s current aesthetic.
Tools and Materials Needed
Gather the following tools and materials ahead of time to make the trim removal process go smoothly:
- Pry bar – helps lift and loosen trim from nails
- Hammer – for pulling nails out of trim
- Putty knife – useful for scraping old caulk or prying
- Painter’s tape – for protecting walls and window frames
- Drop cloths – keep surrounding areas clean
- Wood chisel – helps separate trim pieces
- Utility knife – for cutting paint or caulk seams
- Screwdriver – prying and scraping
- Eye protection – safety glasses or goggles
- Dust mask – avoid inhaling wood dust
- Trash bags – for removing detached trim pieces
You may also need a small pry bar, hammer, and wood chisel to remove any remaining nails or stubborn nails after trim removal.
Prep Work
Complete the following steps to prepare the workspace before starting the actual trim removal process:
- Clear the area around the window so you have room to work.
- Cover nearby furniture, flooring, and other surfaces with drop cloths.
- Tape painter’s tape along wall edges bordering the trim to protect wall surfaces.
- Put on protective eye gear and a dust mask to stay safe.
- Have a trash bag ready to collect and discard detached trim pieces.
- Make sure you have adequate lighting around the trim area.
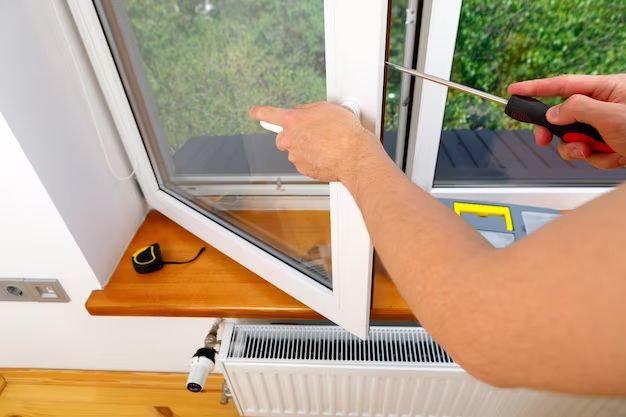
How to Remove Window Trim
Once prepped, you can start dismantling the window trim using the following steps:
- Use a utility knife to score along any caulk or paint sealant bordering the trim and wall. This helps break the trim free.
- Take a pry bar and gently insert the curved end under the trim to slowly pry it off the wall. Work your way around the entire trim piece.
- As you pry, listen for cracking sounds which indicates trim fasteners being loosened.
- Use a hammer to tap trim edges and help release the piece once pried with the bar.
- For extra stuck areas, use a wood chisel to sever the connections before prying.
- Remove any remaining nails or fasteners with hammer claws or pliers once trim is fully detached.
- Discard removed trim pieces into a trash bag as you work.
- Fill any holes or gaps in the wall left behind using spackle.
- Sand and wipe wall edges smooth when dry.
Work carefully around the window frames when prying to avoid damaging them. Take your time and don’t force anything too aggressively. Making multiple scoring passes and working the pry bar incrementally helps release trim without splintering the wood.
Tips for Easier Removal
Keep these tips in mind to help the trim removal process go easier:
- Try to preserve longer trim pieces for reuse or repurposing.
- For long spans of trim, work in smaller sections for better control.
- Cut trim into manageable pieces if necessary using a miter saw.
- Number and label any trim pieces you want to save and reinstall.
- Pre-drill trim to extract stubborn nails without splitting wood.
- Use a heat gun to soften old caulk and paint before prying.
- Go slowly and reset trim pieces multiple times to detach completely.
What About the Window Frames?
With the trim removed, you’ll have full access to window frames in need of repairs, painting, or replacement. Here are some tips for addressing window frames revealed after removing trim:
- Inspect frames for any rot, cracks, or other damage. Make repairs as needed.
- Use painter’s tape and plastic sheeting to protect glass when painting frames.
- Sand and prep window frame surfaces before painting or staining.
- Replace any deteriorated glazing or sealant around glass panes.
- Install new replacement window frames per manufacturer instructions.
- Caulk and seal frames properly to prevent air infiltration.
Installing New Trim
Once underlying window frame maintenance is complete, focus shifts to installing fresh new trim. Here are some tips for getting it right:
- Choose a style and dimensions that fit your home’s aesthetic. Consider rounded, simple, or ornate profiles.
- Use durable hardwoods like poplar or oak for longest lasting results.
- Pre-paint or stain/seal trim before installing for easier finished look.
- Measure and cut miters accurately for tight seamed corners.
- Use a brad nailer and wood glue to adhere trim securely to frames and walls.
- Fill nail holes, caulk edges, sand, and finish for seamless results.
Take care to install new trim pieces plumb, level, and square for proper fit and appearance. Follow manufacturer directions for use of any trim attachment products.
Conclusion
Although removing window trim may seem intimidating, breaking the process down into manageable steps makes the project approachable for any DIYer. Always exercise proper safety precautions and work carefully to avoid damaging window frames or surrounding surfaces. Patience and the right tools go a long way toward hassle-free trim removal. Take advantage of the trimless windows to complete any necessary repairs or updates before installing fresh, new trims that enhance your home’s style.