Fluorescent light fixtures provide bright, energy-efficient illumination in homes, offices, schools, and other buildings. The long tubular bulbs last up to 20,000 hours, making fluorescent lighting a cost-effective choice. Over time, the plastic or acrylic cover on a fluorescent light fixture may become discolored, cracked, or damaged. Replacing the cover restores the fixture’s appearance and protects the fluorescent bulbs. Removing the old cover is the first step in the replacement process.
Page Contents
- 1 Turn Off Power to the Light
- 2 Inspect the Fixture Mounting
- 3 Remove Screws or Bolts
- 4 Release Compression Fittings
- 5 Remove Adhesive Strips or Magnets
- 6 Inspect the Cover
- 7 Check Light Fixture Wires
- 8 Clean Inside the Fixture
- 9 Cover Installation Tips
- 10 Restore Power and Test
- 11 Clean the Cover
- 12 Conclusion
Turn Off Power to the Light
Safety should always be the top concern when working with electrical fixtures. Switch off the power to the fluorescent light at the circuit breaker or fuse box before attempting to remove the cover. Use a circuit tester on the light switch and near the fixture to verify that the power is off. Failure to deactivate the electricity could result in electrocution or shock injuries. Wait 10 minutes after turning off the power to allow any stored energy in the wires to dissipate.
Inspect the Fixture Mounting
Fluorescent light covers are secured in several different ways depending on the fixture style. Inspect the ends or sides of the fixture to determine how it is mounted. Covers may be held in place with screws, bolts, clips, magnets, adhesive strips, or compression fittings. Make note of the fastening method to ensure you remove the hardware correctly. Rushing the process or using excessive force could crack the cover or detach wires leading to the tombstones.
Remove Screws or Bolts
Screws are commonly used to attach fluorescent light covers. Examine the sides or ends of the fixture for screw heads. You may need to insert a screwdriver into notches on the cover edge to access recessed screw heads. Use a screwdriver with the proper head size to back out the screws. Place the screws in a small container to keep them organized for reinstallation later. Pry clips may also need to be detached using a flathead screwdriver. For covers held on by bolts, use the correct wrench size to unscrew the bolts from the fixture. Be careful not to drop bolts into the fixture body.
Release Compression Fittings
Some fluorescent light covers snap into place using compression or tension fittings. Look for notches along the cover edge that allow you to press inward to disengage the compression mechanism. You may need to insert a small flathead screwdriver into the notches for additional leverage. Apply even pressure at both ends and in the middle of the fixture when attempting to release compression fittings. Twisting the cover slightly may help break the seal and allow you to detach it from the housing.
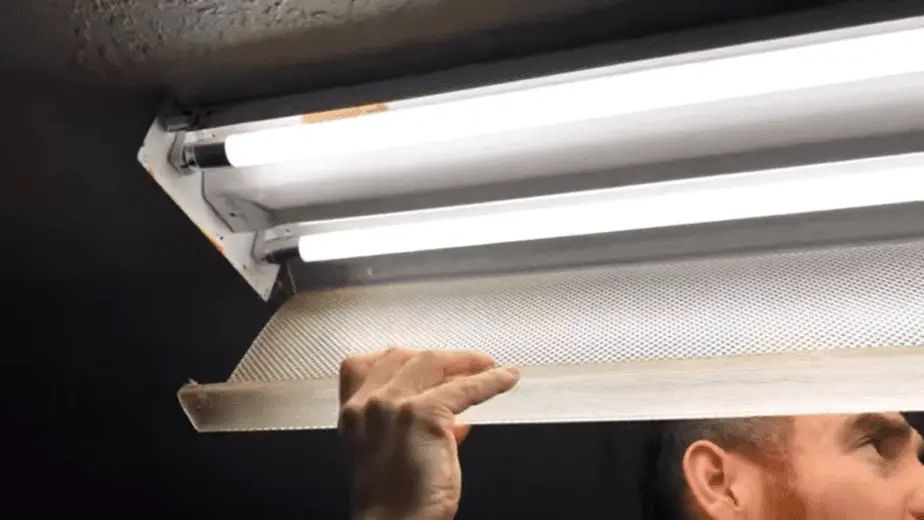
Remove Adhesive Strips or Magnets
Adhesive strips with peel-off backing are another common cover mounting method. Determine where the strips are located and grab the cover firmly. Pull it away from the fixture at a 90-degree angle to break the tape seals. Go slow to minimize the chance of cracking the cover. For magnetically attached covers, grasp the cover and pull gently but firmly toward you. The housing is typically plastic, so take care not to crack it when detaching magnets.
Inspect the Cover
With the old fluorescent light cover removed, take a moment to inspect it for damage. Cracks radiating from screw holes or large dents can indicate a weakened cover that needs replacement. However, small cracks or scratches may not warrant a new cover. Thoroughly cleaning the old cover once it is removed may restore optical clarity and adequate lighting performance. Either clean and reuse the existing cover or have a new one ready to install after electrical safety checks.
Check Light Fixture Wires
Never touch wires inside a fluorescent light fixture while the power is still on! With the electricity deactivated, visually inspect the wires leading from the tombstones to the ballasts. The insulation should be intact with no unraveling or fraying. Also look for cracks, melting, or discoloration which can signify dangerous damage. All wires should be securely attached to the tombstones. If you notice any defective wiring, call an electrician to make the necessary repairs before attempting to replace the cover.
Clean Inside the Fixture
Over time, dirt and dust accumulate on the fluorescent tubes and interior of the fixture. With the cover detached, this is the perfect opportunity to clean the light housing. Use a microfiber cloth to wipe down the fluorescent bulb tubes. Carefully vacuum up any debris inside the fixture using a soft brush attachment. Take care not to disturb any wiring or ballasts. Cleaning improves the lighting performance and extends the life of fluorescent bulbs.
Cover Installation Tips
Once you complete any necessary electrical repairs and finish cleaning the interior of the fixture, you can install a new fluorescent light cover. Here are some tips to make cover installation quick and easy:
– Check that all mounting hardware or fittings line up properly on the replacement cover before attaching it.
– Hand tighten screws or bolts gradually in a crisscross or star pattern when securing the new cover. Avoid overtightening.
– For compression fittings, gently push both ends of the cover inward to snap it into the locked position evenly.
– After installing adhesive strips, apply firm pressure along the strip for 30 seconds to ensure a solid bond with the fixture housing.
– Wear gloves when handling new acrylic or polycarbonate covers to prevent fingerprints and smudges.
Proper alignment and secure attachment of the light cover protects the fluorescent tubes and prevents detachment.
Restore Power and Test
Once the new fluorescent light cover is completely fastened in place, you can restore power to the fixture. Turn the circuit breaker or flip the wall switch controlling the light back on. Verify that the fluorescent tubes illuminate normally without any flickering or dimming. Briefly observe the light for proper coverage without any dark spots which could indicate a loose cover. Finally, check around the cover edges for any bright light leaking out. The fixture may need slight adjustments to sit flush against the housing if you notice leakage.
Clean the Cover
Fingerprints, dirt, or grease on the new fluorescent light cover can diminish light output. Use a soft microfiber cloth to gently clean the plastic or acrylic cover once it is installed. Avoid harsh chemical cleaners which could damage the material. For hard water spots, try distilled white vinegar applied with a non-abrasive sponge or pad. Rinse any cleaning solutions thoroughly. Proper cleaning restores clarity and ensures maximum illumination from fluorescent tubes.
Conclusion
Removing old fluorescent light covers is a necessary first step before replacing them. Always turn off power at the circuit breaker before attempting any cover removal to avoid electrical hazards. Inspect how the existing cover attaches, then use the appropriate tool to detach any screws, clips, or fittings. Clean the interior, check wiring connections, and install the new cover properly before turning the power back on. Follow basic safety precautions when working on any electrical lighting fixtures. With some simple tools and proper care, you can successfully replace fluorescent light covers to boost illumination.