Removing window regulator clips can be a daunting task for someone who has never done it before. However, with the right tools and techniques, it can be accomplished safely and efficiently. In this article, we will walk through the entire process step-by-step, from gathering the necessary materials to reinstalling the window regulator.
Before beginning, make sure you have ample time set aside. Rushing through window regulator clip removal increases the chances of losing pieces or damaging other components. Expect the project to take at least an hour, though it could take upwards of two or three hours if it is your first time. The most important things are to work slowly, follow directions, and use care when handling the delicate window clips and regulators.
Page Contents
When to Replace Window Regulator Clips
There are a few signs that indicate it is time to replace your window regulator clips:
- The window is loose and rattling when going over bumps.
- The window no longer stays up on its own and falls down.
- You hear grinding or binding noises when operating the window.
- The regulator clips are visibly cracked or broken.
Addressing worn or damaged window clips right away prevents more severe issues down the road. Driving with broken regulator clips can cause the window to fall into the door, damaging the glass and the operating mechanism.
Replacing the clips and tightening everything up usually fixes minor problems like loose and rattling windows. If the window no longer works properly or the regulator itself is damaged, the entire mechanism may need replacement.
Tools and Materials Needed
Gather the following tools and materials before getting started:
- Replacement window regulator clips
- Trim removal tools
- Screwdrivers – Phillips and flathead
- Socket wrench and sockets
- Gloves
- Rags
- Masking tape
- Replacement regulator if needed
The clips usually come in repair kits with several sizes to match different car models. Make sure you have the correct ones for your vehicle. The trim tools help pry up door panels carefully without damaging the interior. Rags and masking tape allow you to protect surrounding surfaces from scratches.
If the regulator itself is broken, purchase a replacement made specifically for your car. Remove the old unit completely to install the new one.
Safety Tips
When working on your vehicle, keep these safety tips in mind:
- Wear gloves to protect your hands from sharp edges.
- Wear eye protection like safety glasses.
- Avoid wearing loose clothing or jewelry that could get caught.
- Work in a well-ventilated area.
- Support the window to avoid dropping it.
- Disconnect the negative battery terminal to disable electrical systems.
- Set the parking brake and block the tires to prevent rolling.
Use extreme care when disconnecting springs and regulators. The components are under tension and could snap back forcefully. Pay close attention to how things are assembled so you can reinstall them correctly.
Having a helper makes the removal process easier and safer. They can hold tools and steady the window for you.
Removing Door Panels
The first step is to remove the interior door panel to access the inner workings. Refer to your vehicle’s service manual for the specific instructions. In general, the process goes like this:
- Pry off any trim pieces around the edges with the trim tools. Work slowly and carefully to avoid breaking the clips.
- Remove the door handle linkage by disconnecting the rod or unscrewing a retaining clip.
- Unscrew or unclip the armrest if equipped.
- Find and remove any remaining fasteners holding the panel in place.
- Starting at a corner, carefully pop the panel off by hand. Work your way around prying gently with the trim tools if needed.
- Disconnect any electrical connectors like power mirrors or windows.
- Remove the panel and set it aside safely.
Cover the panel with rags or blankets to avoid scratches. Mark wires so you know where they reconnect later.
Removing the Window
With access to the inner door:
- Tape the window in place so it does not drop down.
- Disconnect any electrical connectors to the motor.
- Lower the window slightly to access the bolts.
- Support the window and remove the mounting bolts.
- Carefully maneuver the window out of the tracks and set it aside.
Take care not to bend or scratch the window when removing it. Have your helper hold it securely.
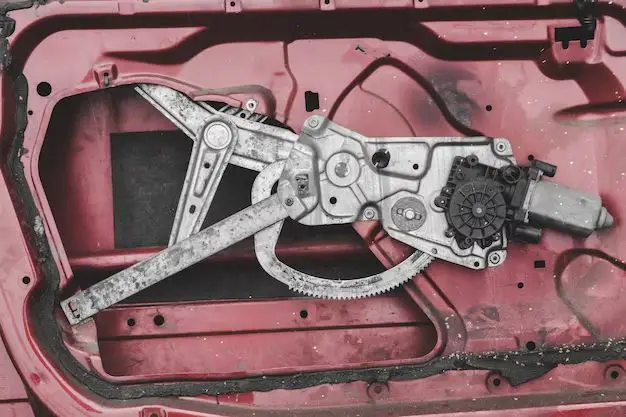
Removing Old Clips and Regulators
Refer to your repair manual for diagram specifics:
- Identify the clips to be replaced based on visual inspection.
- Pry off or unbolt the old clips one by one.
- If regulator replacement is needed, detach it from the window lift arms.
- Mark the regulator orientation and unbolt it from the door.
- Remove the old regulator through the access hole.
Bag and label the old parts so you can refer back during reinstallation.
Installing New Clips and Regulators
- Thoroughly clean the window lift arms and regulator mount points.
- Attach replacement clips one by one in the correct orientations.
- If replacing the regulator, bolt the new unit into place based on alignment marks.
- Reconnect the lift arms to the regulator.
- Lubricate joints and sliding surfaces with white lithium grease.
Ensure clips are fully seated and any bolts are tightened to proper torque specs per manufacturer guidelines.
Reinstalling the Window
- Position the window back into the door tracks.
- Align it properly and insert the mounting bolts by hand initially.
- Once aligned, tighten the mounting bolts with a wrench.
- Connect the window motor wiring.
- Test operation of the window to ensure smooth function.
- Reinstall trimmed pieces and door panel in reverse order of removal.
Make adjustments as needed until the window moves up and down correctly. Take it for a test drive to confirm normal operation.
Conclusion
While removing window regulator clips requires patience and care, practically anyone can complete this repair after acquiring the right materials and following the steps. Allow enough time to remove components slowly and methodically. Key points are protecting the delicate window glass, disconnecting springs and regulators very carefully, and taking photos or marking parts for correct reassembly. In a few hours, those annoying window issues can be fixed and you’ll be rolling down the road worry-free once again.