Hardwood floors can develop indentations over time from heavy furniture or high traffic areas. Thankfully, there are several methods you can use to repair these unsightly marks and restore your floors to their original beauty.
Page Contents
- 1 What causes indentations in hardwood floors?
- 2 How can you determine the depth of the indentation?
- 3 Steam indentation repair method
- 4 Sanding and refinishing
- 5 Wood filler indentation repair
- 6 Preventing future indentations
- 7 Dealing with deep indentations
- 8 Indentation repair costs
- 9 When to call a professional
What causes indentations in hardwood floors?
Indentations in hardwood floors are usually caused by:
- Heavy furniture – The pressure from heavy furniture legs can dent hardwood floors over time. Furniture that is frequently moved tends to cause more damage.
- High traffic areas – Areas that see a lot of foot traffic every day, like hallways or doorways, are more likely to get indented as the wood fibers are slowly compressed.
- Improper floor care – Using excess water to clean floors or failing to properly maintain the finish can damage floors over time and make them more susceptible to indentations.
- Moisture damage – Exposure to moisture from spills, pets, or high humidity can cause wood planks to swell and shrink, resulting in indented areas along the seams or edges.
- Sun exposure – Prolonged direct sunlight can cause the finish to deteriorate and the wood to slightly shrink, creating indentations and gaps.
How can you determine the depth of the indentation?
It’s important to determine how deep the indentations are before repairing them. Shallow dents less than 1/32″ deep can often be fixed with simple steaming. Deeper indentations will require sanding and refinishing.
Here are some ways to measure the depth of floor indentations:
- Use a ruler – Place the end of a ruler across the indented area and measure from the lowest point of the dent up to the normal floor surface.
- Try the coin method – Place a coin that is about 1/16″ thick, like a dime, into the indented area. If the coin is flush or lower than the floor, then the dent is at least 1/16″ deep.
- Use a depth gauge – This tool has a probe that can be inserted into the indentation to measure its depth accurately.
- Estimate with your fingernail – Run your fingernail across the dent to get a rough idea of depth based on how much it catches.
Knowing the depth will determine if simple steaming will raise the indentation or if sanding is required to smooth it out.
Steam indentation repair method
Steaming is an effective no-sanding solution for minor indentations less than 1/32″ deep in hardwood floors. It uses moisture and heat to swell the compressed wood fibers back to their original position.
Here is the basic process:
- Vacuum the area thoroughly to remove any dirt or debris. Make sure the floor is clean before steaming.
- Fill a spray bottle with distilled water and spray the indented area until thoroughly dampened. The moisture helps the wood fibers expand.
- Place a damp cloth over the indentation. Ensure it is large enough to cover the entire affected area.
- Heat your clothes steamer and hold 2-3 inches above the damp cloth. Slowly move back and forth until the cloth is hot and steam penetrates the floor.
- Check indent. Repeat steps 2-4 until the dent rises to the normal floor level. This may take several steam applications.
- Allow floor to fully dry. The wood fibers will remain expanded, filling the indented area.
- Sand lightly with 120-grit sandpaper if needed to smooth any uneven spots.
- Reapply polyurethane finish following manufacturer directions. Feather out finish over a large area to blend repaired section.
Steaming works well for small dents under 1/32″ deep. The key is using enough steam and moisture to make the wood fibers swell without over-saturating the floor. Go slowly to avoid damage from over-steaming.
Sanding and refinishing
For deeper indentations, sanding will be required to level them flush with the surrounding floor area. This involves removing enough of the worn finish and stained wood to get down to new, smooth wood fibers.
Here is an overview of the sanding and refinishing process:
- Remove baseboards and trim if needed to access indented areas. Number pieces for reinstallation.
- Vacuum floor thoroughly. Tack cloth all areas to remove dust.
- Select coarse 36-40 grit sandpaper for your orbital sander. Begin sanding in the direction of the wood grain using overlapping passes.
- Focus on indented areas using an edge sander. Sand until indentation is flush with surrounding floor area.
- Vacuum again. Make sure floor is perfectly clean before moving to finer grit sandpaper.
- Switch to 60-80 grit sandpaper to smooth sanding scratches. Finish sanding with 100-120 grit paper.
- Clean floor again with tack cloth. Apply stain if desired following manufacturer directions.
- Allow stain to fully dry. Apply 2-3 coats of water-based polyurethane, lightly sanding with 220 grit sandpaper between coats.
- Replace trim and baseboards, nailing into place with finish nails. Trim head flush and fill nail holes with matching wood putty. Allow putty to dry fully before final poly coat.
- Apply final poly coat across entire floor to blend newly refinished area. Allow to fully cure per manufacturer directions before use.
Deep sanding allows the floor indentation to be made flush and smooth again. It is labor intensive but gives a beautiful, revitalized floor surface.
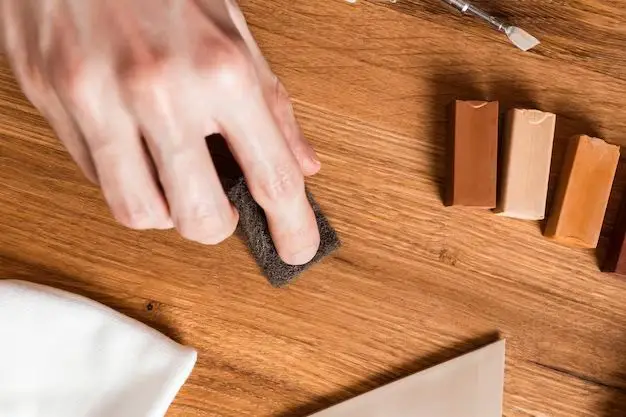
Wood filler indentation repair
Using wood filler is a less invasive indentation repair option for small dents. It will not work for large, deep indentations but can be ideal for minor flaws.
Here is how to complete wood filler repairs:
- Clean the indented area thoroughly and let dry.
- Apply painter’s tape around the outside of the affected area. This keeps filler only in the indentation and makes sanding easier.
- Select an enamel wood filler closest in color to your floors. Knead the putty thoroughly until it reaches a uniform color.
- Force the putty firmly into the indentation, overfilling slightly. Smooth with a plastic putty knife.
- Allow putty to dry per manufacturer directions, usually about 8 hours. Drying time depends on putty depth.
- Once fully cured, remove painter’s tape. Sand indentation and surrounding area to feather out edges.
- Vacuum well and tack cloth indentation to remove all dust.
- Apply polyurethane finish to the repaired area using a small brush. Feather out finish over a 4-6 inch area to blend repair.
- Allow finish to fully cure before regular use.
Filling small indentations with putty avoids sanding the surrounding finish. Use putty colors matched to your specific floor stain for a seamless repair.
Preventing future indentations
To help prevent indentations from recurring after you repair your hardwood floors, follow these tips:
- Use floor protectors – Place felt pads or wide, rubber-based protectors under all furniture legs. Replace worn protectors regularly.
- Rearrange furniture periodically – Don’t leave heavy pieces in the same spot for years. Shift placement now and then.
- Maintain stable humidity levels – Keep relative humidity around 45-55%. Use dehumidifiers or humidifiers as needed.
- Clean with wood floor cleaners – Never over-wet or use excess moisture. Vinegar and water works great.
- Reapply polyurethane – Renew the protective finish layer every 3-5 years or as wear dictates.
- Address spills immediately – Don’t let liquid sit on the surface. Blot up immediately.
- Avoid walking on floors with cleats, stilettos or spikes – Choose footwear that spreads out weight more evenly.
Protecting your refinished hardwood floors will help them stay beautiful and indentation-free for years to come.
Dealing with deep indentations
In cases of severe, deep floor indentations it may not be possible to fully repair the damage. Here are some options for dealing with these indentations:
- Partial board replacement – Cut out and replace severely damaged boards if the indentation encompasses more than half the width.
- Complete board replacement – Remove and install new boards over a large area for uniform appearance if multiple adjacent boards are damaged.
- Plank floor overlay – Install new engineered hardwood over top of existing floor to conceal damage. This adds a small amount of height.
- Carpet or area rugs – Carpeting or area rugs can be used to cover over and hide deep indentations.
- Embrace the character – For homeowners who like the distressed look, very deep scratches and dents can be seen as adding character.
Depending on your goals and budget, there are ways to deal with even severe hardwood floor indentations.
Indentation repair costs
The cost to repair indentations in hardwood floors depends on the size of the affected area and repair method used. Here are some average price ranges:
| Repair Method | Average Cost |
|---|---|
| Steaming small indentations | $100 – $300 |
| Spot sanding and refinishing | $200 – $500 |
| Wood filler for minor dents | $50 – $150 |
| Sanding and refinishing 100 sq. ft. room | $1,500 – $3,000 |
| Plank floor overlay per sq. ft. | $4 – $8 installed |
| Engineered wood flooring per sq. ft. | $3 – $13 installed |
Professional refinishers often charge per square foot for sanding and refinishing. DIY repairs can be done more affordably. Get multiple estimates before starting a project.
When to call a professional
While some indentation repairs can be DIY, there are times to call in a pro hardwood floor refinisher:
- If unsightly staining or discoloration accompanies indentations
- For repairs needed over large areas, like an entire room
- If the polyurethane finish has thick residue buildup or requires chemical stripping
- For repairs requiring new hardwood plank installation
- If there are multiple deep scratches causing a uneven appearance
- For homes occupied by infants or the elderly due to dust concerns
- If you do not own the proper sanding and finishing tools
- For intricate custom patterns like herringbone that require experience
Professional refinishers have the equipment, materials and experience to repair even severe hardwood floor damage.
Conclusion
Repairing indentations in hardwood floors keeps them looking beautiful without having to fully replace them. For shallow dents under 1/32 inch, simple steaming can raise the wood fibers back into position. Deeper marks require sanding to smooth and refinishing for a uniform appearance. Preventing future indentations through furniture pads, humidity control and prompt spill clean-up helps protect your hardwood investment.