Luxury vinyl plank (LVP) flooring is a popular flooring option for many homeowners due to its durability, water resistance, and realistic wood or stone look. However, like any flooring, LVP can become scratched over time from furniture, pets, shoes, and other objects being dragged across the surface. Thankfully, there are several methods you can use to repair minor scratches and scuffs on vinyl plank flooring to restore it to like-new condition.
Page Contents
What causes scratches on vinyl plank floors?
There are a few common causes of scratches and scuffs on vinyl plank flooring:
- Dragging furniture or appliances across the floor without lifting them
- Pet nails scratching the surface as they walk across it
- Dirt, sand, and grit under shoes scraping the floor
- Toys with sharp or rough edges being pushed around
- Dropping heavy or sharp objects on the floor
Even though LVP is designed to be scratch-resistant, it’s not completely impervious to damage over time with regular use and traffic. The top protective layer can become compromised, allowing scratches and scuffs to affect the vinyl layer underneath.
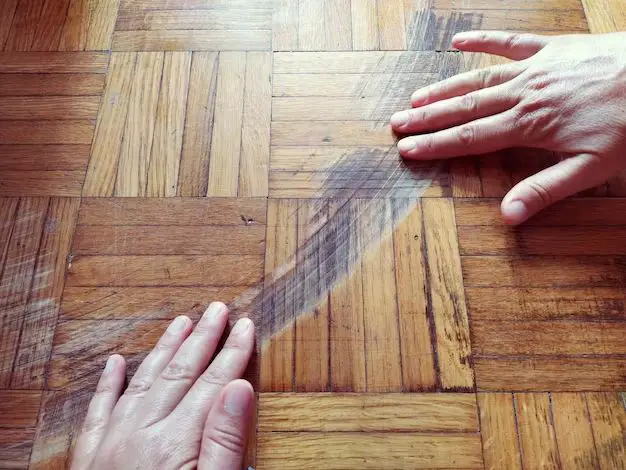
How deep are the scratches?
Not all scratches on vinyl plank floors are created equal. Light surface scuffs and scratches are much easier to repair than deeper gouges that penetrate through the top layers. Here’s a quick guide on determining scratch depth:
- Surface scuffs – These affect only the clear top coat and don’t penetrate to the print or vinyl layers. Often they can be buffed out.
- Light scratches – Slightly deeper than surface scuffs but don’t catch a fingernail when running it across them.
- Medium scratches – Visible when the light catches them right, and a fingernail catches when running across them.
- Deep gouges – Obvious depth and ridges you can easily feel with a fingernail. May penetrate down to the vinyl layer.
The deeper the scratch, the more difficult it will be to repair. Light surface scratches are the easiest to fix with simple DIY methods. Medium scratches may require specialized scratch repair kits. Deep gouges usually call for professional repair or plank replacement.
How to repair light surface scratches
If your vinyl plank flooring only has minor surface scuffs and scratches that don’t catch when you run a fingernail over them, they can often be buffed out rather easily:
Use a scratch repair marker:
- Select a marker that matches the color of your LVP flooring.
- Shake the marker well and “prime” it by making a few marks on a piece of scrap paper or wood.
- Run the marker over and back-and-forth across the length of the scratches, applying several coats and allowing it to dry in between.
- Buff the repaired area with a soft cloth once fully dried.
Rub the scratches with rubbing alcohol:
- Dampen a soft cloth with a small amount of isopropyl rubbing alcohol.
- Gently rub back-and-forth over the scratches to help smooth them out.
- Wipe the area with a clean damp cloth once finished.
Use a vinyl floor repair kit:
- Purchase a kit made for filling in and disguising surface scratches.
- Clean and dry the scratched area thoroughly.
- Apply the specialty filler paste/putty, allow to dry completely.
- Buff and polish the repaired spot per kit directions.
These simple DIY methods work well for minor surface scratches that are not too noticeable. Use caution when buffing – you don’t want to make the damage worse.
Repairing deeper vinyl plank scratches
Once scratches start to catch your fingernail and penetrate deeper into the vinyl wear layer, more intensive repair methods are needed:
Use wax filler sticks:
- Buy vinyl plank flooring touch-up sticks that match your color.
- Fill in the scratch grooves tightly with the colored wax.
- Scrape off excess wax with a plastic card once dry.
- Buff with a soft cloth to blend into the surrounding plank.
Apply vinyl plank seam sealer:
- Purchase a sealant designed for filling in gaps between planks.
- Press the sealant applicator tip into the scratch and fill it in completely.
- Wipe away any excess while still wet.
- Allow to fully cure for 24 hours.
Use a specialty filler/putty:
- Buy a vinyl scratch repair product made for deeper damage.
- Work the putty into the scratch with a putty knife.
- Smooth with damp cloth and let dry completely.
- Sand any dried excess minimally if needed.
These methods involve filling in the damaged area to disguise the scratches. It takes some practice to achieve the best results.
When to call a professional
If your vinyl plank flooring has deep gouges and ridges you can easily feel with your fingernail, or the print layer is damaged, professional help is recommended. DIY repair methods likely won’t suffice. A trained flooring technician has the skills and tools to:
- Inject specialty vinyl filler deep into wide gouges.
- Sand down ridges and uneven areas from deep scratches.
- Match the color and pattern perfectly.
- Smooth and retexture extensive damaged sections.
- Replace a severely damaged plank if needed.
They can make even serious scratches and gouges virtually invisible. While this costs more than DIY, it saves you having to replace planks.
How to prevent future scratches
While vinyl plank flooring is highly durable and scratch-resistant, it’s not invincible. Taking measures to prevent scratches will save you hassle down the road:
- Attach felt pads to all furniture legs.
- Keep pet nails trimmed.
- Take off shoes when inside.
- Use area rugs in high traffic zones.
- Place walk-off mats at entrances.
- Immediately clean up spills.
- Avoid abrasive cleaners.
- Lift heavy furniture when moving – never slide.
Following vinyl plank flooring care best practices will minimize potential damage. But even with your best efforts, scratches still happen. Thankfully, many can be repaired with minimal hassle and expense.
In summary:
- Assess scratch depth – surface scuffs vs. deeper gouges needing specialty filler.
- Try rubbing alcohol, repair markers, or kits for light scratches.
- Use wax sticks, sealant, or vinyl putty for deeper damage.
- Call a professional for extensive gouges down to the print layer.
- Prevent scratches by adding furniture pads, trimming pet nails, and lifting furniture when moving.
With the right materials and techniques, you can make those unsightly scratches disappear and restore your luxury vinyl plank flooring to like-new condition again.