Over time, the seal around your patio door can become worn out or damaged, allowing air, water, insects, and noise to leak through. Replacing a patio door seal is an easy DIY project that can be done in just a few hours, requiring only simple tools and materials.
In this comprehensive guide, you’ll learn everything you need to know about replacing patio door seals, including:
- When to replace your patio door seal
- What supplies you’ll need
- How to remove the old seal
- How to measure for the new seal
- How to install the new seal
- Tips for weatherproofing and maintaining your new seal
Equipped with these steps and tips, you can replace your patio door seal like a pro. A fresh seal will keep your home comfortable, quiet, and energy-efficient for years to come.
Page Contents
When Should You Replace Your Patio Door Seal?
Here are some signs that it may be time to replace the seal around your patio door:
- Drafts – If you feel cold air leaking around the edges of your closed patio door, your seal is likely worn out. This allows valuable heated or cooled air to escape, driving up energy costs.
- Visibility – Over time, patio door seals can become brittle and cracked. Visually inspect the seal and replace it if you see any tears, gaps, or decomposition.
- Pests – If you’ve noticed bugs, spiders, or other pests creeping in around your patio door’s seal, it means it’s no longer doing its job of keeping them out.
- Noise – A worn patio door seal will allow outside noise to freely enter your home. If you notice an increase in outside noise coming through the closed patio door, the seal may need replacing.
- Age – Seals deteriorate over time due to weather and use. If your patio door seal is more than 5-10 years old, it’s likely ready to be replaced.
Replacing a worn patio door seal as soon as you notice any of these issues will allow you to reseal and weatherproof your home before problems arise.
What You’ll Need
Replacing a patio door seal is an easy project that requires minimal tools and materials. Here’s what you’ll need to complete this repair:
Tools
- Utility knife or razor blade
- Metal putty knife
- Rubber mallet
- Ruler or measuring tape
- Pencil
Materials
- Replacement patio door seal
- Mineral spirits or alcohol to clean the channel
- Rags
- Masking tape (optional)
The most important item is the new patio door seal, which you’ll need to purchase before starting this project. Bring your ruler or tape measure to the hardware store when buying a new seal to ensure you get one that fits your patio door perfectly. Most home improvement stores carry a variety of sizes.
Removing the Old Patio Door Seal
Before installing a fresh patio door seal, you’ll need to fully remove the old, worn out one from the door frame. Follow these steps:
- Use the utility knife to cut through the seal at both bottom corners of the patio door.
- Grab one end of the seal and pull firmly, peeling it out of the channel around the door frame. Go slowly and take care not to damage the channel itself.
- Use the putty knife or razor blade to scrape out any remaining seal fragments left in the channel.
- Clean out the channel using a rag and mineral spirits or rubbing alcohol, removing any dirt, debris, or old caulk.
- Dry the channel thoroughly after cleaning it.
Removing the old seal completely is an important first step that allows the new patio door seal to adhere properly. Take your time during this process to avoid damaging the door frame.
Measuring for a Replacement Seal
Once the old seal is fully removed, take precise measurements of your patio door frame to ensure you buy a replacement seal that fits just right.
- Measure the height of each side of your patio door frame. Jot down the measurements.
- Measure the top width of the frame.
- For the bottom, measure the width of the frame itself along with any additional threshold or sill on the very bottom.
Bring these measurements with you when purchasing a new seal to find one that’s an ideal, tight fit all the way around your patio door. The seal should be slightly longer than your measurements to make sure it can be stretched and compressed for a snug fit.
Table of Measurements
| Location | Measurement |
|---|---|
| Left Side Height | 72 inches |
| Right Side Height | 72 inches |
| Top Width | 48 inches |
| Bottom Width (frame + threshold) | 60 inches |
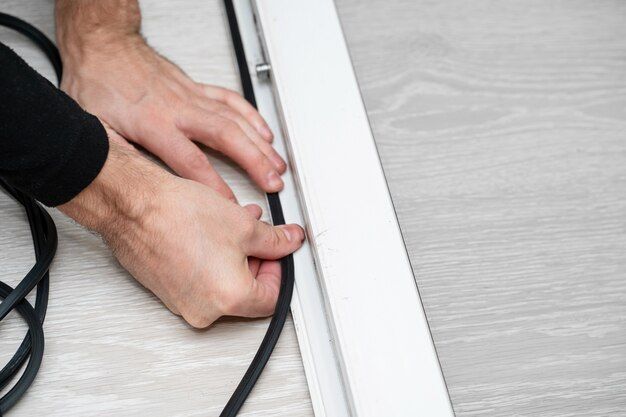
Installing the New Patio Door Seal
Once you have the ideal replacement seal for your patio door, it’s time to install it for a tight, durable fit that keeps out drafts, moisture, and noise.
- Starting at the top left corner of the door frame, peel back a few inches of the adhesive backing on the new seal.
- Press the exposed adhesive into the top corner, beginning to adhere the seal to the frame.
- Slowly pull the backing down further as you work your way across the top, applying pressure to form a strong bond between seal and frame.
- Continue pressing the adhesive seal into the frame down the left side until you reach the bottom corner.
- Use a razor blade to trim off any excess length so the bottom corner fits flush and tight.
- Repeat steps 2-5 to adhere the seal along the bottom edge and up the right side until the two ends meet at the top right corner.
- Ensure the seal meets tightly in the corners and that there are no gaps.
- Use a damp rag to wipe away any residue or excess adhesive.
- Let the seal adhere fully for 24 hours before opening or closing the patio door.
Take it slowly when installing the new seal and apply even pressure to maximize adhesion. The seal should fit snugly into the patio door channel without bunching up.
Helpful Tips
- If needed, use masking tape to hold the seal in place as you adhere it.
- Use a rubber mallet and wood block to gently tap the seal into the channel for consistent contact.
- In colder weather, use a hair dryer to slightly warm the seal and increase flexibility.
- Avoid over-stretching or compressing the seal, which can lead to early failure.
- Contact an experienced window pro if you encounter issues getting an ideal fit.
Weatherproofing and Maintaining the Patio Door Seal
To maximize performance and longevity of your fresh patio door seal, follow these weatherproofing tips:
- Use 100% silicone caulk to seal the bottom corners and threshold area, preventing water intrusion.
- Apply silicone lube to the tracks and rollers to prevent sticking and tearing.
- Keep patio door tracks clear of dirt and debris which can degrade the seal.
- Avoid over-closing or slamming the patio door, which stresses the seal.
- Inspect the seal yearly for any gaps or cracks and reapply caulk if needed.
With proper installation and maintenance, your new patio door seal should last for many years before needing replacement again. Keep an eye out for leaks, drafts, visibility issues, and pests to determine when it’s time to reseal the patio door again.
Conclusion
Replacing a worn patio door seal is an easy and affordable DIY project that can improve your home’s energy efficiency, comfort, and security. With a little time, effort, and the right materials, you can seal up air leaks, block noise, and keep out the elements.
Following the step-by-step instructions in this guide will allow you to remove the old seal, measure and fit the door properly with a new one, and weatherproof it for long-lasting performance. In less than an afternoon, you can do this repair and start reaping the benefits.
Maintaining your patio door seal every year and replacing it at the first signs of wear is a smart way to get the most out of your patio door. With a tight seal, you can enjoy quiet, comfortable indoor temperatures and lower energy bills.