The rubber seals around car doors serve an important purpose – they help keep water, air, and noise from entering the passenger compartment. Over time, these seals can become brittle, cracked, or detached from the door, allowing drafts, leaks, and road noise into the cabin. Replacing worn out door seals is an inexpensive repair that can make a huge difference in keeping the interior of your car comfortable and quiet.
Page Contents
When to Replace Door Seals
Here are some signs that the rubber seals around your car’s doors need to be replaced:
- Water leaks – If you notice water dripping into the car when it rains, the door seals are likely worn out or damaged. Leaks can lead to water damage and mold growth inside the door panels and carpet.
- Wind noise – As seals degrade, you may hear an increase in wind noise from the perimeter of the doors while driving. Good seals help block exterior noise.
- Air leaks – Drafty air coming into the cabin is another indication of a bad door seal. You may feel cold air coming in near the doors.
- Cracks or holes – Visually inspect the seals around the door edges. Look for cracks, tiny holes, or sections peeling away from the door.
- Stiffness – Healthy seals feel pliable when you press on them. Brittle and hard seals are dried out and need replacement.
If you notice any of these warning signs, it’s a good idea to replace the door seals. Waiting too long can allow more water intrusion or noise problems to occur. Replacing worn seals is fast and inexpensive compared to repairing water damaged interiors.
DIY or Professional Replacement?
Replacing door seals is a relatively straightforward DIY project on most vehicles. With basic hand tools and inexpensive supplies, you can complete the job in an hour or two. However, there are a few cases where you may want to have a professional mechanic take care of the seal replacement:
- Luxury vehicles – Some high-end imports like Mercedes, BMW, or Lexus have complex door panels that are difficult to remove without damaging clips and fasteners.
- Rusted screws – If the screws holding your door panels in place are rusted or stripped, a pro may be needed to drill them out and install new retainers.
- No garage – Without access to a warm garage, DIY seal replacement in cold climates can be challenging.
- Lack of time/confidence – If you don’t have several hours to devote to the repair, or aren’t confident working on your car, a mechanic can replace the seals efficiently.
For most vehicle owners, the DIY route is preferred to save on labor charges. As long as you have the necessary supplies, patience, and take precautions against damaging components, you can swap your own door seals successfully.
Rubber Seal Replacement Supplies
Gather the following tools and materials before starting:
Tools
- Socket set
- Flat head screwdriver
- Phillips head screwdriver
- Plastic pry tools
- Razor blade
- Rags
- Gloves
Materials
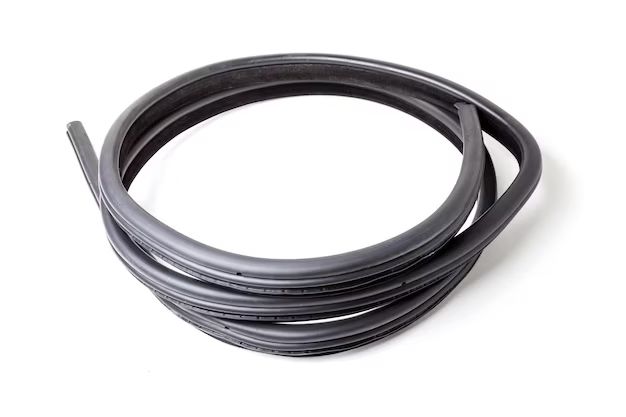
- Replacement door seals
- Seal lubricant
- Paper towels or rags
- Masking tape (optional)
Search online or at your local auto parts store for the correct seals for your vehicle’s make and model. You’ll need to purchase enough to do all four doors for a complete job. Seal lubricant helps slide the new seals into place without tearing. Check that you have all the necessary tools and supplies ready before starting the door panel removal process.
How to Remove Door Panels
The first step in replacing door seals is accessing the area by removing the interior door panels. While specific steps vary, there are common procedures for most vehicle makes and models:
1. Disable the Window Controls
Before removing door panels with powered windows, disable the window controls. This prevents accidentally lowering the glass while the panel is off. Turn off power window switches or remove fuses as required.
2. Remove Access Covers
Look along the edges of the door panel for any obvious plastic covers. Pry these off carefully with a flat head screwdriver to expose retaining screws underneath. The armrest may also need to be popped off.
3. Remove Control Panel Screws
Use a Phillips head screwdriver to remove any exposed panel screws within the armrest, door handle, or power control areas. Removing screws helps release the panel.
4. Pop Off Panel Retainers
Slide a plastic pry tool between the door panel and door frame to detach the perimeter retaining clips. Work your way around the entire panel to fully disengage it. Use care not to break any of the plastic retainers.
5. Lift Off the Panel
Once all screws are out and clips detached, carefully lift the panel off the door. Pivot it out from the bottom and lift up. Be careful not to tear the fabric. Detach any wiring harness connectors or rods linking the handles. Remove the panel completely.
Taking your time at each step reduces the chance of breaking fragile door components. Have a rag handy to padding areas being pried off. With the panel removed, you can now access the inner door and old seal.
How to Remove the Old Door Seal
Here are the basic steps for removing the old, worn out rubber door seal from the vehicle frame:
1. Peel Out the Old Seal
Starting in a corner, gently peel up the seal from the door groove. Slowly work your way around the entire frame, ripping the old seal out completely. Resist just tearing pieces off as you go. Removing it entirely helps get a clean surface.
2. Clean Seal Contact Areas
Use a rag and rubbing alcohol to thoroughly clean the now-exposed groove where the old seal was mounted. This gets rid of any remaining adhesive, dirt or debris so the new seal can adhere properly.
3. Remove Rust Buildup
Check for any flakey rust along the bare metal door flange. Use a wire brush or sandpaper to clean off oxidization buildup so it’s smooth for new seal contact.
4. Dry and Degrease
Wipe down the cleaned door mounting area with a dry rag. Follow up with an alcohol-dampened rag to degrease any oily residue left over so the new seal properly bonds when installed.
5. Test Fit the New Seal
Do a test fitting with the new replacement seal temporarily to ensure it matches the groove before applying adhesive. Trim or modify as needed for optimal fitting.
Thorough removal of the old seal and proper metal cleaning are vital for the new component to function properly. Take time with each step. Now the door is prepped and ready for the fresh seal.
How to Install the New Door Seal
Once the old seal is removed, here are the steps for adhering the new one into place:
1. Apply Adhesive Lubricant
Open up the supplied tube of adhesive lubricant. Run a bead of the sticky gel along the full length of the door seal groove. Spread it evenly to prep the contact surface area.
2. Mount the New Seal
Position the new seal starting at one end of the door frame. Carefully press it into place, embedding it deeply and evenly into the adhesive lubricant. Work your way around the entire frame.
3. Reconnect Retainers
Some new seals may come with plastic retainers to reconnect into door sheet metal holes. Clip these back into place as you work your way around.
4. Roll the Seal
Once mounted, roll the seal gently using your thumbs to evenly distribute adhesive behind it. Apply pressure working your way around the door to prevent air gaps.
5. Allow Curing Time
Let the adhesive lubricant fully cure with the door open for at least an hour before reassembling panels. The door seal needs this time to bond tightly.
Installing the fresh seal carefully results in optimal sealing performance. Avoid stretching or twisting the seal during mounting. Closing the door too soon can break the bond. Patience leads to effective protection.
How to Reinstall Door Panels
With the new door seal mounted in place, reassembly of the door components is straightforward:
1. Connect Latch Linkages
Reattach any detached link rods from handles to the door latch mechanisms. Insert pins and fasten retaining clips back into place.
2. Plug In Window Units
For doors with powered windows, reconnect the window motor harness connectors. This enables electrical contact.
3. Position the Panel
Place the door panel back into original position. Feed any wiring through slots. Align it flush before reattaching retainers.
4. Press On Retaining Clips
Tap firmly around panel perimeter edges until the plastic retaining clips snap back into their slots in the door frame.
5. Replace Any Screws
Reinsert armrest and access cover screws using a Phillips head screwdriver to secure the panel. Don’t overtighten.
6. Reconnect Access Covers
Pop armrests, controls panels, and any access covers back into position by pressing firmly until the retaining clips engage.
7. Perform a Water Test
Run water onto the seal areas to check for leaks with a helper. Adjust the fit if any wetness comes through into the cabin.
Taking precautions with wiring connectors, linkage pins, and retaining clips reduces the chance of interior rattles or component damage after reassembly. Test door operation before considering the seal replacement complete.
Tips for DIY Door Seal Replacement
Follow these handy tips for a smooth, successful DIY door seal installation on your vehicle:
- Watch tutorial videos to get familiar with the process beforehand.
- Take photos during disassembly to help with correct panel reinstallation.
- Bag and label any loose components and hardware to avoid confusion later.
- Work slowly when prying – rushing can crack fragile clips or brackets.
- Wear gloves to avoid skin contact with adhesive lubricant.
- Talk to other owners to ask for any model-specific tips or tricks.
- Be extra careful sliding the new seal into place to prevent twisting or tearing.
- Use masking tape temporarily if needed to hold the seal in proper alignment.
- Make sure the door frame mounting area is perfectly clean before installing the fresh seal.
- Ask a helper to press around the seal while fastening clips for tighter fitting.
Equipped with the right process, materials, and care, you can swap out old, degraded seals for like-new condition. Proper installation results in doors that once again seal out the elements properly. Just allow adequate working time and exercise patience at each stage.
Conclusion
Replacing worn out rubber seals around car doors is an economical way to improve comfort and reduce noise. Typical symptoms of seals in need of replacement include water leaks, wind noise from door edges, and air drafts entering the cabin. Gather the necessary pry tools, cleaning supplies, and fresh door seals. Removing door panels takes care to avoid damage. Peel out the old seals completely and thoroughly clean the contact area before installing new ones using adhesive lubricant. Allow time for curing before reassembling the doors. With some basic skills and care, you can often tackle door seal replacements yourself. Just work slowly and double check for proper fit. The result will be doors that once again provide a tight barrier against the elements.