Replacing a valve stem without removing the tire from the wheel is possible on most vehicles, but does require some special tools and knowledge. With the right preparation and technique, this repair can be performed fairly quickly to get your vehicle back on the road. Here is a step-by-step guide to replacing a valve stem while leaving the tire mounted.
Page Contents
- 1 What You’ll Need
- 2 Prep the Tire
- 3 Remove the Valve Stem
- 4 Install New Valve Stem
- 5 Finish the Tire
- 6 Tips for an Easier Stem Replacement
- 7 Benefits of In-Situ Valve Stem Replacement
- 8 When to Avoid In-Situ Stem Replacement
- 9 Valve Stem Types
- 10 Valve Stem Tools
- 11 How to Maintain Valve Stems
- 12 Warning Signs of Bad Valve Stems
- 13 Conclusion
What You’ll Need
Before starting this project, you’ll need to gather the following tools and supplies:
- New valve stem that matches your existing type (rubber or metal)
- Valve stem tool or small screwdriver
- Razor blade or sharp knife
- Needle nose pliers
- Hammer
- Tube of tire bead lubricant
- Air compressor
- Chalk or marker
- Eye protection
- Work gloves
You’ll also need access to an area where you can lay the wheel flat during the process, such as a driveway or garage floor. Ensure the space is clean and free of any debris or objects that could damage the tire.
Prep the Tire
Before attempting to replace the valve stem, you’ll need to loosen the tire beads from the wheel rim. This will allow you to pull the tire sidewall away and access the bad valve stem. Here are the preparation steps:
- Remove the wheel from the vehicle and lay it flat on the ground near an air compressor.
- Deflate the tire completely by depressing the valve stem until all air escapes.
- Lubricate the tire beads on both sides with a generous amount of tire bead lubricant. Spray around the entire circumference of the bead.
- Re-inflate the tire to about 40 psi and then let the air back out. This will help spread the lubricant.
- Repeat the inflation and deflation steps 2-3 more times until the beads feel loose on the rims.
Once the tire beads are loose and lubricated, you can move on to removing the valve stem.
Remove the Valve Stem
With the tire deflated and prepped, you can now access and remove the faulty valve stem:
- Locate the position of the valve stem on the wheel. Mark its position on the rim with chalk or marker so you can align the new stem later.
- Use a valve stem tool or small screwdriver to detach the valve stem’s nut, which holds it against the rim.
- Remove any rubber grommets or seals surrounding the stem and pull it out from the rim hole.
- Inspect the rubber tire stem hole for any cracks or damage. It should look round and smooth.
- Use a razor blade to scrape any old adhesive or residue off the rim surface around the stem hole.
With the old valve stem completely removed, you can now install the new replacement.
Install New Valve Stem
Installing the new valve stem into the rim hole requires working one sidewall of the tire away to gain access:
- Wrap a rag or cloth around the rim edge near the stem hole for cushioning.
- Insert the straight end of a hammer handle under the tire sidewall and pry it up and over the rag-covered rim edge. This will create an opening.
- Insert the new valve stem through the rim hole from the inside of the wheel. Make sure the stem aligns with the chalk marking.
- Replace any rubber grommets or metal washers that were around the old stem. Slide them onto the new stem.
- Thread the valve stem nut on and tighten it very securely with pliers.
- Tuck the sidewall back inside the rim and remove the hammer handle.
With the new stem tightened in place, you can re-mount and inflate the tire.
Finish the Tire
The last steps are to complete the tire remount and air it back up with the new valve stem:
- Set the wheel upright and clear of any objects.
- Attach an air chuck to the new valve stem.
- Inflate the tire to about 40 psi and check that the beads have seated back on the rims.
- Continue inflating to the manufacturer’s recommended pressure.
- Remove the chuck and check that no air is leaking around the new stem.
- Perform a final check that the stem aligns properly with the rim hole. The tire should not wobble.
- Re-install the wheel on your vehicle and lower it to the ground.
- The tire repair is now complete. You have succeeded in replacing the valve stem without removing the tire from the wheel.
Tips for an Easier Stem Replacement
While this valve stem replacement method is possible, it does require some physical effort and skill. Here are some useful tips for making the job go smoothly:
- Always use fresh tire lubricant and fully deflate the tire before prying off the sidewall. Never use any prying tools without lubricating first.
- Go slowly when working the sidewall off the rim. Rushing can damage the tire bead and ruin the seal.
- If you can’t get enough slack in the sidewall to access the stem hole, deflate the tire more and lubricate the beads again.
- Make sure the new stem’s grommets, washers and nut go on the correct way before inserting it in the hole.
- Inflate the tire about 10 psi past the recommended pressure to help fully seat the beads. Then deflate it down to the proper pressure.
- Always check for air leaks and looseness in the new stem by hand after inflating. Tighten it more if needed.
While replacing a valve stem without removing the tire is possible in many cases, it’s always safest to demount the tire from the wheel if you have any doubts or concerns about getting it resealed properly. Taking the tire off gives full access to the rim and beads for a reliable repair.
Benefits of In-Situ Valve Stem Replacement
Replacing a valve stem without dismounting the tire can provide some useful benefits in certain situations:
- Faster repair time since you don’t have to break the tire beads loose or remount/rebalance the tire after.
- Avoid buying a tire mount/demount machine if you don’t already have one.
- Prevent damage to tire beads or the interior liner that can happen during demounting.
- Don’t need to reprogram TPMS sensors since the tire stays on the wheel.
- Convenient way to replace a stem on a spare tire still stowed under the vehicle.
However, the procedure does require more labor, skill, and the right tools. Trying to replace a valve stem without the proper technique can risk damaging the tire or wheel and lead to an unsafe repair. Only attempt this method if you have experience working with tire beads and inflating/deflating tires on a regular basis.
When to Avoid In-Situ Stem Replacement
Despite the potential benefits, there are times when it is not advised to replace a valve stem without removing the tire first:
- If the tire beads are corroded or difficult to break loose, demounting may be the only option.
- On large truck tires that require special machines to mount and inflate safely.
- If there are any doubts or signs of problems with sealing the tire beads again properly.
- When replacing rubber valve stems on older wheels with recessed stem holes.
- On low-profile performance tires where the sidewalls are stiff and difficult to manipulate.
- When other repairs like patching a puncture need to be made—better to demount once for everything.
In these cases, it is safest to just fully remove the tire and avoid any risk of an improper bead seal after disturbing it during stem replacement. The small additional time needed to remove and remount the tire is worth it for the reliability of a full demount and proper remount.
Valve Stem Types
When purchasing a replacement valve stem, you need to match it to the type that was originally installed on your wheels:
| Valve Stem Type | Description |
|---|---|
| Rubber valve stem | Most common type, made of durable rubber. Requires replacing rubber grommets. |
| Metal valve stem | Used on many alloy wheels. All metal construction. May include rubber grommets. |
| TPMS valve stem | Contains a sensor to monitor tire pressure. More expensive but necessary for TPMS operation. |
Within those options, stems are further categorized by their stem style and length. Common styles include:
- Standard straight stem
- 45-degree angle stem
- 90-degree angle stem
- Cut-to-fit adjustable stem
Lengths range from about 0.5 inches up to 2.5 inches for larger wheels. Match this as closely as possible when ordering a replacement stem.
Valve Stem Tools
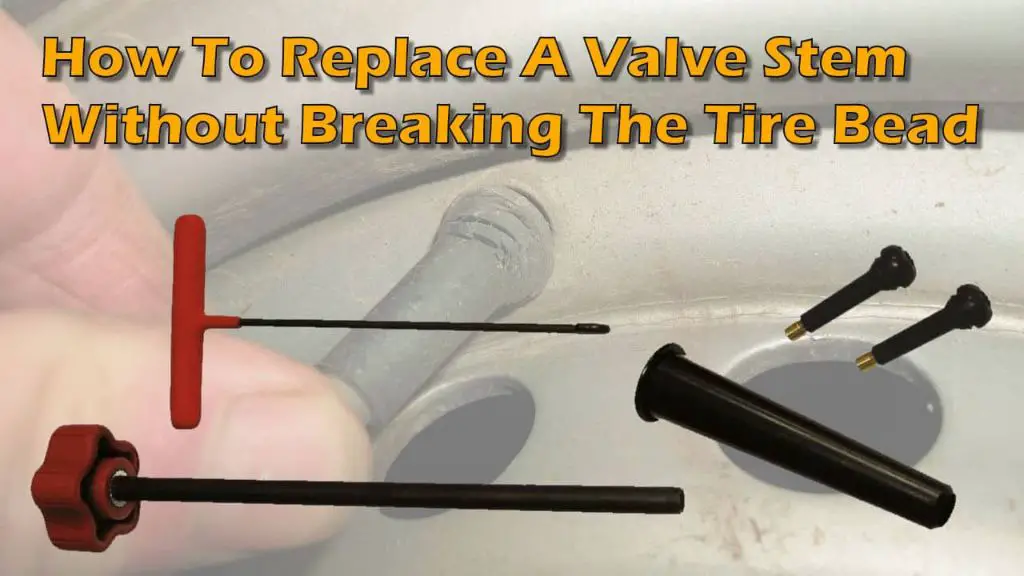
Having the proper tools makes removing and installing valve stems much easier. Here are some specialized tools to consider:
- Valve core tool – For removing rubber valve cores from old stems for reuse.
- Valve stem removal tool – Grips outside of the stem for easy turning.
- Valve stem installer tool – Pushes new stems into place without damage.
- Beaded valve stem tool – Allows installing stems without tire removal.
Less specialized tools like small screwdrivers, pliers, utility knives, and a hammer can also be used. But the valve stem specific tools simplify the process and reduce the risk of tire damage.
How to Maintain Valve Stems
To get the most life out of your tire valve stems and prevent failures, here are some important maintenance tips:
- Check stems periodically for cracks, swelling or leaks – replace as needed.
- Make sure the stem cap seals tightly to keep out dirt and moisture.
- Lubricate the stem occasionally with rubber grease to prevent drying.
- Ensure stems are always torqued to spec with a valve stem tool.
- Add metal valve stem caps on rubber stems to prevent wear when checking pressure.
- Avoid putting wheels with cracked or damaged valve stem holes back in service.
With proper maintenance and prompt replacement when needed, valve stem problems can be avoided to ensure safe operation.
Warning Signs of Bad Valve Stems
Watch for these potential warning signs that a valve stem is failing and needs immediate replacement:
- Visible cracking, dry rot, or swelling of the rubber.
- Air leaking around the stem when inflating the tire.
- The stem does not spring back after being depressed.
- Tire loses air pressure quickly after being filled.
- White chalky deposits around the stem, indicating corrosion.
- Tire constantly needs refilling more than normal.
- Stems look loose, bent or show abnormal wear.
Never ignore these signs of valve stem problems, as they usually indicate an impending stem failure. Replacing them promptly is necessary to avoid getting stranded with a flat tire.
Conclusion
Replacing a tire valve stem without removing the wheel is possible in many cases, but also comes with some risks if not done properly. Make sure you are fully prepared with the right tools and feel confident handling the tire beads before attempting this method. When in doubt, it is usually best to simply demount the tire fully for the most reliable results. With some care and the proper techniques however, this in-situ repair can allow you to get rolling again quickly.