Replacing a worn or broken wooden drawer runner is a relatively straightforward home improvement project that can breathe new life into an old dresser or cabinet. With some basic tools, a little patience, and the right replacement parts, you can have your drawers sliding smoothly once again in no time.
Page Contents
What is a Drawer Runner?
A drawer runner, also called a drawer slide, is the hardware that allows drawers to slide in and out of a cabinet or other furniture piece. There are a few main components:
- The cabinet member attaches to the inside of the furniture cabinet
- The drawer member attaches to the drawer
- The actual runner connects the cabinet and drawer members, usually with ball bearings or rollers that enable smooth motion
On wooden drawer runners, the components are made of wood rather than metal. The runner may have wheels or wooden glides to reduce friction.
When to Replace a Wooden Drawer Runner
Here are some signs that it’s time to replace your wooden drawer runners:
- The drawer doesn’t slide smoothly and gets stuck or caught up
- There is excessive wobbling from side to side when you pull the drawer out
- The wooden runners are visibly cracked, warped, or split
- Portions have broken off completely
If you try lubricating the old runners and the issues persist, replacement is likely needed. Catching problems early makes the job easier too, before the existing runners become too damaged to remove intact.
Choosing New Drawer Runners
When selecting replacement drawer runners, you’ll need to match a few specifications:
- Length – Measure the interior depth of your cabinet. The runners need to be slightly shorter than this length.
- Style – Match the style of your old runners – side-mounted, center-mounted, etc.
- Mounting – Look for the same mounting hardware as your originals, e.g. screws versus nails.
- Material – For wooden runners, opt for durable hardwoods like maple or birch rather than a softwood like pine.
- Number of runners – Most drawers have 2 or 4 runners total (1 or 2 per side). Measure to confirm the number for your specific drawers.
Take one of the old runners with you to the hardware store when shopping for replacements. This makes it easy to find the right length, style, and mounting. If the original runners are beyond repair, at least measure them before heading to the store.
Tools and Materials Needed
Gather the following tools and supplies before starting your drawer runner replacement:
- Replacement drawer runners
- Pencil
- Tape measure
- Carpenter’s square
- Clamps
- Screwdriver
- Hammer
- Wood chisel
- Hand saw
- Sandpaper
- Wood glue
- Rags
- Safety glasses
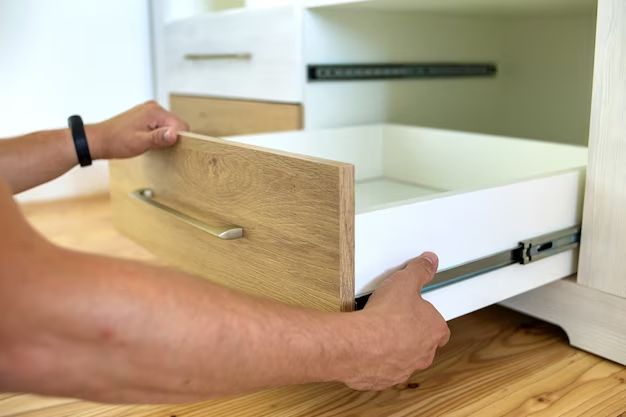
How to Replace Wooden Drawer Runners
Follow these steps to remove your old drawer runners and install new ones:
- Remove drawer – Pull the drawer completely out and set it aside.
- Remove runner mounting screws – Unscrew any obvious screws attaching the runner pieces to the drawer and cabinet. Set the screws aside in an organized way so you can find them later.
- Pry runners away – Insert a sturdy wood chisel or flat pry bar underneath each runner component to gently pry it away from the wood. Tap lightly with a hammer if needed. The old glue may cause it to stick.
- Clean surfaces – Once the runners are removed, scrape away any remaining wood glue or debris on the cabinet and drawer surfaces where they were mounted. Smooth with sandpaper.
- Measure for new runners – Confirm the length you need by measuring the interior depth of the cabinet. Refer to your new runners’ instructions for where to measure.
- Cut to length if needed – If your new runners are too long, measure and mark where you need to cut them. Use a handsaw or miter saw.
- Mark positions – Line up each new runner component along the drawer and cabinet interiors. Use a carpenter’s square to ensure they’re perfectly perpendicular to the edges. Mark mounting holes.
- Drill pilot holes – Drill small pilot holes at all your markings for the mounting screws. This prevents splitting the wood.
- Attach runners – Use a screwdriver to insert and tighten all screws through the pilot holes, securing the runner components to the drawer and cabinet.
- Check alignment – Slide the drawer back in carefully. Make sure the runners align smoothly. If not, adjust as needed.
- Glue runners – Run a thin bead of wood glue along the edges of each runner component where it meets the wood. Let dry completely.
- Test operation – Once the glue dries, test sliding the drawer in and out. It should operate smoothly if aligned and installed properly.
- Adjust if needed – If the drawer doesn’t operate smoothly, check for any rubbing or catching. You may need to tweak the alignment or sand or plane down problem spots.
- Clean up adhesive – Carefully scrape away any excess dried wood glue with a putty knife. Wipe the drawer and cabinet with a damp rag.
Troubleshooting Problems
Here are some common issues and solutions for replacing wooden drawer runners:
| Problem | Potential Cause | Solution |
|---|---|---|
| Drawer gets stuck or won’t open fully | Runners too long | Cut runners shorter as needed |
| Misalignment | Adjust runner positions to improve alignment | |
| Rubbing against cabinet interior | Sand or plane problem areas for clearance | |
| Excessive wobbling | Mounting screws loose | Tighten screws firmly |
| Cabinet/drawer warped | Shim behind runners to compensate | |
| Squeaking or rattling | Needs lubrication | Apply dry lubricant like wax or graphite |
| Debris in runners | Clean inside runners | |
| Drawer doesn’t slide smoothly | Improper alignment | Align runners properly perpendicular to drawer edges |
Conclusion
With some basic DIY skills and tools, replacing worn-out wooden drawer runners is usually a straightforward, cost-effective fix that can restore functionality and prolong the life of your furniture. Focus on getting accurate measurements, proper alignment, secure mounting, and smooth sliding action. Refer to your new hardware’s instructions as well for specific guidance. And don’t be afraid to get help from a second pair of hands! Investing a little time and effort into this project pays off in enhanced ease of use and aesthetics.