Page Contents
- 1 Why replace the outside dryer vent?
- 2 How to replace an outside dryer vent flap
- 2.1 Materials needed:
- 2.2 Step 1: Disconnect electrical power to the dryer
- 2.3 Step 2: Detach the dryer vent from the wall
- 2.4 Step 3: Remove the old dryer vent flap
- 2.5 Step 4: Clean lint and debris from the vent opening
- 2.6 Step 5: Install the new dryer vent flap
- 2.7 Step 6: Reattach the vent to the exterior wall
- 2.8 Step 7: Restore power and test operation
- 3 Conclusion
- 4 Frequently Asked Questions
- 5 Key Takeaways
Why replace the outside dryer vent?
The outside dryer vent, also called the dryer exhaust vent, is a critical part of your dryer system. It allows hot, moist air to exit your home after drying loads of laundry. Over time, the vent can become blocked with lint buildup or damaged, preventing proper air circulation. Replacing a damaged outside dryer vent flap helps ensure that your dryer exhaust system functions safely and efficiently.
Some signs that your outdoor dryer vent needs replacing include:
- Lint is visible around the outside vent
- The flap no longer opens properly
- The flap is damaged or missing
- Drying cycles take longer than normal
- Clothes are not fully dried at the end of a cycle
- You notice a musty smell from your dryer
If your outdoor dryer vent shows any of these warning signs, replacing the vent flap is recommended.
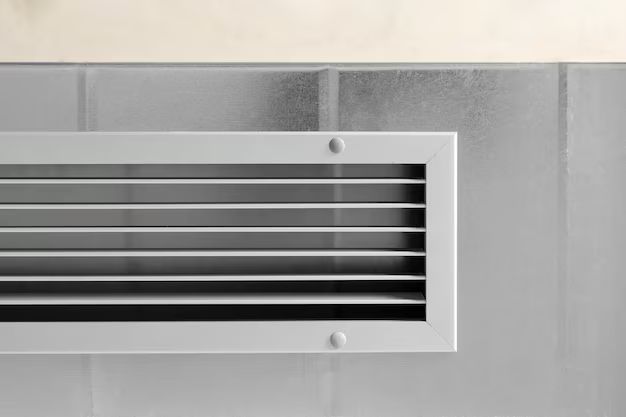
How to replace an outside dryer vent flap
Replacing an exterior dryer vent flap is a straightforward DIY project for most homeowners. Here are the step-by-step instructions:
Materials needed:
- Replacement dryer vent flap kit (available at home improvement stores)
- Screwdriver
- Work gloves
- Safety goggles
- Vacuum cleaner with hose attachment
Step 1: Disconnect electrical power to the dryer
Before starting any repairs, always disconnect the electrical power supply to your dryer. Locate the circuit breaker or fuse box and turn off the breaker/remove the fuse for the dryer circuit. This helps prevent electric shock while working.
Step 2: Detach the dryer vent from the wall
Go outside to where your dryer vent exits the home. Look for screws or other fasteners holding the vent to the exterior wall. Carefully detach the vent from the wall using a screwdriver. Be careful not to damage the vent duct inside the wall.
Step 3: Remove the old dryer vent flap
Examine how the current flap is held in place. There may be screws, pressure fits, or other fastening methods. Remove the damaged vent flap so you can install the new one. Wear gloves to protect your hands from sharp edges.
Step 4: Clean lint and debris from the vent opening
Use the vacuum cleaner hose to thoroughly clean out any accumulated lint or debris inside the vent opening. Blockages can hinder airflow, so it’s important to clean the vent duct at this stage.
Step 5: Install the new dryer vent flap
The replacement kit will include instructions for proper installation. Most vents use a flap that slides or snaps into place over the vent opening. Make sure it is oriented correctly to swing outward when the dryer is running. Secure any screws or fasteners according to the manufacturer’s directions.
Step 6: Reattach the vent to the exterior wall
Position the dryer vent back over the opening and reattach it securely to the outside wall with the original fasteners. Double check that all connections are tight.
Step 7: Restore power and test operation
With the new vent flap installed, restore electrical power to the dryer. Run a test cycle and inspect the vent from outside. Verify that the new flap opens properly and closes shut when the dryer is not operating.
If the flap appears stuck or ventilation seems weak, adjust the flap position or connections until proper function is achieved.
Conclusion
Replacing a damaged exterior dryer vent flap helps optimize clothes drying and prevents issues like mold, mildew, and moisture damage in a home. Always use replacement parts that match your specific dryer model. Periodically inspect the outdoor vent flap and clean the ducts to maintain free airflow. With proper dryer venting, clothes and linens will dry faster and your appliance will run safely for years to come. Consult a professional if you have any doubts or issues replacing your dryer vent flap.
Frequently Asked Questions
What are outside dryer vents made of?
Most exterior dryer vents are constructed from vinyl, aluminum, or galvanized steel. These materials resist corrosion and the high temperatures of dryer exhaust. Plastic flaps may become brittle and crack over time.
Where should the dryer vent be located outside?
Ideally, the dryer vent should be on a wall directly behind the machine and as short as possible. This minimizes lint buildup and venting issues. Keep the vent at least 12 inches above the ground and make sure it is not blocked by landscaping, snow, etc.
How do I know if my outside dryer vent is clogged?
Warning signs of a clogged external dryer vent include clothes taking longer than normal to dry, feeling hot or damp at the end of a cycle, lint accumulating around the outside vent, and a musty smell from your dryer. Annual cleaning helps prevent blockages.
Can I replace the flap myself or do I need a professional?
In most cases, a homeowner can replace an exterior dryer vent flap themselves following the manufacturer’s instructions. Use extreme caution when working with the electrical connections. Call a technician if you have any concerns about safely completing the repair.
Should the flap open to the outside or inside of the house?
The vent flap should swing open to the outside of the house. This allows moist exhaust air to exit your home unobstructed. Make sure to orient and test the flap before reattaching the ducting.
Key Takeaways
- Replace an exterior dryer vent if it appears damaged, clogged, or prevents proper air circulation.
- Turn off electrical power to the dryer before starting the repair project.
- Thoroughly clean lint and debris from the vent duct while replacing the flap.
- Carefully install the new flap so it swings outward when the dryer runs.
- Inspect the vent flap periodically to ensure it still functions correctly.
Replacing an old, damaged outside dryer vent flap improves dryer performance and home safety. With the proper materials and safety precautions, it can be a straightforward DIY repair. Make sure to orient the new flap properly so moist exhaust air exits the home.