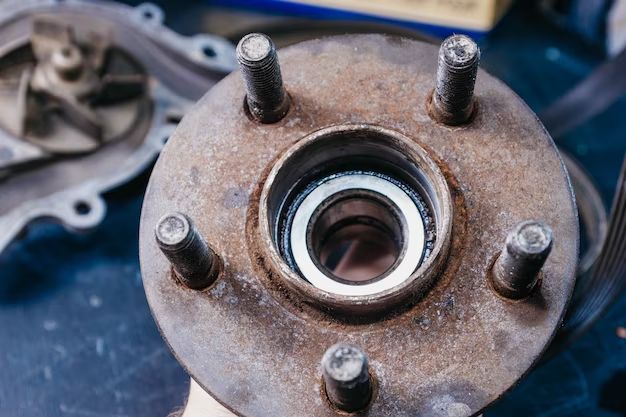
Replacing wheel hub studs can seem daunting, but with the right tools and patience, it can be done at home. Here is a step-by-step guide on how to replace wheel hub studs safely and properly.
Page Contents
- 1 What You’ll Need
- 2 Safety First
- 3 Step 1: Loosen Lug Nuts
- 4 Step 2: Remove Tire/Wheel
- 5 Step 3: Remove Brake Caliper
- 6 Step 4: Remove Dust Cap
- 7 Step 5: Remove Axle Nut
- 8 Step 6: Remove Hub Assembly
- 9 Step 7: Remove Studs
- 10 Step 8: Install New Studs
- 11 Step 9: Reinstall Hub
- 12 Step 10: Reinstall Components
- 13 Step 11: Torque Lug Nuts
- 14 Step 12: Road Test
- 15 Conclusion
What You’ll Need
- Jack and jack stands
- Lug wrench
- Hammer
- Wheel hub stud remover
- Replacement wheel hub studs
- Threadlocker
- Torque wrench
Safety First
When working under a vehicle, safety should always come first. Here are some safety tips:
- Use jack stands – don’t rely solely on a jack to support the vehicle
- Chock the wheels – this prevents accidental rolling
- Wear safety glasses
- Avoid loose clothing that could get caught
- Work in a well-ventilated area
Step 1: Loosen Lug Nuts
With the vehicle safely lifted and supported on jack stands, loosen the lug nuts securing the wheel. Loosen the nuts in a star pattern, but do not fully remove them yet.
Step 2: Remove Tire/Wheel
With the lug nuts loosened, you can now fully remove them by hand. Take the tire/wheel off the vehicle and set it aside.
Step 3: Remove Brake Caliper
To access the wheel hub assembly, you’ll need to remove the brake caliper. This usually requires unbolting it from the mount and suspending it out of the way using zip ties or wire. Refer to your vehicle’s service manual for specifics.
Step 4: Remove Dust Cap
Locate and remove the dust cap from the wheel hub to expose the axle shaft nut.
Step 5: Remove Axle Nut
Using the proper size socket, remove the axle shaft nut. You may need to hold or lock the rotor in place to prevent the wheel hub from turning.
Step 6: Remove Hub Assembly
Slide the wheel hub assembly off the axle shaft. On some vehicles, you may need to strike the backside of the assembly with a hammer to dislodge it.
Step 7: Remove Studs
With the hub assembly removed, you can now use a wheel hub stud remover to extract the old, damaged studs. Apply penetrating oil if they are seized and be patient.
Step 8: Install New Studs
Press the new replacement wheel hub studs into the hub assembly by hand or use a hammer if needed. Make sure they are fully seated.
Step 9: Reinstall Hub
Slide the wheel hub assembly back onto the axle shaft. Replace the axle nut and torque it to spec using a torque wrench.
Step 10: Reinstall Components
Replace the brake dust cap, caliper, tire/wheel, and hand tighten the lug nuts.
Step 11: Torque Lug Nuts
With the vehicle on the ground, use a torque wrench to tighten the lug nuts to the vehicle manufacturer’s spec in a star pattern.
Step 12: Road Test
Drive the vehicle for a short distance to ensure proper operation. Re-torque the lug nuts after 25-50 miles.
Conclusion
Replacing wheel hub studs requires time, patience, and the right tools. But with this step-by-step guide, you can save money by doing it yourself. The most important steps are pressing the new studs in fully, torquing the axle nut properly, and using a star pattern to tighten the lug nuts. Take your time and refer to your vehicle’s service manual as needed. Driving safely requires properly torqued and secured lug nuts on good wheel hub studs.
