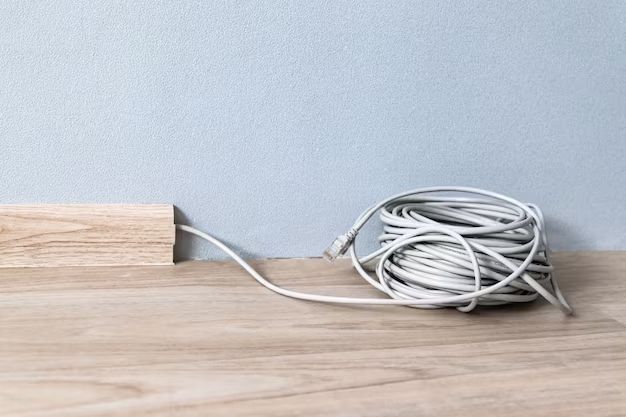
Running cables along baseboards is a great way to keep wires organized and out of sight. Here are some tips on how to properly run cables along your baseboards.
Page Contents
What You’ll Need
Before starting any wiring project, you’ll want to make sure you have the right supplies. Here’s what you’ll need to run cables along baseboards:
- Cables – Ethernet, HDMI, speaker wire, etc. Make sure you have enough length to run the full distance.
- Cable raceway/concealer – Plastic channels to contain and hide wires. Available in different sizes.
- Cable clips – To affix raceway to baseboard. Get clips designed for baseboard installation.
- Cable staples – To tack cable to wall/studs in discreet areas.
- Low voltage brackets – For mounting TVs and speakers away from wall.
- Drywall screws
- Stud finder
- Drill/screwdriver
- Wire strippers
Pick Your Route
Before starting the installation, map out the path you want the cables to follow along the baseboards. Here are some tips for mapping your route:
- Follow baseboard as closely as possible, even around corners
- Avoid doors and openings where cable may be damaged
- Note location of studs where you’ll secure cables
- Mark locations for wall-mounted devices
- Minimize instances where cable crosses open floor
Also consider how the cables will connect to their power sources, TVs, computers, etc. Allow enough length for a clean installation.
Install Cable Raceway
With your route mapped, it’s time to install the cable raceway. Raceway housing gives a clean, finished look while protecting your cables. Here are some raceway installation tips:
- Cut raceway to appropriate lengths using a hacksaw or heavy duty scissors.
- Use interior grommets at any junction point to protect cables from abrasion.
- Affix raceway to wall an inch or two above baseboard using cable clips designed for baseboard installation. The clips slide under the raceway and screw into the wall.
- Place clips 12-16 inches apart and also at the beginning and end of each raceway segment.
- Use 45-degree raceway fittings at any corner to maintain a smooth bend radius for cables.
- For discreet areas, raceway can be attached directly to wall or baseboard with adhesives or double-sided tape.
Take care to keep gaps and seams between raceway pieces as tight as possible for a seamless aesthetic.
Run and Secure Cables
With the raceway installed, it’s time to run the cables through the path you laid out.
- Feed cables through carefully to avoid damage, keeping them as straight as possible.
- Do not staple cables intended for raceway installation.
- Place cables evenly within raceway, keeping low voltage wires separated from power when able.
- Secure cables by mounting low voltage brackets to studs. Keep cable slack to allow wall-mounted devices to be pulled away from wall.
- Use cable staples to tack cable against baseboard discreetly only where necessary. Avoid puncturing or crimping cables.
- Group multiple cables together with zip ties or electrical tape for easier handling.
- Label both ends of each cable to keep organized.
Taking extra care when running cables ensures everything will connect properly and allows for easy troubleshooting later on.
Connect Devices
With all the cables run cleanly along the baseboard, it’s time to hook things up.
- Cut cables to appropriate length, leaving some extra slack.
- Use wall plates or panels to cleanly transition cables from raceway to devices.
- Connect cables to devices like TVs, receivers, computers, speakers etc. Consult device manuals if unsure.
- Bundle up and secure any excess cable slack with zip ties or clips.
- Confirm devices are getting signal and functioning properly.
- Install cable concealer along any remaining exposed cables for a streamlined finish.
Taking the extra time to properly connect cables at both ends gives your system the best chance of smooth operation.
Tips and Tricks
Follow these tips and tricks for the most professional looking and functional baseboard wired installation:
- Purchase cables in a variety of lengths to have flexibility in cutting to custom sizes.
- Use cable with in-line male connectors when possible for easiest installation.
- Leave an extra 1-2 ft of cable at power sources in case devices need to be relocated.
- Label cables at 5-6 foot intervals for easy identification along the entire run.
- Use grommets when running cables through holes to avoid shearing.
- Keep low voltage cables separated from power cables to avoid interference.
- Periodically open raceway to inspect cables for damage during initial installation.
- Take pictures before and throughout installation to remember cable routing.
Properly running cables along baseboards takes planning and attention to detail. Following these tips will help your installation go smoothly and provide a functional, organized system.
Common Mistakes
It’s easy to make mistakes when installing cables along baseboards. Be mindful of these common pitfalls:
- Not buying enough cable resulting in a piecemeal, disjointed installation.
- Securing cables too tightly leading to cracked insulation and signal issues.
- Making bends in cables tighter than allowed bend radius.
- Not affixing cables properly leading to loose wires getting damaged.
- Running cable across doorways or walks ways where they can be snagged.
- Running power and low voltage cables too close together.
- Not using grommets when passing cables through metal studs or drilled holes.
- Leaving too much bare cable when connecting to devices leading to shorts.
Avoiding these common mistakes takes planning and patience. Rushing through installation often leads to sloppy, unsafe work that requires re-doing.
Conclusion
Running cables professionally along your baseboards takes some forethought and effort. But the clean look and organized setup is well worth it. By using cable raceway, properly securing cables, and paying attention to detail, you can create a baseboard wired system to be proud of. Just be sure to take your time and adhere to best practices. Your patience will pay off with a seamless, functional installation that will look great and work reliably for years to come.