Running electrical conduit inside walls is a common task for many DIYers and electricians. Properly running conduit allows you to safely and neatly run wiring through your home’s walls and provides a robust system for future electrical projects. There are some key steps to follow when running conduit inside walls to ensure it is done correctly.
Page Contents
- 1 What tools do you need to run conduit inside walls?
- 2 What type of conduit should you use?
- 3 How do you determine conduit size?
- 4 Should you use compression vs. set-screw connectors?
- 5 How do you run conduit through studs?
- 6 How do you run conduit through concrete or block?
- 7 What is the proper conduit bending technique?
- 8 How many bends are allowed per conduit run?
- 9 How do you ream and deburr conduit ends?
- 10 What are the best practices for conduit connections?
- 11 How do you pull wires through installed conduit?
- 12 What mistakes should you avoid when installing conduit?
- 13 Conclusion
What tools do you need to run conduit inside walls?
Having the right tools for the job will make running conduit much easier. Here are some of the basic tools you will need:
- Hammer drill and masonry drill bits – To drill holes through studs or concrete/masonry walls
- Fish tape – To pull wires through conduit
- Hacksaw – To cut conduit and EMT bends
- EMT bender – To make crisp 90° bend in conduit
- Conduit cutting pliers – Cleanly cut conduit
- Screwdrivers
- Stud finder – Locate studs to drill through
- Safety glasses and gloves
What type of conduit should you use?
Choosing the right type of conduit for your application is important:
| Conduit Type | Characteristics | Uses |
|---|---|---|
| EMT (Electrical metallic tubing) | Thin wall steel, available in 10′ lengths, cheap | Indoor, dry locations |
| Rigid metal conduit | Thick steel walls, threaded connections | Outdoor or indoor wet areas |
| Flexible metal conduit | Interlocking steel construction, flexible | Connecting motors or appliances |
| PVC | Plastic conduit, non-conductive | Outdoor direct burial |
For most indoor, dry locations, EMT is the recommended choice for conduit inside walls.
How do you determine conduit size?
Choosing the proper size conduit for your electrical wires is key. Conduit is sized by its inside diameter and commonly comes in 1/2″, 3/4″, 1″, 1-1/4″ sizes. Use this general guideline for sizing:
- 1/2″ – For up to 6 wires
- 3/4″ – Up to 30 wires
- 1″ – Up to 60 wires
- 1-1/4″ – Up to 100 wires
Calculate your total wire fill and choose conduit that allows some extra room for expansion. Oversized conduit is better than conduit that is too small.
Should you use compression vs. set-screw connectors?
You have two main options for joining lengths of EMT conduit:
- Compression connectors – A metal sleeve is compressed with a special tool to join conduit ends. Provides excellent mechanical strength.
- Set-screw connectors – A metal fitting is attached to each conduit end and screwed together. Lower cost option.
In general, compression connectors are preferred for reliable, vibration-resistant connections. However, set-screws can also provide solid connections if installed correctly. Use set-screws for accessible junction box connections.
How do you run conduit through studs?
When running conduit through wood or metal studs:
- Locate the studs using a stud finder and mark opening locations
- Use a hammer drill with an appropriate size masonry bit for the stud material
- Drill holes through each stud, ideally centered vertically
- Vacuum debris from holes after drilling
- Run a pull string through each hole to use later for pulling wires
Size holes 1/2″ to 5/8″ larger than the conduit outer diameter. Avoid notching out studs which will weaken them.
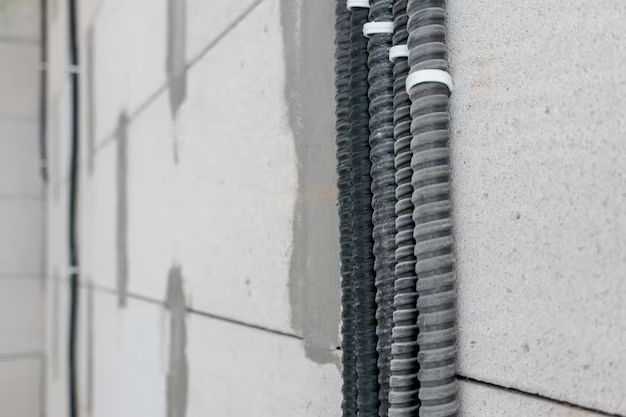
How do you run conduit through concrete or block?
Running conduit horizontally through concrete or concrete block walls requires similar steps:
- Mark opening location on wall surface
- Use hammer drill to drill holes slightly larger than conduit
- Insert conduit with wire pull string into holes
- Pack concrete backfill around conduit for support
For large conduit sizes, you may need to chip out some concrete between holes with a chisel and smooth openings.
What is the proper conduit bending technique?
Bends in conduit provide wire pull access and flexibility in routing. Here are some tips:
- Use bend supports to avoid kinking or collapsing conduit.
- Make rounded bends, not sharp 90° angles.
- Avoid bends sharper than 90°.
- Insert fish tape before bending.
- Use a conduit bender to make uniform, consistent bends.
- Conduit bending takes practice – start with scrap material.
How many bends are allowed per conduit run?
The National Electrical Code limits the number of bends per conduit run to:
| Conduit Size | Total Bends Allowed |
|---|---|
| 1/2″ to 1-1/4″ | 360 degrees total (e.g. 4 x 90° bends) |
| 1-1/2″ to 4″ | 270 degrees total |
This limit prevents excessive friction while pulling wires. Plan your conduit layout to work within the bend limitations.
How do you ream and deburr conduit ends?
Proper conduit preparation is critical for smooth wire pulling. Always ream and deburr the ends of conduit before installing:
- Ream inside of conduit with a reaming tool to remove rough edges
- Reaming also rounds out conduit ends for smoother wire insertion
- Deburr outside of conduit end with a file or deburring tool
- Remove any small metal shards that can cut wires
Well-reamed and deburred conduit ends prevent wire insulation from getting cut or scraped during pulls.
What are the best practices for conduit connections?
Follow these guidelines when installing conduit connections:
- Use permitted, listed conduit fittings
- Tighten connections securely
- Use junction boxes to split conduit runs
- Seal connections from moisture if present
- Allow slight expansion/contraction movement
- Clamp conduit securely if used as physical support
Proper conduit connections will prevent separation or moisture ingress and provide reliable service.
How do you pull wires through installed conduit?
When running wires through conduit:
- Select proper wire size for circuit current and voltage drop
- Choose wire insulation type for environment
- Pull wires with a fish tape or vacuum system
- Apply wire pulling lubricant to reduce friction
- Follow bend radius limits for wire type
- Limit maximum wire fill per NEC (National Electrical Code)
Take care when pulling wires to avoid damage to the insulation or wire breakage.
What mistakes should you avoid when installing conduit?
Some common mistakes to avoid with conduit installation include:
- Bending conduit beyond permissible angles
- Having too many bends in a run
- Using under-sized conduit
- Rough conduit ends that damage wires
- Not securing conduit adequately
- Outdoor installations without weatherproofing
Properly planning your conduit sizing, layout and preparation will help avoid these issues.
Conclusion
Installing conduit inside walls takes planning and attention to detail, but is a manageable task for a DIYer. Following the code requirements and sound practices outlined here will ensure safe, reliable conduit installation. Key steps include proper conduit sizing, smooth bends and connections, drill hole preparation, and wire pull lubrication. Taking the time to do it right will provide robust conduit raceways for running wiring inside any home’s walls.