Installing an outdoor shower can be a great way to rinse off after spending time in the pool or yard during the warm summer months. However, running hot and cold water to an outdoor shower requires some planning and work. In this article, we will walk through the steps needed to supply an outdoor shower with both hot and cold running water.
Page Contents
- 1 Things to Consider Before Installing an Outdoor Shower
- 2 Running Cold Water to an Outdoor Shower
- 3 Running Hot and Cold Water Lines
- 4 Choosing the Right Plumbing Parts
- 5 Installing Shower Fixtures and Drainage
- 6 Insulating Hot Water Pipes
- 7 Safety Tips
- 8 Maintenance
- 9 Costs
- 10 Hiring a Professional
- 11 Conclusion
Things to Consider Before Installing an Outdoor Shower
There are a few key factors to think through before installing an outdoor shower:
- Location – Pick a spot that is convenient to access but still private. You’ll need it to be near an exterior wall of the house where you can tap into the indoor plumbing.
- Water lines – Determine if you want just cold water or both hot and cold. Pulling hot water lines takes more work.
- Drainage – You’ll need proper drainage so water doesn’t pool under the shower. Ideally there should be a slope or drain nearby.
- Materials – Outdoor showers are often made of materials like wood, tile, stone, or metal that can withstand the elements.
- Permits – Check if you need any permits for plumbing or construction before installing the shower.
Once you’ve considered these factors, you can start planning the specifics of how to pipe in water lines and drain the shower.
Running Cold Water to an Outdoor Shower
The easiest option for an outdoor shower is to supply it with only cold water. This avoids the complexity of running hot water lines. Follow these steps:
- Locate the closest accessible cold water pipe in your home’s plumbing system. Often an outdoor spigot or laundry room will have suitable access.
- Shut off the water and drain the lines. Turn the water back on briefly to relieve pressure before turning it off again.
- Cut into the wall surface to access the plumbing. Cut the cold water pipe and install a T-joint fitting.
- Install new piping from the T-joint, running it under the house’s subfloor or foundation and out to the shower location.
- Add an isolation valve near the shower to allow shutting off the water when not in use.
- Connect the end of the piping to the plumbing inlet on the shower fixture.
With proper parts and tools, an experienced DIYer can tap into existing plumbing and run a new cold water line to an outdoor shower in approximately half a day’s work.
Running Hot and Cold Water Lines
While more complex, it is possible to have both hot and cold water piped to an outdoor shower. Here are the basic steps involved:
- Locate a suitable hot water source. The water heater or a nearby hot water line is ideal.
- As with the cold line, cut into the wall and install a T-joint to tap into the hot water pipes.
- Run piping from both hot and cold supply lines under the subfloor to the shower area.
- Use pipes suitable for hot water such as copper or CPVC for the hot water line.
- Insulate the hot water line to minimize heat loss over its length.
- Install isolation valves for both hot and cold lines at the shower.
- Connect the pipes to the shower fixture.
Getting hot water to an outdoor shower is more challenging. Long pipe runs will lose heat, so try to find the shortest route possible from the water heater. Proper insulation is also key.
Choosing the Right Plumbing Parts
Having the right plumbing parts on hand will make installing water lines for the outdoor shower much easier. Here are some of the key parts needed:
- Pipe – Use copper, CPVC, or galvanized steel. Choose the right material for hot vs. cold lines.
- Fittings – T-joints, elbows, couplings, and other fittings to connect pipe sections.
- Valves – Isolation valves to control water flow to the shower.
- Pipe insulation – Insulate hot water lines using foam or fiberglass wrap.
- Strapping – Secure pipes with metal or plastic strapping.
- Pipe cement & primer – For joining and sealing CPVC, PVC, or ABS pipe joints.
- Teflon tape – Used to seal threaded pipe connections.
Having these supplies on hand will make the installation much smoother and prevent delays if additional parts are needed.
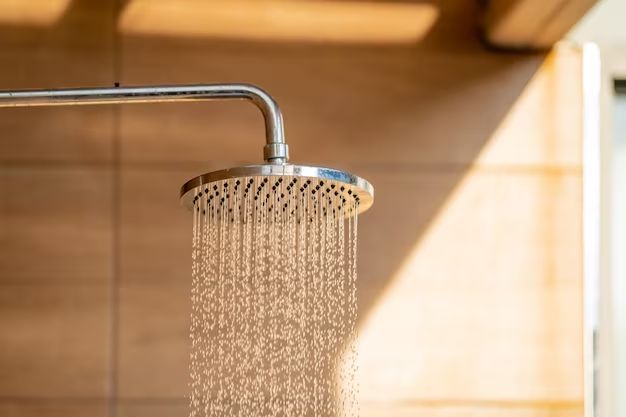
Installing Shower Fixtures and Drainage
Once the water lines are in place, the next key steps are installing the shower head, handles, and drainage:
- Mount the shower fixtures according to the manufacturer instructions.
- Connect the hot and cold lines to the appropriate fittings.
- Install a backflow preventer device on the shower water supply.
- For drainage, install a standard shower drain and route to the nearest sewer line.
- Alternatively, drainage can flow to a drywell or gravel trench.
- Test the shower for leaks and proper hot/cold water flow.
The shower fixture style and configuration is up to you. Choose a simple shower head or go for a more deluxe multi-head shower. Just be sure everything is securely installed and rated for outdoor use.
Insulating Hot Water Pipes
One of the challenges when running hot water to an outdoor shower is heat loss. As hot water travels through pipes over distance, it loses heat. Here are some tips for insulating hot water supply lines:
- Use only hot water rated pipe like copper or CPVC, not PEX or PVC.
- Wrap pipes with foam pipe insulation sleeves. Secure with tape.
- For cold climates, consider heating tape along pipes to further prevent heat loss.
- Insulate all fittings, elbows, T-joints, and valves – not just straight pipe runs.
- Make sure insulation is watertight with vapor barrier tape at seams.
- Insulate pipe runs under the ground for frost protection.
Proper insulation will keep the hot water hot, even over long distances. This allows you to place the shower further from the hot water source.
Safety Tips
When installing plumbing and an outdoor shower, keep these safety tips in mind:
- Turn water supply off and relieve pressure before doing any work.
- Wear safety glasses and other protective equipment when cutting pipe or soldering.
- Use care when operating a torch for copper soldering.
- Have a fire extinguisher and first aid kit available.
- Follow local building codes for any required permits or inspections.
- Hire a professional if you lack plumbing experience.
Rushing through the job or taking shortcuts can lead to leaks, property damage, or even injury. Focus on doing the job right the first time.
Maintenance
An outdoor shower requires some periodic maintenance to keep everything working properly. Be sure to:
- Inspect pipes and connections for leaks.
- Check insulation and patch areas as needed.
- Drain pipes before winter if shutting shower down in cold climates.
- Clean shower head and check for mineral deposits which can clog it.
- Seal any cracks around the shower floor or walls.
- Keep debris clear from any drains.
Taking care of minor maintenance as needed will extend the life of your outdoor shower.
Costs
What’s the typical cost to run plumbing for an outdoor shower? Here are some rough estimates:
- Basic cold water line – $200 to $500 for a short run
- Hot and cold water lines – $500 to $1,500 depending on complexity
- Shower enclosure / fixtures – Budget $500 to $2,000+ depending on materials and features
- Drainage – Around $100 to $500 unless sewer line needs to be extended
- Permits – $0 to $200 depending on complexity and location
In total, expect to spend $1,000 to $3,000+ for a nicely equipped outdoor shower with hot and cold water feeds. Going with just a simple cold water shower can cost half as much.
Hiring a Professional
While an ambitious DIYer can tackle installing an outdoor shower, for many a professional is worth the cost. Reasons to hire a pro include:
- An expert can properly size pipes and design the system.
- They have the right tools and parts on hand.
- Work is completed faster with less risk of leaks.
- Knowledge of codes and permit requirements.
- Outdoor plumbing often ties into indoor systems, so experienced plumbers are helpful.
To find a qualified plumbing pro, get recommendations from friends or check ratings on sites like HomeAdvisor. Be sure to get an itemized quote for parts and labor.
Conclusion
Installing hot and cold water lines to supply an outdoor shower is a big project but can add great enjoyment and convenience during warm months. The key steps include tapping into existing plumbing, running new supply lines under the house, insulating hot water pipes, installing shower fixtures, and handling drainage. While requiring some plumbing skills, the job can be tackled by an ambitious DIYer. However, for more complex setups or if you lack experience, hiring a professional plumber is advised. With proper planning and preparation, you can soon be enjoying the refreshment an outdoor shower provides.