Sanding with a hand sander is a common task for woodworking and home improvement projects. While power sanders make the job easier, it is possible to get good results sanding by hand. The key steps are choosing the right abrasive paper, proper sanding technique, and taking precautions to control dust.
Page Contents
- 1 What supplies do you need to sand with a hand sander?
- 2 How to choose sandpaper grit for hand sanding
- 3 Proper hand sanding techniques
- 4 Sanding pattern tips
- 5 Consider using a sanding block
- 6 Dust control when hand sanding
- 7 Tips for finishing hand sanding
- 8 Tips for sanding different materials
- 9 Sanding techniques for specific projects
- 10 Common hand sanding mistakes
- 11 Hand sanding vs machine sanding
- 12 Safety tips for hand sanding
- 13 How to hand sand a damaged wood tabletop
- 14 How to hand sand new wood furniture
- 15 Tips for hand sanding wood floors
- 16 Conclusion
What supplies do you need to sand with a hand sander?
The basic supplies needed to sand with a hand sander include:
- Hand sander – Either a simple block sander or more ergonomic contoured grip sander. Look for one with easy paper replacement.
- Sandpaper – Sheets of abrasive paper to fit your sander. Aluminum oxide and silicon carbide are common abrasives. Grits from 80 to 220 are useful.
- Respirator – A basic N95 dust mask or preferably a respirator to control dust inhalation.
- Hearing protection – Sanding can be noisy, so wear ear plugs or muffs.
- Clamps – To secure the workpiece if sanding needs to be hands-free.
Optional items include a sanding block for small work, knee pads if sanding floors, and eye protection to keep sawdust out of your eyes.
How to choose sandpaper grit for hand sanding
Sandpaper comes in a range of grit sizes from coarse to fine. Higher grit numbers indicate finer abrasives. Some common uses for different grits are:
- 60-80 grit – Aggressive removal for rough wood, old finishes or contours
- 100-120 grit – Smoothing rough sawn surfaces
- 150-180 grit – Smoothing prior to final finish
- 220+ grit – Light smoothing between finish coats
Try to only move up 1-2 grits at a time for the best finish. You’ll need a range of papers for the full sanding process. For final prep before staining or painting, 220 grit or higher is usually ideal.
Proper hand sanding techniques
Here are some tips for effective hand sanding technique:
- Always sand with the grain – Moving your sander in the same direction as the wood grain helps avoid scratches.
- Use consistent pressure – Pressing too hard can cause uneven surfaces or indentations.
- Keep the sander moving – Don’t stay in one place too long to avoid sanding depressions.
- Maintain a flat sanding surface – Twist or tilt can gouge the wood.
- Overlap sanding strokes – Each pass should overlap slightly to ensure even sanding.
- Clean the surface – Brush away sawdust between grit changes to reveal any uneven areas.
- Consider ergonomics – Reduce strain using a contoured grip sander or work at waist height.
Be methodical and take your time to get a smooth finish. Rushing can lead to mistakes that require going back a grit to fix.
Sanding pattern tips
The exact sanding pattern isn’t crucial, but using an efficient path can get the job done faster. Here are patterns to try:
- Linear – Up and down or side to side strokes over the full surface.
- Circular – Move across the surface in overlapping circles.
- Figure 8 – Trace figure 8s so the grit flexes in different directions.
- Diagonal – Follow crisscross 45 degree strokes rotating around the piece.
If you notice swirling from sanding in one direction, switch to a different pattern. The randomness will help remove the swirl marks.
Consider using a sanding block
For sanding small workpieces, wrap sandpaper around a hand-sized block of wood, hard rubber or plastic. This supports the paper and gives you a larger grip surface. Sanding blocks allow control and precision for detail work.
Dust control when hand sanding
Sanding produces large amounts of fine dust. This dust is hazardous to inhale due to the particles penetrating deep into the lungs. Use the following precautions when sanding:
- Ventilate the area – Work outside or open windows and use a fan to blow dust away.
- Wear a respirator – A proper N95 or N100 respirator protects much better than a simple dust mask.
- Use dust collection – Attach a vacuum with HEPA filter to collect dust at the sander.
- Clean up thoroughly – Don’t allow dust layers to build up on all surfaces in the workspace.
- Consider wet sanding – Water reduces airborne dust but raises the grain on raw wood.
Tips for finishing hand sanding
It takes extra care to prepare a surface for finishing:
- Finish sanding with the grain using 220+ grit paper.
- Wipe surface with tack cloth to pick up any remaining dust.
- Avoid handling the surface barehanded to prevent oil transfer.
- Consider “raising the grain” before final sanding using a damp rag.
- Allow sufficient drying time before applying stains or finishes.
- Seal the wood after sanding to prevent blurring of water-based finishes.
A thorough final sanding leaves the surface smooth, uniform and ready for an attractive finish.
Tips for sanding different materials
Sanding technique varies slightly by the workpiece material:
Wood
- Sand with the grain direction – Avoid cross-grain scratches.
- Start coarse and work up through the grits.
- Consider an orbital sander for flat surfaces.
- Hand sanding works well for moldings and contours.
Metal
- Use aluminum oxide or silicon carbide paper specific for metal.
- Lubricate the surface with WD-40 or soapy water to avoid loading up the paper.
- Sand in crisscrossing directions to remove scratches.
- Finish sand very fine grit paper to achieve a polished surface.
Concrete
- Use open-coat sandpaper made for concrete.
- Avoid standard sandpaper that clogs quickly.
- Wet the surface to control concrete dust.
- Begin with 60 grit to remove significant material.
- Finish grit depends on the desired texture.
Sanding techniques for specific projects
Hand sanding plays a key role in achieving high quality results for many woodworking and renovation projects:
Furniture
- Sand with the wood grain using a sanding block on small surfaces.
- Ease edges by hand sanding up to 320 grit.
- Smooth curves and rounded components by hand.
- Sand raised grain after staining and before finishing clear coats.
Cabinets
- Use a pad sander for flat panels and orbital sander for frames.
- Carefully hand sand to maintain edges and profiles.
- Don’t round over sharp edges unless required.
- Finish sand faces up to 220 grit prior to finishing.
Trimwork
- Pre-sand moldings before installation for best results.
- Use a profiled sanding block that matches the trim shape.
- Maintain the correct profile by sanding lightly.
- Finish sand with 220 grit paper to avoid visible scratches.
Drywall
- Fill joints, then sand smooth using broad drywall sanding blocks.
- Pole sanders allow sanding ceilings from the floor.
- Use fine grit papers and sand finish coats minimally.
- Avoid rounding corner beads – sand them carefully by hand.
Wood floors
- An orbital floor sander covers large areas efficiently.
- Use palm or detail orbital sanders along edges and wall lines.
- Hand scrapers remove old finish layers effectively.
- Pole sanders extend your reach for sanding ceilings and walls.
Common hand sanding mistakes
It’s easy to make mistakes hand sanding that impair the finish quality. Here are some common errors to avoid:
- Not sanding with the grain – Cross grain scratches won’t come out.
- Skipping grits when progressing – Creates deep scratches from overly coarse paper.
- Using worn sandpaper – Dulls quickly and causes wiping rather than cutting.
- Applying too much pressure – Can damage softer woods and leave indentations.
- Not cleaning between grit changes – Leads to swirls and uneven sanding.
- Sanding across joints – Potential for rounding edges or creating visible steps.
- Sanding too much near edges – Rounds over sharp profiles.
- Sanding too lightly over repairs – Doesn’t fully integrate repair with surrounding area.
Be attentive when hand sanding and stop to inspect your progress frequently. This helps avoid these common mistakes that result in a poor finish.
Hand sanding vs machine sanding
While hand sanding works for many smaller projects, machine sanding is much faster and more efficient for larger surfaces. Here is a comparison of hand and machine sanding:
| Hand Sanding | Machine Sanding |
|---|---|
|
|
Machine sanding excels at preparing large flat surfaces like floors, tables, and cabinet panels. Hand sanding shines for small projects, detail work, and custom sanding irregular objects. Many projects combine both hand and machine sanding for the best outcome.
Safety tips for hand sanding
Follow these safety precautions when hand sanding:
- Wear eye protection – Safety glasses or goggles.
- Use a dust mask – Preferably an N95 respirator mask for fine dust.
- Wear hearing protection – Use ear plugs or muffs when sanding.
- Don’t wear gloves – they can catch in sanders.
- Unplug sanders before changing paper or clearing jams.
- Avoid breathing dust – Work in a ventilated area and control dust.
- Support your work – Use clamps rather than holding the workpiece.
- Maintain your balance – Ensure proper footing when sanding floors.
Stay alert and never rush when operating a sander. Always allow the tool to come to a complete stop before setting it down. Practicing safe habits reduces the risk of a serious injury while sanding.
How to hand sand a damaged wood tabletop
Sanding a wood tabletop refinishes the surface and removes minor damage like scratches, water rings, or dents. Follow these steps:
- Remove any finish – Use paint stripper or sand very coarsely with 60-80 grit to remove old finish layers.
- Repair divots or gouges – Fill with colored wood putty and allow to fully cure.
- Smooth repairs – Sand bumps flush starting with 100-120 grit paper.
- Sand entire surface – Use an orbital sander or hand sand with the grain up to 180 grit.
- Detail sand – Carefully hand sand edges and rounded corners.
- Clean surface – Tack cloth and vacuum to remove every speck of dust.
- Apply finish – Stain if desired and follow with protective clear topcoats.
This process completely refinishes the tabletop surface in order to remove any marks or blemishes. Always maintain the existing shape when sanding by hand.
How to hand sand new wood furniture
Sanding smooths rough sawn surfaces and prepares new wood furniture for finishing. Follow this process:
- Sand with the grain – Start with 80-100 grit moving in the direction of the wood grain.
- Ease edges – Softly round sharp corners and edges by hand with 220 grit.
- Smooth moldings – Use profiled sanding blocks that match any contours.
- Detail sand – Hand sand joints, carvings, turnings and any decoration.
- Remove dust – Wipe and vacuum after each grit to remove sanding residue.
- Finish sand – Go up to 220 grit for a smooth sanded surface.
- Clean thoroughly – Use compressed air and tack cloths before finishing.
Always inspect in good lighting and run your hands over all surfaces to find any areas needing more sanding. Consistent sanding provides the foundation for an attractive finish.
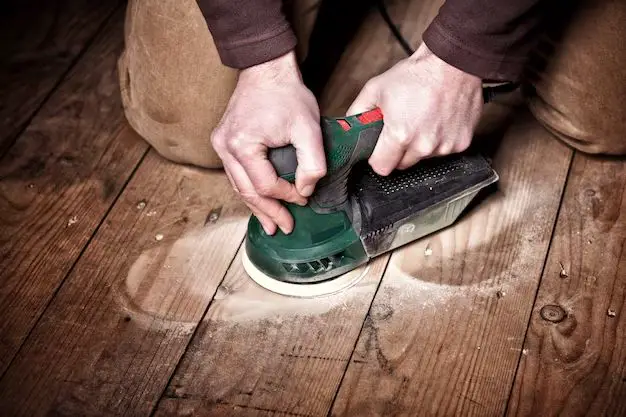
Tips for hand sanding wood floors
While most wood floor sanding uses power sanders, hand sanding has an important role. Hand sand areas that machines can’t reach. Useful tips include:
- Use floor sanding blocks – Sand tight to baseboards and under door jambs.
- Pole sanders – Extend reach to sand walls and ceiling areas.
- Pad sanders – Quickly smooth edges along floors and stairs.
- Scrapers – Remove old finish in detailed areas before sanding.
- Vacuum as you work – Continually remove dust to see any missed spots.
- Follow machine sanding – Hand sand in same direction as floor machines.
- Finish with fine grit – Hand sand final coats up to 220 grit.
Focus hand sanding on areas the floor sander can’t access. Blend these areas to create an evenly sanded floor ready for new finish.
Conclusion
While hand sanding requires more physical effort than machine sanding, it remains an essential part of countless woodworking and finishing projects. By choosing appropriate grit sandpaper, maintaining proper sanding technique, and taking safety precautions, quality hand sanding results can be achieved. Keep in mind the differences when sanding various materials and the unique requirements of specific project types. Avoid common mistakes like sanding across the grain or rounding edges. Hand sanding well provides a smooth surface ready for a beautiful finish.