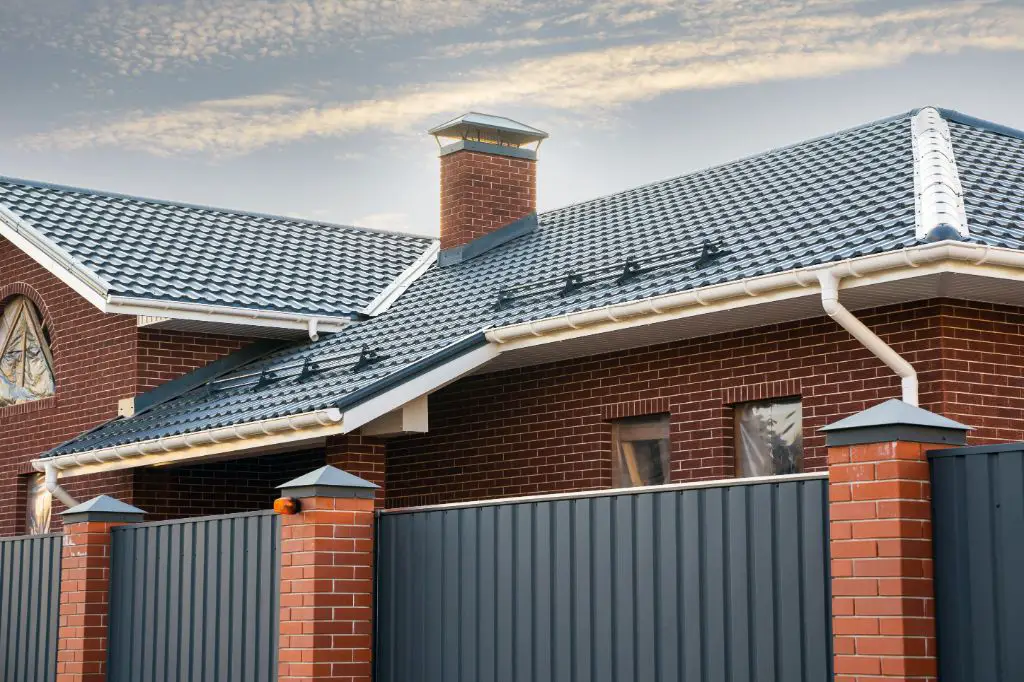
Sealing a metal roof around a chimney is important to prevent leaks and ensure your chimney and roof remain in good condition. There are several key steps involved in properly sealing a metal roof around a chimney.
Page Contents
- 1 Assess the Chimney Area
- 2 Prepare the Area
- 3 Caulk the Seams
- 4 Install Step Flashing
- 5 Apply Protective Sealant
- 6 Inspect and Maintain the Seal
- 7 Frequently Asked Questions
- 8 The Importance of Properly Sealing Your Metal Roof Chimney Area
- 9 Tips for Sealing a Metal Roof Chimney Area
- 10 Step-By-Step Instructions for Proper Chimney Sealing
- 11 Common Mistakes to Avoid
- 12 Conclusion
Assess the Chimney Area
First, you’ll need to assess the chimney area to determine what type of metal roof you have and look for any existing leaks or damage. Examine the chimney flashing which is the metal components built around the chimney. Flashing is designed to help form a water tight seal.
Look for any signs of deterioration such as cracks, open seams, corrosion, or holes. Check the sealant if present around the chimney and see if it is still pliable or if has hardened and cracked. Also check the condition of the metal roof panels around the chimney. If there is any obvious damage, those areas will need to be repaired or replaced.
Prepare the Area
Once you’ve assessed the area, prepare it for sealing. First clean the chimney flashing and roof panels thoroughly with a wire brush to remove any dirt, debris, or old caulk. This will allow the new sealant to properly adhere.
Use a scraper to remove any loose paint, rust, or old sealant. Wipe the area clean using solvents such as denatured alcohol to remove any oily residue. Allow the area to fully dry before applying new sealant.
If there are any damages to the flashing or metal panels, those will need to be repaired. You may need to replace certain sections or install additional flashing components. Use matching metal pieces when making repairs.
Caulk the Seams
With the area prepped, you can begin sealing by caulking the seams. Use a high quality polyurethane roofing sealant that is formulated for metal and made for high movement joints. These types of flexible sealants work well for flashing joints.
Load the sealant into a caulking gun and apply it into any open seams where the chimney and roof panels meet. Push the sealant into the seam until it is filled and then smooth with a putty knife or caulk tool.
Make sure you completely seal all corners and seams around the chimney for optimal water protection. Also run a bead of sealant along the joint where the metal flashing meets the actual brick chimney.
Install Step Flashing
Once major seams are sealed, install step flashing around the chimney. Step flashing provides an overlapping, layered barrier. Cut pieces of flashing to fit around each side of the chimney.
Bend the flashing so there are vertical and horizontal sections. Align the horizontal part underneath the roof panels and use roofing nails to secure. Have the vertical pieces overlap each side of the chimney by at least 2 inches.
Each subsequent piece of step flashing should overlap the previous piece by several inches. This creates the stair stepping pattern that prevents water from being driven under the flashing. Having multiple layers of step flashing will greatly improve the chimney seal.
Apply Protective Sealant
As one final protective layer, apply an elastomeric sealant over the step flashing and seams. Choose a sealant designated for metal roofs. Brush or roll the sealant onto the flashing and seams around the chimney.
Make sure to cover the nail heads used to secure the flashing. This added coating will prevent corrosion and deterioration of the flashing while adding another waterproof barrier around the chimney.
Inspect and Maintain the Seal
Once fully sealed, inspect around the chimney periodically to ensure the seal remains intact. Look for any cracks or gaps that may have developed, and recaulk as needed.
High winds, storms, and other factors could damage the seal over time. Regular maintenance and upkeep will help prevent leaks and other chimney issues.
Use the above steps to properly seal a metal roof around the chimney. Adequate sealing is essential for preventing damage and costly repairs down the road. Let us know if you have any other questions!
Frequently Asked Questions
What type of sealant should I use?
Use a high quality polyurethane sealant designed specifically for metal roofs and flashing. Look for a sealant that offers superior flexibility, adhesion, and longevity.
How long does the sealing process take?
Plan on the entire sealing process taking 2-3 hours or longer depending on the roof and chimney size. Proper surface prep takes time while caulking and flashing installation are also involved.
Should I seal under storm collars?
Yes, it is important to place sealant under the storm collar where it meets the metal flashing. Storm collars help protect the flashing but sealing here provides added waterproofing.
What if my chimney flashing is deteriorated?
If the metal chimney flashing is severely rusted, cracked, or falling apart, it is best to replace it. Attempting to seal severely deteriorated flashing will likely fail. Install new flashing prior to sealing for best results.
How often should I reseal the area?
Expect to reseal around the chimney every 3-5 years. Use visual inspections to determine when the sealant needs to be refreshed. Proper maintenance can extend the resealing time frame.
The Importance of Properly Sealing Your Metal Roof Chimney Area
Taking the proper steps to seal around the chimney on a metal roof is very important for several reasons:
- Prevents leaks – An unsealed chimney area is prone to leaks which can lead to costly roof and interior damage.
- Avoids moisture issues – Leaks allow moisture penetration which can rot rafters and sheathing while promoting mold growth.
- Extends roof life – Trapped moisture accelerates corrosion and deterioration of the metal roof.
- Lessens chimney damage – Moisture seepage through the flashing mortar joints deteriorates the chimney itself.
- Reduces energy bills – Leaks can decrease a home’s overall energy efficiency leading to higher heating and cooling costs.
Taking the time to properly seal your metal chimney flashing provides long-term benefits by keeping your roof, chimney, and home protected from the elements.
Tips for Sealing a Metal Roof Chimney Area
Follow these helpful tips when sealing around a metal roof chimney:
- Always use high quality caulking and sealants designed for metal and made for expansion and contraction.
- Thoroughly clean all surfaces before applying new sealants for proper adhesion.
- Ensure flashing joints overlap by at least 2 inches to allow water to flow over them.
- Check for chimney and flashing cracks or damage and repair as needed before sealing.
- Consider metal bonnet style chimney caps which fit over sealing areas to provide additional leak protection.
- Have an experienced roofer handle any chimney or metal roof repairs if needed.
- Inspect seals yearly and reapply fresh sealant every 3-5 years or as needed.
Following these tips will lead to an effective, long-lasting seal around your metal roof chimney area.
Step-By-Step Instructions for Proper Chimney Sealing
Use these step-by-step instructions for properly sealing a metal roof chimney:
- Clean surface – Brush and scrape all areas to remove debris, rust and old caulk.
- Make repairs – Replace any damaged flashing sections or roof panels as needed.
- Caulk seams – Fill all open seams and corners around the chimney with polyurethane caulk.
- Install step flashing – Cut flashing pieces and nail in an overlapping stepped pattern around chimney.
- Apply sealant – Brush or roll elastomeric sealant over all flashing and seams.
- Seal storm collar – Caulk beneath the storm collar and flashing joint.
- Consider chimney cap – For extra protection, install a covered chimney cap.
- Inspect annually – Check for any seal deterioration or new cracks.
- Reseal every 3-5 years – Refresh sealants to keep barrier intact.
Following these nine steps will provide a fully sealed chimney flashing installation built to protect from leaks.
Common Mistakes to Avoid
Avoid these common mistakes when sealing a metal roof chimney:
- Not cleaning surfaces – Sealants won’t adhere properly to dirty or oily surfaces.
- Using the wrong sealant – General caulking won’t withstand expansion and contraction.
- Applying sealant too thinly – Caulk needs to fill seams fully to create a proper water barrier.
- Limited step flashing – Chimney needs multiple, overlapping step flashing pieces for full protection.
- Forgetting the storm collar – This joint also needs sealed to prevent moisture entry.
- Not flashing reglet joints – Vertical flashing sections must be installed behind chimney masonry.
- Neglecting inspections – Sealants deteriorate over time so regular inspection is key.
- Putting off resealing – Failing to reapply fresh sealant every few years compromises the flashing seal.
Being aware of these common mistakes will help ensure your metal roof chimney sealing project is successful.
Conclusion
Sealing a metal roof chimney area properly involves assessing, cleaning, repairing, caulking, flashing, sealing, inspecting, and maintaining the area. Using the right techniques and materials significantly improves the water tightness of the seal. This protects your roof, chimney, and home from costly damage related to moisture issues. Follow the recommendations outlined to confidently seal your own metal roof chimney flashing.