Page Contents
Quick Answers
There are a few quick answers to shaving the bottom of a door without removing it:
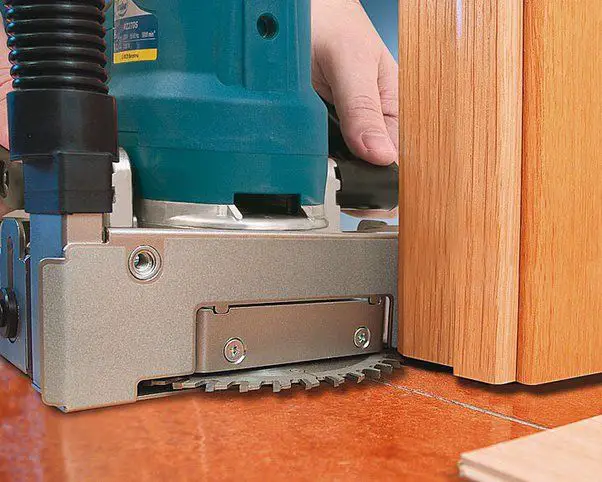
- Use a power planer – Set the depth and run along bottom of door to shave off material.
- Use a hand plane – Clamp door in place and plane bottom edge.
- Use a chisel – Carefully chisel away bottom edge of door.
- Use a utility knife – Score bottom edge repeatedly with utility knife and break off material.
The key things to keep in mind are protecting the surrounding floor, using sharp blades, and taking off small amounts of material at a time to slowly shave down the bottom of the door. Safety gear like gloves and eye protection should be used.
When to Shave a Door Bottom
There are a few common reasons you may need to shave down the bottom edge of a door:
- The door is rubbing or sticking on the floor – This can happen if floors are uneven or shift over time.
- To increase clearance under the door – For example, if you’re installing new flooring that makes the floor height taller.
- To fit new carpeting or change carpet thickness – Thicker carpet can reduce the gap under the door.
- Removing material damaged by pets or moisture – Pet scratches or water damage may require shaving off bottom edge.
Basically any time the clearance under the door needs to be increased, taking material off the bottom edge with the techniques described can solve the problem without completely removing the door.
Tools and Materials Needed
Here are the basic tools and materials you’ll need to shave down a door bottom:
- Power planer – Allows fastest material removal, can precisely set cutting depth
- Hand plane – Manual option for fine shaving if needed
- Chisel – For detailed trimming in corners or around hinges
- Utility knife – Scoring blade can slice off thin pieces when used carefully
- Sandpaper – Helpful for smoothing out any uneven spots left by other tools
- Eye protection – Safety glasses to prevent sawdust or debris in eyes
- Work gloves – Protect hands from splinters and pinches
- Clamps – Hold door securely while planing bottom edge
- Drop cloth – Protect floor from wood shavings and falling pieces
Having the right simple tools for the job makes trimming a door bottom much easier. Investing in a power planer is worthwhile if you have many doors needing adjustment.
Step-by-Step Process
Here is a step-by-step process to shave down a door bottom:
- Prepare work area – Lay down drop cloth under door and several feet beyond. Have tools and safety gear ready.
- Loosen hinge pins – Partially loosen pins so door can move but still hang in place.
- Clamp door – Use several clamps along top or sides of door to securely hold it.
- Measure clearance needed – Determine how much gap you need to create under door.
- Set planer depth – Adjust planer blade depth to remove slightly more than measured clearance.
- Plane bottom edge – Run planer evenly along bottom of door, front to back. Repeat until sufficient clearance.
- Smooth with sandpaper – Lightly sand any splinters, uneven areas.
- Test fit – Rehang door and test open/close. Carefully plane or sand any tight spots.
- Finish exposed wood – Stain, paint, or seal newly exposed raw wood at bottom edge.
- Reinstall door – Securely tighten hinge pins and test operation of door.
It’s important to work slowly and remove just a small amount at a time. Trying to shave too much material at once can damage the door or result in an uneven edge. Patience gets the best results.
Power Planer vs. Hand Plane
Both power planers and hand planes can effectively shave down a door bottom, but they have some pros and cons to weigh:
| Power Planer | Hand Plane | |
|---|---|---|
| Speed | Much faster material removal | Slower |
| Precision | Depth easily adjusted | Takes more skill |
| Cost | More expensive tool | Lower cost for basic model |
For most homeowners, borrowing or renting a power planer may be the quickest and easiest approach. But a hand plane is an affordable option and gives greater control.
Precautions When Using Sharp Blades
From power planers to utility knives, shaving a door bottom involves very sharp blades and requires these safety precautions:
- Wear thick work gloves to protect hands
- Use eye protection – safety glasses minimally
- Unplug power tools before adjusting blades
- Secure door and material with clamps
- Don’t rush the cutting action
- Make relief cuts before removing large sections
- Keep blades sharpened for clean cuts
- Stay focused and alert – no distractions
Rushing through the process or failing to take proper precautions can lead to slip-ups in a split second. Always put safety first by wearing protective gear, using tools properly, and focusing fully on the task.
Tips for Getting it Right
Here are some helpful tips to get the best results from door bottom shaving:
- Use a combination of tools – Each has strengths like a power planer for fast removal and chisel for corners.
- Work across the full width – Don’t just shave one section narrower.
- Leave door hanging while planing – Allows you to test for clearance.
- Make light passes – Sneaking up on the right height takes patience.
- Aim for consistent clearance – Floor won’t be perfectly level so get gap as even as possible.
- Check reveal around rest of door – Look for new gaps created by process.
- Seal exposed wood – Prevent moisture damage on new bare wood edge.
Having sharp tools, a steady hand, and unwillingness to rush are keys for success. Leaving the door hung while carefully shaving down the bottom little by little will get you the clearance you need.
What Not to Do
There are also some things you shouldn’t do when shaving a door bottom:
- Use a dull blade – Will tear wood rather than cut it.
- Go too deep, too fast – Can remove way too much material.
- Work without safety gear – Invites accidents.
- Use makeshift tools – Drywall saws and box cutters often won’t cut it.
- Force the planer – Smooth steady light pressure avoids gouges.
- Remove door – Hard to rehang perfectly and match clearances.
- Shave top edge – Will obviously impact whole door.
- Go wider than needed – Focus only on the tight spot.
Rushed, sloppy work often leads to a door that looks unprofessional, loses its fit, and requires extensive repair. Measure carefully, move slowly, and stick to purpose-built woodworking tools.
Common Problems and Fixes
Here are some frequent problems and how to avoid or fix them:
| Problem | Cause | Solution |
|---|---|---|
| Uneven shaving/gaps | Rushing the work | Work more carefully across entire width |
| Planer slips and gouges | Not securing door | Properly clamp door before planing |
| Door side reveal uneven | Hinge pins not aligned | Straighten pins when rehanging door |
| Door won’t shut | Planed too much off | May need to replace door or re-trim jamb |
The key is to avoid mistakes like planer gouges and over-shaving by working slowly and deliberately. But if problems do occur, fixes like sanding, rehanging carefully, or re-planing the jamb can get things back on track.
When to Call a Professional
While this is generally a DIY-friendly project, you may want to call in a carpenter or contractor if:
- You need to shave numerous doors – They’ll have right tools and can do it faster.
- The door has intricate molding – Complex details require skilled hand work.
- There is damage too deep for shaving – May need complete door/frame replacement.
- You don’t have the right tools – Pros have all necessary equipment.
- The project is over your head – Don’t risk damaging doors and home.
If the door must be removed, disposed of, and replaced, that also requires a professional. Some situations like very old/ornate doors or unusual circumstances mean calling a carpenter is your best bet.
Conclusion
Shaving off the bottom of a door without fully removing it can be done successfully by most DIYers. The keys are using sharp wood-shaping tools, working deliberately across the full width, and removing thin amounts at a time. Power planers quickly remove material, but manual hand planes also get the job done with practice. With caution and patience, you can modify door clearance to solve rubbing and sticking issues. Just be realistic about your skill level and call a professional contractor if needed to avoid making problems worse.