Splicing two lamp cords together can seem intimidating, but with the right materials and safety precautions, it’s actually quite simple. In this comprehensive guide, we’ll walk you through the complete process step-by-step.
Page Contents
Why Would You Need to Splice Lamp Cords?
There are a few common reasons you may need to splice two lamp cords together:
- To extend the length of a cord that is too short to reach an outlet
- To repair a damaged or severed cord
- To install a new plug end on a cord that has a broken/missing plug
- To connect a new lamp to an existing cord
Splicing cords allows you to avoid having to replace the entire cord, saving time, money, and material waste.
Safety Precautions
Any time you work with electrical wiring, safety should be your top priority. Follow these precautions when splicing lamp cords:
- Turn off power and unplug the lamp before starting.
- Use heat shrink tubing or electrical tape to insulate splices.
- Avoid overloading circuits by using appropriately sized cords and fuses.
- Follow local electrical codes for in-wall splices.
- Consider hiring an electrician if you are uncomfortable working with wiring.
Materials and Tools Needed
Gather the following materials before splicing lamp cords:
- Replacement lamp cord of the same gauge as the original
- Wire strippers
- Wire nuts, crimp connectors, or solder
- Electrical tape or heat shrink tubing
- Optional: Voltage tester, wire cutters, needle-nose pliers
How to Splice Lamp Cords – Step-by-Step
Follow these steps to properly join two lamp cords:
- Turn off power and unplug the lamp. Make sure the lamp is disconnected from any power source before working on the cord.
- Measure and cut new cord to needed length. Measure how much new cord you need to extend the original. Add a few extra inches, then cut the replacement cord to length.
- Strip insulation from wire ends. Use wire strippers to remove 3/4″ of insulation from the wire ends you will be joining.
- Align wire ends. Line up the cut ends of the original cord with the new cord so the insulation overlaps slightly.
- Twist like colors together. Twist the bare copper ground wires together, the white (neutral) wires together, and the black (live) wires together.
- Apply wire connectors. Secure the splices by twisting a wire nut onto each pair of twisted wires. Make sure no copper is exposed.
- Wrap with electrical tape. Cover each wire nut and splice with electrical tape for a stronger connection.
- Slide heat shrink over splices. For extra insulation, slide heat shrink tubing over the taped splices and apply heat to shrink it tight.
- Test circuit continuity. Use a multimeter or voltage tester to confirm no shorts exist between wires.
- Secure cord and plug into outlet. Coil up any excess cord and secure with zip ties or clips. Plug lamp in and test.
Video Guide
Here is a helpful video demonstrating the full lamp cord splicing process:
Common Splicing Methods
Twist-On Wire Nuts: This is the most common manual splicing method. You simply twist matching wires together clockwise, then twist on a plastic wire nut until tight. Ensure no bare copper is exposed.
Crimp Connectors: Crimped metal splices require a special crimping tool. They provide a very secure metal-to-metal connection. Best for high-vibration applications.
Soldering: Joining wires via soldering creates solid electrical splices. Requires more skill and special soldering tools/supplies. Insulate afterwards with tape.
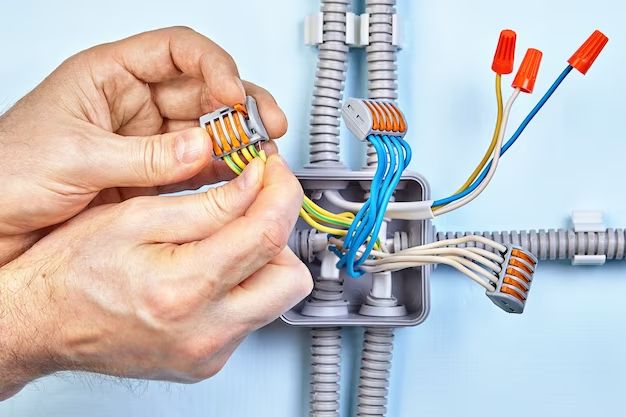
Wago Connectors: No tools needed – these lever-clamp connectors are idiot-proof. Just insert matched wires into the ports and clamp down the lever. Great for easy DIY splicing.
Split Bolt Connectors: Secure copper wires by wrapping them around a cone-shaped metal bolt and tightening the nut to clamp down. Provides a safe mechanical joint.
Important Tips
Follow these important tips when splicing lamp cords for safety:
- Match wire size (gauge) as close as possible – lamp cords are usually 14-18 AWG.
- Ensure splices are fully insulated with no exposed wire.
- Avoid wire nuts for high-vibration applications (use crimped splices).
- Label cords to identify hot/neutral/ground if colors don’t match.
- Perform continuity test before restoring power.
- Consider hiring an electrician if unsure about electrical codes.
Splice Location
In-Wall: Any splices inside the wall must be made inside a covered junction box according to electrical code.
In-Line: Lamp cord splices outside the wall can be taped up but should not be inside the lamp body or exposed.
At Plug: You can cut off the plug, splice in new cordage, and install a new plug following wiring diagrams.
Troubleshooting Guide
| Issue | Cause | Solution |
|---|---|---|
| Lamp doesn’t turn on | Loose wire connection | Redo splices with wire nuts or solder |
| Short circuit | Inspect wires for insulation damage | |
| Wires crossed | Correct hot/neutral/ground connections | |
| Light flickers | Damaged wire | Replace damaged cord section |
| Poor splice contact | Re-splice wires with proper method | |
| Spliced cord overheats | Insufficient gauge wire | Replace with thicker gauge wire |
| Loose connection | Redo splices with better method |
FAQs
Is splicing lamp cords safe?
Splicing lamp cords is safe if done properly. Use the correct size replacement cord, match wire colors, make tight connections, fully insulate splices, and test for continuity.
Can I bury a spliced lamp cord in the wall?
No, any splices inside the wall must be inside a covered electrical junction box per code. Outdoor underground splices also require watertight connectors.
Should I solder or use wire nuts to splice cords?
For occasional splices, twist-on wire nuts are usually adequate. But for a more solid connection, soldering is recommended for lamps subject to vibration or frequent movement.
What gauge wire should I use for lamp cords?
Most factory lamp cords use 14-16 gauge wire. Choose replacement cord with similar gauge size wire for proper current handling and safety.
Can I splice different wire sizes together?
It’s best to splice wires of the same gauge. If necessary, splice a larger gauge wire to a slightly smaller one, but avoid large mismatches in size.
Warnings
- Always turn off electricity before splicing wires.
- Do not overload electrical circuits – use proper fuse/breaker sizes.
- Inspect cords for damage before splicing – replace damaged sections if needed.
- Double-check wire connections to prevent shock or fire hazards.
- Consult an electrician if you are unsure about electrical safety.
Conclusion
Splicing lamp cords is a relatively easy project for DIYers to extend, repair, or replace existing wiring. With some basic materials, safe methods like twist-on wire nuts or soldering, and following proper precautions, lamps can be wired up safely and return to service. Be mindful of electrical codes for in-wall splices and test all completed connections before restoring power. With this helpful guide, you can now confidently splice those lamp cords and illuminate your space.