Staining a fence with a paint roller can be a quick and easy way to refresh the look of your outdoor space. When done properly, using a roller to apply fence stain can save time and deliver an even, professional-looking finish. Here is a step-by-step guide to staining a wood fence using a paint roller.
Page Contents
Benefits of Using a Roller to Stain a Fence
Roller application offers several advantages over brushing when staining a fence:
- Faster application – A roller can quickly coat large, flat fence boards.
- Even coverage – Rollers deliver a more uniform coat of stain than brushes.
- Smooths texture – Rolling helps fill in wood grain for a smoother look.
- Easier on vertical surfaces – Applying stain with a roller is less tiring than brushing up and down.
- Fewer drips – The thin layer left by a roller is less prone to runs and drips.
For these reasons, a paint roller is an excellent tool for staining wood fence panels, posts, gates and other surfaces. The key is using the right roller and technique.
Choosing a Paint Roller for Fence Staining
Not just any roller will do for staining a fence. Use these tips to select the right roller:
- Fiber material – Choose a high-density foam or microfiber roller, which hold plenty of stain while leaving a smooth finish.
- Nap length – Opt for a 1/4″ or 3/8″ nap length. Shorter naps work stain into wood pores better than thicker ones.
- Core size – A 9″ roller frame is ideal for covering large fence boards efficiently.
- Edge – Use a roller with a beveled or rounded edge to easily coat next to posts and rails.
- Handle – Choose a frame with at least an 18″ handle for comfortable rolling on tall fences.
Mini foam rollers, stain pads and stain brushes come in handy for cutting in edges and smaller areas.
Preparing a Fence for Staining
Proper prep is crucial for successful staining results. Follow these steps to get your fence paint-ready:
- Remove loose wood fibers – Use 120-150 grit sandpaper to sand away any splinters, peeled paint or gray, weathered wood.
- Clean thoroughly – Use a hose, power washer and/or cleaner to remove dirt, mildew and other contaminants.
- Repair damage – Fill holes, cracks and other defects with exterior wood filler before staining.
- Replace rotten boards – Boards that are split, warped or rotted should be replaced prior to applying stain.
- Let dry – Allow the fence to dry completely before applying stain.
Be sure to remove or cover any nearby plants and objects to protect them from stain splatters.
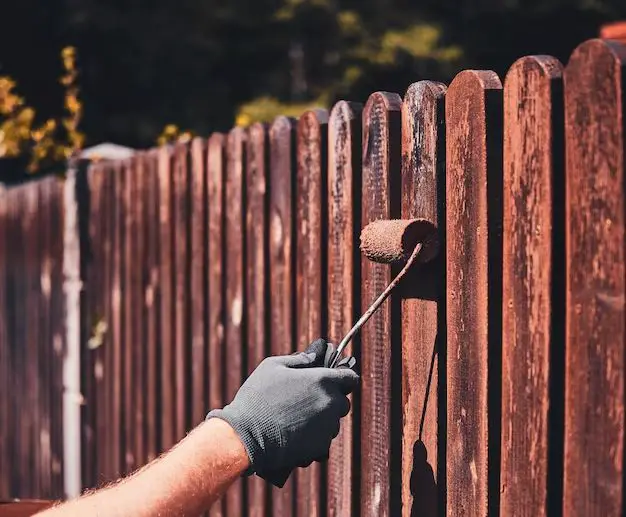
How to Stain a Fence with a Paint Roller
Follow these steps for rolling stain on a wood fence:
- Load the roller: Pour stain into a roller tray or wide container. Dip in the roller cover so that it is fully saturated with stain. Roll it against the tray ramp to distribute and remove any excess.
- Cut in edges: Use a brush to cut in along the edges, posts, and any tight corners that a roller can’t easily reach.
- Apply stain in sections: Begin rolling on one board or section at a time. Apply in long, even, overlapping strokes from bottom to top.
- Re-saturate as needed: Re-dip the roller before sections start to dry. Stain dries quickly, so work in manageable sections.
- Maintain wet edge: When transitioning between sections, make sure previously coated wood stays wet so the two sections blend seamlessly.
- Push stain into grain: Apply extra pressure over knots and dense areas to help saturate and smooth the wood texture.
- Coat all sides: Make sure to roll edges and end grain for maximum protection.
- Watch for drips: Periodically scan for drips and backbrush them into the wood. Applying thin coats minimizes drips.
- Apply evenly: Maintain consistent coverage, and avoid excessive overlapping of strokes.
- Work methodically: Move systematically across the fence from one end or side to the other so no boards are missed.
- Smooth strokes: Use long, smooth strokes for the most professional looking finish.
Roller Staining Tips and Tricks
Follow these roller staining tips and techniques for best results:
- Thin coats are better – Applying stain too thickly can create drips and lead to uneven absorption. Build thin layers instead.
- Backbrush drips – Lightly brushing out drips as you go blends them into the finish.
- Keep a wet edge – Don’t let edges start to dry or overlap marks will be visible.
- Maintain speed – Moving quickly enough to keep stain wet prevents lap marks but not too fast to cause heavy drips.
- Roll parallel – Stroke along the length of boards rather than across them.
- Overlap slightly – Each stroke should overlap the last by a couple inches to ensure even coverage.
- Reload frequently – Top up stain in the roller tray often to prevent it from drying on the roller.
- Change direction – Alternate vertical and horizontal strokes when coating rails and posts.
- Watch layout – Staining perpendicular boards needs special attention at intersections to prevent blotchiness.
- Check coverage – Scan for dry spots or areas that need more stain after each board. Touch up if needed.
Cleaning Up
Properly clean and store painting tools once the staining job is complete:
- Dry rollers – Start by rolling out excess stain on newspapers or cardboard.
- Clean rollers – Use paint thinner or mineral spirits to remove remaining residue.
- Spin clean – For foam rollers, spin the excess solvent out using a centrifugal spin cleaner.
- Air dry – Allow rollers to dry completely before storing or reusing.
- Store properly – Place dried rollers in sealed bags or wrap them in plastic to prevent drying out.
- Discard if worn – Throw away shedding, matted or worn rollers that won’t smooth properly.
Be sure to clean brushes and dispose of used solvents properly as well. Follow the stain manufacturer’s recommendations for cleanup.
Applying Multiple Coats
For optimal protection and color intensity, two coats of stain are often best. Here are tips for applying multiple coats:
- Dry time – Allow the first coat to dry completely per the manufacturer’s recommendations before re-coating, typically 24 hours.
- Sand lightly – Slightly sanding smooths the dried first coat to help the second coat bond.
- Clean – Wipe away any dust before applying the topcoat.
- Same direction – Maintain the same application direction for each coat.
- Check absorption – If the first coat soaks in quickly, applying a slightly thicker second coat helps build protection.
- Blend – Maintain a wet edge and overlap properly so coatings blend seamlessly.
Additives like Penetrating Stain Intermediary Oil can improve absorption of multiple coats. Some thick stains may only require a single saturating coat.
Protecting and Maintaining Stained Fences
Sealing in stain with a clear wood sealer or topcoat provides extra protection and durability. Using maintenances products will also help a stained fence retain its beauty. Consider these tips:
- Apply topcoat – A water repellent clear coat or wood sealer minimizes moisture damage.
- Refresh periodically – Reapply fresh stain every 2-4 years depending on exposure and wear.
- Clean regularly – Use cleaners formulated for wood fences to remove dirt buildup.
- Inspect for damage – Watch for cracking or peeling stain that indicates a repair is needed.
- Control moisture – Improve drainage near fences and repair leaky sprinklers to reduce rot risk.
- Prevent UV damage – Fences last longer when shaded from intense, direct sunlight.
Taking good care of stained wood fences helps them stay beautiful and functional for years.
Conclusion
Applying fence stain with a paint roller allows you to quickly and efficiently refresh wood fences with a like-new look. Choosing the right roller and techniques results in smooth, even coverage. Prepare fences properly, work methodically in sections, and maintain wet edges between coats. With adequate drying time between coats, roller-applied stain delivers maximum protection and a professional quality finish. Maintain the results by cleaning regularly and adding fresh coats every few years. Follow these tips for roller staining success on your next wood fence project.