Threading a new bike chain can seem daunting for beginners, but it’s actually a straightforward process once you understand the basic steps. In this comprehensive guide, we’ll walk through everything you need to know to successfully thread a new chain onto your bike’s drivetrain.
Page Contents
- 1 Step-by-Step Guide
- 1.1 1. Degrease the drive train
- 1.2 2. Remove the old chain
- 1.3 3. Set the new chain to approximate length
- 1.4 4. Break the chain at the determined length
- 1.5 5. Thread chain through the rear derailleur
- 1.6 6. Wrap chain around cassette cog
- 1.7 7. Route through front derailleur
- 1.8 8. Connect ends with chain tool
- 1.9 9. Check derailleur alignment
- 1.10 10. Shorten chain to proper length
- 1.11 11. Lubricate the chain
- 2 Conclusion
- 3 Tips for Threading a Bike Chain
- 4 Common Threading Mistakes
- 5 How to Select the Right Chain
- 6 How Often Should You Replace Bike Chains?
- 7 Conclusion
What You’ll Need
Before starting, gather the following supplies:
- New bike chain
- Chain tool (with cutting and peening pins)
- Quick link or master chain link
- Degreaser and rag
- Chain lube
The chain tool is a critical piece of equipment that’s required for breaking and riveting the chain. A quick link or master link allows you to reconnect the chain without needing to break a permanent rivet.
Why Thread a New Chain?
There are a few reasons why you may need to thread a new bike chain:
- Replacing an old, worn out chain
- Switching to a new chain type or speed
- Fitting a chain on a new bike build
Replacing worn chains is crucial for extending the lifespan of your bike’s drivetrain components. If you run chains too long, they can cause excessive wear on cassette cogs and chainrings.
Step-by-Step Guide
With the necessary supplies in hand, follow these steps to thread a new bike chain:
1. Degrease the drive train
Before removing the old chain, use a degreaser to thoroughly clean the front chainrings, rear cassette, derailleurs, and chain if still installed. This will prevent any contaminants from impacting the performance of the new chain.
Apply degreaser and let it sit for a few minutes before wiping down with a rag. Be sure to fully remove all debris and oily residue.
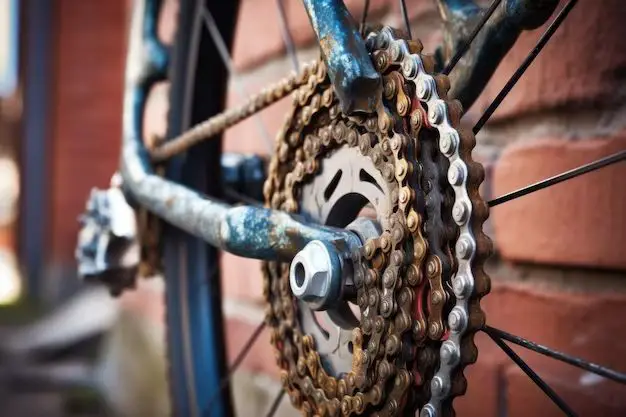
2. Remove the old chain
Using your chain tool, push the peening pin completely through a link to push out the rivet. This will disconnect the chain.
If installing on a new bike, simply remove any plastic packaging or ties protecting the chain during shipping.
3. Set the new chain to approximate length
Drape the new chain over the large front chainring and largest rear cog. Pull the two ends together until they just touch.
You want a little extra length to account for the chain tooling and connector. It’s better to remove excess links later for a perfect fit rather than cut the chain too short.
4. Break the chain at the determined length
Using your chain tool, clamp one link and insert the peening pin into the recess of the pin. Turn the tool handle to push the pin through until it breaks one side of the riveted link.
Repeat this process a second time a few more links down the chain to create your two free ends.
5. Thread chain through the rear derailleur
Loop the chain through the rear derailleur pulleys from the bottom and out the top. Ensure it is properly seated in the derailleur cage.
6. Wrap chain around cassette cog
Bring the chain up and over the largest rear cog. For best results, loop it up from behind the cog in a clockwise direction.
You may need to use your hand to guide it between the cassette and spokes.
7. Route through front derailleur
From the rear cog, bring the chain up to the front derailleur. Loop it from the inside of the derailleur cage around the bottom bracket shell.
You want it to pass through the cage properly seated in the chain guide.
8. Connect ends with chain tool
Bring both loose ends of the chain together on the large front chainring. They should overlap by 2-3 links.
Clamp one end into your chain tool. Insert the peening pin into the recess of the pin of the mating end link. Slowly turn the tool handle to press the pin through, re-riveting the permanent connection.
9. Check derailleur alignment
Shift through the full range of gears, front and rear. Ensure the chain moves smoothly between sprockets without any jamming or skipping issues.
If necessary, make minor adjustments to the derailleur limit screws or cable tension.
10. Shorten chain to proper length
Shift into the small rear and front sprockets. This combination results in the tightest chain.
Pull the rear derailleur body backward to take up any excess slack in the chain. Mark the link that just touches the derailleur pulley.
Break the chain there with your chain tool. Re-connect it using either a special quick link or master link.
11. Lubricate the chain
Apply your preferred chain lube liberally over all the links. Let it soak in a few minutes before wiping off any excess with a rag.
Lubricating helps minimize friction and extends the working life of your new chain.
Conclusion
Following these step-by-step instructions, you can easily master threading a new bike chain. The process involves degreasing the drivetrain, breaking the chain, routing it properly through the derailleurs, re-connecting it with a chain tool, shortening it to the ideal length, and finally lubricating it.
Taking your time and having the right tools makes the job straightforward. Just remember to regularly measure and replace worn chains before they damage more expensive drivetrain components. A smoothly running, well-lubricated chain is crucial for optimal shifting performance.
Tips for Threading a Bike Chain
Here are some helpful tips to make your bike chain installation go smoothly:
- Invest in a quality chain tool. Cheap tools can break or damage new chains.
- Always replace chains at regular intervals. Stretching over 0.5% indicates replacement time.
- Keep your drivetrain clean when sizing the chain. Debris can impact proper fitting.
- Don’t force a stiff link when re-riveting. It likely needs to be realigned in the tool.
- Make sure the chain is fully seated in the rear derailleur. A loose loop can cause dropping.
- Use manufacturer’s directions if installing a special connecting link.
- Check derailleur limit screws after installing chain. Fine tune as needed.
- Spin cranks backward to check for tight spots after shortening chain.
- Wipe off excess lube after application. It will just attract dirt.
Following these tips will help avoid headaches and ensure optimal drivetrain performance with your new chain.
Common Threading Mistakes
It’s easy to make simple mistakes when installing a new bike chain. Be aware of these common pitfalls:
- Not using a chain tool properly – can over or under set rivets
- Routing chain backwards through derailleurs – causes poor shifting
- Insufficient chain lube – leads to stiff links and premature wear
- Failing to set chain length – either too tight or too loose
- Not connecting link plates correctly – results in binding and popping
- Forgetting to check derailleur limit screws – can throw the chain
- Inadequate degreasing – leaves contaminants on drivetrain
Avoiding these simple miscues will ensure you thread your new bike chain correctly the first time without any frustrating rework.
How to Select the Right Chain
Not all bike chains are created equal. Follow these tips to select the best chain for your bike and riding:
- Match appropriate speeds – narrow chains for higher gear counts
- Consider conditions – wider chains may help for off-road use
- Compare metal materials – nickel alloys smoother but can wear faster
- Analyze special features – anti-rust coatings, master links, etc.
- Research brand reputation – quality matters for durability
- Determine proper length – check derailleur specs and capacity
- Factor in budget – higher cost chains typically last longer
An 8 to 10 speed chain with optimized materials from a leading brand is suitable for most bikes. Seek advice from your local bike shop if uncertain what chain is ideal for your cycling needs.
How Often Should You Replace Bike Chains?
To maximize the lifespan of your bike drivetrain, you should replace chains at regular intervals before they become excessively stretched and wear out sprockets.
Guidelines for Replacing Bike Chains
| Chain Type | Replacement Interval |
|---|---|
| Low quality | Every 1,000 miles |
| Mid-range | Every 2,000 – 3,000 miles |
| High-end | Every 4,000+ miles |
Higher quality chains typically have greater durability. Stretching over 0.5% also indicates it’s time for a new chain regardless of mileage. Environmental conditions like wet, dirty riding can shorten lifespan.
Regular professional maintenance checks can help determine optimal chain replacement timing specific to your bike. Replacing chains before excessive wear saves money and prolongs drivetrain life.
Conclusion
Threading a new bike chain is a straightforward process with the right tools and techniques. Following proper sizing, derailleur routing, connecting, and lubricating steps allows for smooth shifting performance. Avoid common mistakes like improper chain tool use, incorrect routing, and forgetting to set correct chain length.
Invest in a quality chain designed for your specific bike gears and riding needs. And remember to replace chains at recommended intervals before excessive stretching occurs. With this guide, you’ll be prepared to thread new bike chains quickly and proficiently.