Turning existing shelves into drawers can be a great way to increase storage and improve accessibility in your home. Often, shelves are located in inconvenient spots or are difficult to see and access items towards the back. Replacing them with drawers provides an easy pull-out system that makes better use of the available space. This project can seem daunting for a beginner DIYer, but with the right planning and materials, it can be accomplished in a weekend. In this article, we will walk through the complete process step-by-step to teach you how to turn shelves into functional drawers.
Page Contents
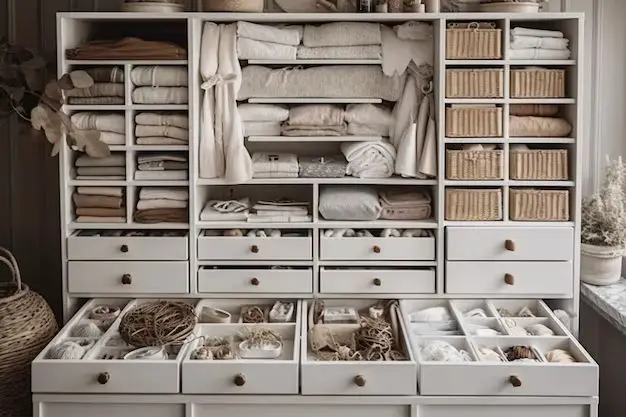
Why Convert Shelves to Drawers?
There are several benefits to converting existing shelving to drawers:
- Increase accessibility – Drawers make contents easy to see and access instead of having to reach deep into shelves.
- Maximize space – Drawers allow you to utilize all available vertical space, rather than just the front portion of shelves.
- Improve organization – Dividers and compartments can be added to drawers to neatly organize contents.
- Customize storage – Drawers can be built to precisely fit items being stored.
- Versatility – Drawers allow you to store a wide variety of items from clothing to office supplies.
- Aesthetics – Built-in drawers look neat and elegant. The front can be customized with different stains, paints, hardware, and more.
If your existing shelves are no longer serving your household needs, converting them to drawers can help transform the space into a much more functional storage solution.
Planning Your Drawer Conversion Project
The first step is to assess the existing shelf unit to determine if a drawer conversion is feasible. Make sure to consider:
- Shelf construction – The shelves must be sturdily built into the wall studs or flooring to support drawers.
- Space around and under the shelf – Is there room to install drawer slides or guides underneath?
- Placement of plumbing or electric – Drawer depth may be limited by existing wall utilities.
- Drawer size and configuration – Visualize drawer size and layout within the shelf space.
It is also important to measure the interior dimensions of the shelf cavity so your drawers can be built to precisely fit the space. Having an accurate plan of the existing shelf and room layout will make the project go smoothly. Consider sketching ideas to visualize the finished result.
Removing the Existing Shelves
Once you have determined that the shelf can be converted, the next step is dismantling it. Start by clearing off all items stored on the shelves and cleaning the surrounding area. Use a stud finder to locate where the sides of the shelf are secured to wall studs. These are likely screwed and/or nailed in place. You will need to remove any screws or nails attaching the sides, top and bottom to the wall studs or floor.
Caution should be taken to avoid damaging the surrounding wall as you remove shelving boards. Pry them off carefully with a pry bar or hammer. Wear safety goggles and gloves for protection. Take photographs along the way to document how the original shelving was constructed. This can aid reassembly later.
Completely remove all existing shelving boards and supports so you are left with an empty cavity. Sweep and vacuum out any debris or dust. Now you have a blank slate for your new drawers.
Building and Installing Drawers
With the old shelves removed, you can begin constructing and installing replacement drawers. For safety, drawers must be properly built and secured within the cavity. Follow this process:
Step 1: Cut Boards to Size
Use plywood or solid wood boards to build drawers. Cut boards to precise interior dimensions of the shelf cavity with a table saw for smooth edges.
Step 2: Build Drawer Boxes
Attach boards together with wood glue and nails to form the drawer boxes. Typically boards are attached perpendicular to each other. You can include a plywood bottom or opt for an open bottom drawer.
Step 3: Install Drawer Slides
Mount drawer slides evenly into the interior sides of the shelf cavity. Make sure they are level. Slides allow the drawers to smoothly extend out.
Step 4: Add Drawer Fronts
Cut boards for drawer fronts and attach to drawer boxes with hinges or other hardware. Sand and stain/paint drawer fronts to desired finish.
Step 5: Mount Drawers
Attach drawer boxes to mounted slides in shelf cavity. Test opening and closing action. Add drawer pulls or knobs if desired.
The entire construction process can take 1-3 days depending on number of drawers. Make sure to evenly space multiple drawers and dual slides for even extension. Built properly, your new drawers should operate smoothly for years to come.
Customizing Drawers for Storage Needs
One benefit of building your own drawers is the ability to customize them for your exact storage needs. Here are some options to consider:
- Add compartment dividers – Use thin boards or panels to divide drawers into smaller sections for organizing items.
- Use angled dividers – Dividers set at angles can hold items upright such as cooking utensils.
- Make drawers shallower – Less deep drawers work well for organizing paperwork, mail, or office supplies.
- Build narrow drawers – Smaller width drawers allow you to store slim items or stash clutter.
- Incorporate racks or hooks – Installing racks, pegs, or hooks inside drawers allows you to hang tools or jewelry.
- Line drawers – Line with felt, foam, or another soft material to store delicate items.
Get creative with ways to customize your new drawer space! Determine how you intend to use the drawers and build accordingly.
Tips for Smooth Operation
Properly installed drawers should operate smoothly for many years. Here are some tips for optimal performance:
- Choose quality drawer slides rated for the weight of your drawers.
- Make sure drawer boxes are square for even sliding.
- Wax slides periodically with a dry lubricant like paste wax.
- Open/close drawers gently to avoid excessive wear.
- Periodically check attachment screws/nails and tighten if needed.
- Consider adding rubber bumpers inside to prevent slamming.
- Clean drawer slides/boxes regularly with compressed air.
Following these tips will help prevent issues like jerky operation or drawers coming off track down the line. Taking good care of your converted shelves will ensure they function just like built-in drawers.
Conclusion
Converting existing shelves into functional drawers can make an immense improvement in storage, organization, and accessibility. By following the process of removal, installation, and customization outlined above, you can achieve drawer storage even with existing fixed shelving. The ability to build drawers tailored precisely to your needs makes this a highly rewarding project for the dedicated DIYer. Just take care to do the carpentry work safely and properly. In the end, you will have upgraded storage space and gained valuable woodworking skills. So don’t be afraid to start a drawer conversion project – you may be amazed by what you can DIY!
| Tool | Purpose |
|---|---|
| Stud finder | Locating wall studs |
| Pry bar | Removing existing shelves |
| Table saw | Cutting boards |
| Sander | Sanding drawer fronts |
| Drill | Drilling pilot holes |
| Hammer | Nailing boards together |
| Tape measure | Taking precise measurements |
This table outlines the key tools needed for a drawer conversion project along with their purpose in the process.