Page Contents
Understanding Faucet Nuts
Faucet nuts are used to secure faucets to sinks or other fixtures. They are usually found at the base of the faucet, connecting the faucet to the sink underside or countertop. Faucet nuts come in different shapes and sizes, but most commonly they have either a hex or slotted design.
Hex nuts have six flat sides that you can grip with an adjustable wrench or basin wrench. Slotted faucet nuts have two straight sides for using a screwdriver. In some cases, the nuts may be plastic and can be turned by hand once the faucet is disassembled.
Over time, faucet nuts can become stuck in place due to mineral deposits from water or corrosion. Trying to loosen a firmly stuck faucet nut can be challenging. With the right techniques and tools, you can successfully unscrew the nut without damaging the faucet or countertop.
Gather the Right Tools
Before attempting to remove a stuck faucet nut, make sure you have the proper tools on hand. Useful tools include:
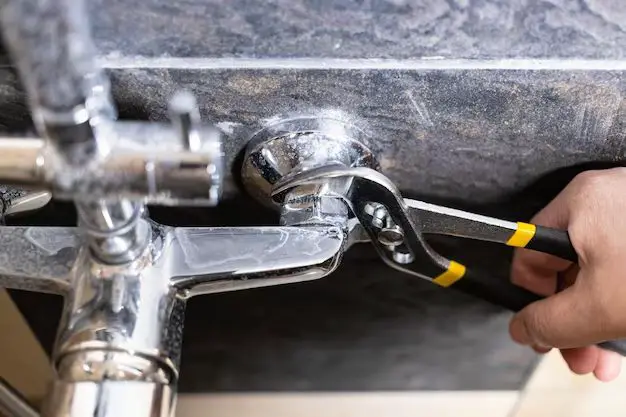
– Basin wrench – This specialized wrench has an elongated S-shape that allows you to reach up behind the sink basin to grip nuts. The jaws open parallel to the handle, perfect for turning nuts in tight spaces.
– Adjustable wrench – A standard adjustable wrench may be able to grip smaller hex nuts. Open the jaws all the way to fit around the nut.
– Locking pliers – These provide an extremely firm grip on nuts once clamped into place. Cover the teeth with tape or a rag to protect the finish.
– Penetrating oil – Apply penetrating oil to the threads and let it sit before trying to unscrew the nut. This can help loosen a stuck nut.
– Replacement washers or gaskets – You’ll need new ones to reinstall the faucet. Have them ready before starting.
Disassemble the Faucet
Most faucets need to be partially disassembled before you can access and remove the nut holding it down. Take note of how the parts fit together so you can properly reassemble the faucet later. Steps may include:
– Removing the faucet handle. There is usually a set screw, cap, or button covering the screw that holds the handle in place.
– Detaching any hoses or spray heads that connect to the spout or faucet body with slip joints.
– Taking out the cartridge or valve core inside the faucet body with a valve removal tool.
– Lifting off any dome covers or escutcheon plates around the faucet base.
– Pulling out the spout and faucet body toward you once other parts have been detached.
This exposes the faucet nuts for unscrewing. Take care not to misplace small parts or lose any rubber washers in the sink drain.
Loosen the Nut
With the faucet partially disassembled, you can now work on getting the nut loose. Here are some tips for success:
– Turn off the water supply lines and drain any residual water from the faucet. This prevents leaks as you work.
– Apply penetrating oil around the nut and let it soak in for several minutes. Reapply if needed.
– Place the correct size wrench, basin wrench or locking pliers onto the nut. Make sure you have a solid grip.
– Turn the wrench counterclockwise to loosen the nut. Turn slowly and gently at first.
– Increase turning force if the nut is stubborn. Be patient and keep spraying with penetrating oil.
– If using pliers, take care not to strip the nut edges. Wrapping duct tape around them helps protect the finish.
– Turn the wrench from different angles to break the nut free. Sometimes working up and down or side to side is needed.
– Take a break if your hands get tired! Returning later can help after more soaking time.
Remove the Old Faucet
When the nut finally gives way, finish unscrewing it completely to detach the old faucet. Some tips for completing faucet removal:
– Check that any supply tubes or hoses have been disconnected. Remove any remaining washers.
– Lift the faucet assembly straight up to pull the base free from the sink holes or countertop.
– Clean away any putty, silicone or gasket debris from the sink or countertop faucet holes.
– Inspect the sink/counter area for any damage like cracks that may need repair before installing the new faucet.
– Measure hole spacing and dimensions to ensure your new faucet will fit properly.
– Twist the old faucet nut off the threads and set it aside. You’ll need a new nut and washers for the new faucet.
– Take the old faucet apart the rest of the way to fully remove all washers and gaskets. Properly discard any unusable parts.
– Thoroughly clean the sink area in preparation for the new faucet.
Install the New Faucet
Once the old faucet is fully removed, you can install the new one. Follow any specific manufacturer instructions, but general steps include:
– Slide any gaskets or washers over the faucet tailpieces or supply tubes if needed. Use new ones provided.
– Lower the new faucet assembly into place in the sink holes. Make sure hoses/tubes align properly.
– From below, thread on the new faucet nut by hand until tight. Then tighten fully with your wrench or basin wrench.
– Reconnect supply valves and tubes. Make sure all slip joints are secure.
– Reassemble any handles, dome caps, spouts or pull-out spray heads. Verify their proper operation.
– Turn water supply back on and check for leaks. Tighten any connections if needed.
– Run the faucet for several minutes to flush out sediment and check flow/drainage.
– Make any needed temperature adjustments. Most faucets have hot limit safety stops.
Taking your time with the installation will ensure your new faucet functions flawlessly for years!
Tips for Removing Stubborn Faucet Nuts
Here are some additional tips to employ when an old faucet nut refuses to budge:
– Use a breaker bar or long pipe over your wrench handle for extra leverage. Just be cautious not to over-torque.
– If necessary, use a hacksaw blade to saw through the old nut to split it. Protect the finish with tape and go slowly.
– Tap the wrench or pliers handle with a hammer while turning to help jar the nut loose through vibration.
– Heat the nut for expansion with a hair dryer or pipe warmer. Take care not to overheat porcelain/plastic components.
– Cool the stuck nut with ice for contraction. Chilling it can sometimes help break the bond.
When to Call a Plumber
In most cases, homeowners can tackle a stuck faucet nut successfully. But if you’ve tried all the tricks without success, it may be time to call in a professional plumber. Signs it’s time to call for help include:
– The nut won’t budge at all, even with penetrating oils/heating/chilling.
– You’ve stripped or damaged the nut making it unusable.
– Other faucet parts break during your removal attempts.
– Significant corrosion or mineral deposits have “welded” the nut in place.
– You don’t feel comfortable using power tools or force to saw off the nut.
– Repairs will involve significant sink or countertop modifications.
Hiring a pro to deal with a seized faucet nut can be worthwhile to get the job done quickly and safely. They have specialized tools and expertise to deal with extreme cases of stuck nuts and corrosion.
Preventing Stuck Faucet Nuts
You can take steps to prevent faucet nuts from ever seizing up like this again:
– Lubricate nuts periodically with non-petroleum grease or oil.
– Use pipe dope or plumber’s tape on threads during installation for smoother tightening.
– Make sure nut connections are snug but do not overtighten initially.
– Choose solid brass nuts over plastic if possible for more durability.
– Keep nuts free of grime and mineral deposits by cleaning occasionally.
– Remove and inspect nuts as part of routine faucet maintenance.
A little preventive care will make faucet repairs much quicker and easier when the time comes!
Conclusion
Removing old, stuck faucet nuts can be a frustrating process. With some perseverance and the right tools and techniques though, you can get that stubborn nut freed without too much hassle. Be patient, use penetrating oils, and get a good tight grip on the nut. The secret is taking your time and applying steady, even force. Before you know it, the nut will release and you can finish replacing the old faucet with ease. And next time, proper lubrication and maintenance will keep that new faucet nut from ever seizing up on you again!