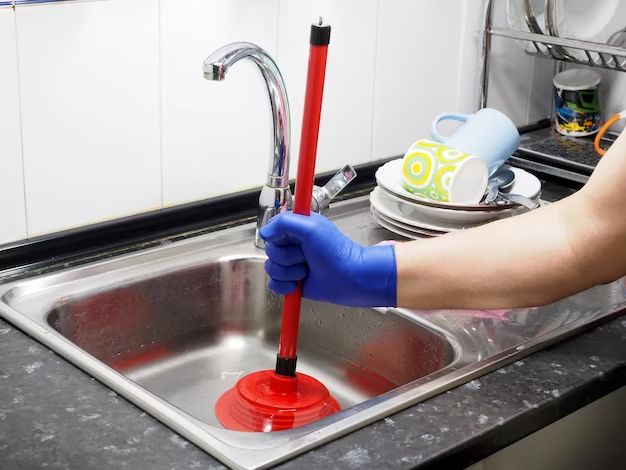
Unscrewing a kitchen sink drain can seem daunting, but it’s actually a straightforward process that anyone can do with the right tools and tips. Knowing how to remove and replace a sink drain is an important home maintenance skill that will allow you to fully clean your drain pipes and fix clogged or leaky drains. In this comprehensive guide, we’ll walk through each step for successfully unscrewing a kitchen sink drain and offer troubleshooting advice for difficult drains.
Page Contents
What You’ll Need
Before starting any kitchen sink drain project, you’ll want to gather the necessary supplies. Having these tools on hand will make the task much smoother. Here are the basic items you’ll need:
| Tool | Purpose |
|---|---|
| Basin wrench | Loosening and tightening drain nuts and connections |
| Adjustable wrench | Backup for loosening stuck drain nuts |
| Bucket | Catching water and debris |
| Rags or small bucket | Catching excess putty or plumber’s putty |
| Plumber’s putty | Resealing drain connections |
| Flashlight | Seeing into drain openings |
A basin wrench is specially designed to fit inside the narrow space under a sink and allow you to grip the drain nut. An adjustable wrench provides extra leverage for stubborn drain nuts. Have a bucket ready to catch water and gunk that will spill out of the drain opening. Rags or a small container will be useful for catching any excess putty as you remove drain pieces. Plumber’s putty or sealant will be needed to reseal the drain. A flashlight can help you see up into the drain opening while working.
You may also want to have on hand:
– Goggles or safety glasses to protect your eyes
– Work gloves to protect your hands
– Vinegar to clean and deodorize the drain opening
– Baking soda to use with the vinegar to clean and deodorize
Preparing to Remove the Drain
Before you can access the drain nut and unscrew the drain, you’ll need to fully or partially detach the sink from the countertop. Follow these steps to prepare for drain removal:
1. Clear away items from under the sink. Remove any storage bins or cleaning supplies that are under the sink. You’ll need open workspace to complete the project.
2. Locate hot/cold shut-off valves under the sink and turn them off. This will prevent water from spraying out when you detach the drain. Test to make sure the water is fully shut off.
3. Place a bucket under the trap. Some water will spill out when you detach hoses.
4. Disconnect supply lines if you need to fully detach sink. The hot and cold water supply hoses or lines will need to be disconnected at the shut-off valves before you pull the sink out.
5. Disconnect and detach drain P-trap. Unscrew the nuts connecting the curved P-trap pipe to the drain tailpiece and sink drain. Set parts aside.
6. Remove sink fasteners to detach sink partially or fully. Depending on your sink type, you may be able to simply tilt the sink up to access the drain or need to fully remove it.
With the water lines and P-trap detached, you can now see the drain nut clearly and have room to grip it with your basin wrench.
Using a Basin Wrench to Loosen the Drain
The key tool for unscrewing a sink drain is a basin wrench, also called a sink wrench. Here are tips for using this tool effectively:
– Insert the wrench head up inside the drain opening. Make sure the wrench teeth are gripping the drain nut before turning.
– Turn the wrench handle counterclockwise to loosen the drain nut. You may need to bear down hard.
– If the drain nut won’t budge, stabilize the basin wrench with one hand while turning the handle with your other hand.
– Pull up as you turn the wrench handle to help break the seal of the nut.
– Try spraying WD-40 or another penetrating oil around the drain nut to help loosen a stuck nut.
– Switch to an adjustable wrench on the drain nut to provide more leverage if needed.
Take your time and don’t force the wrench if you meet a lot of resistance. Penetrating oil and gentle yet firm pressure will help coax off the toughest drain nuts.
Unscrewing the Drain Tailpiece
Once the drain nut is detached, you can unscrew the tailpiece from the sink drain opening. Follow these steps:
1. Remove the drain nut and any washers from the tailpiece. Set aside to reuse.
2. Rotate the tailpiece counterclockwise to unscrew it from the sink opening. It may still be somewhat stuck with plumber’s putty.
3. Use pliers if needed to get a better grip and finish unscrewing the tailpiece.
4. Detach the washer and backup flange plate (if present) from the sink opening.
5. Inspect the sink opening for any remaining putty or old plumber’s tape. Scrape off any debris.
6. Clean the removed tailpiece, flange, washers, and drain nut. Reused parts should be free of putty and grime.
Take notes or pictures of how the washers, flange, and nut were arranged on the tailpiece. This will make reassembly much easier. Thoroughly clean the sink opening to prepare for installing the new drain.
Unscrewing a Garbage Disposal Drain
If your kitchen sink has a garbage disposal unit, the process will be slightly different. Here are some tips for removing a disposal drain:
– Unplug the disposal unit before starting. This will prevent accidental activation.
– Use a screwdriver to disconnect the disposal wiring from under the sink.
– Detach the discharge drain tube that connects to the disposal drain port.
– Support the disposal weight as you detach the mounting assembly.
– Once supported, use a basin wrench up inside the disposal to loosen the drain.
– Finish unscrewing the disposal drain pipe from the sink opening.
– You may need to pry the disposal flange loose if it is stuck to the sink with sealant or putty.
Taking the extra steps to safely detach wiring and support the disposal unit will allow you to successfully remove the entire drain assembly.
Challenges and Troubleshooting
It’s common to encounter difficulties when trying to detach old sink drains. Here are some solutions for common issues:
Drain nut won’t budge:
– Allow penetrating oil to work into the threads for 5-10 minutes. Reapply if needed.
– Use a larger wrench or pliers to get more leverage on the nut.
– Wedge a block of wood in the sink opening to stop the drain from spinning as you turn the nut.
– Remove any decorative trim rings so you can grip the drain nut directly.
Tailpiece is fused onto the sink opening:
– Heat the joint with a hair dryer to soften stuck plumber’s putty so you can twist off the tailpiece.
– Use a wood block to tap the tailpiece counterclockwise to break the seal.
– As a last resort, chisel away the sink opening lip that is fused to the tailpiece.
Existing sink hardware is rusted in place:
– Soak nuts, bolts, and threads in vinegar or penetrating oil to dissolve rust.
– Gently tap fittings with a wrench or hammer to break rust bonds.
– Heat may help break up rusted connections.
P-trap nuts won’t loosen:
– Use two wrenches to grip both trap nuts at once for added torque.
– Wrap a hot wet rag around the trap nuts to loosen mineral deposits.
– Cut P-trap tubes with a hacksaw if the nuts absolutely will not break free.
With some patience and the right troubleshooting techniques, you can overcome difficult drain removal issues. Just take your time and use gentle force.
Preparing for Reinstallation
Once you’ve fully detached the old drain hardware, take a few preparatory steps before putting in the new drain:
– Clean the sink opening again with a vinegar soak to remove grime and odor.
– Smooth any rough edges around the sink opening with a file.
– Apply plumber’s putty around the opening and smooth into an even ring.
– Have your new drain parts, gasket, washers, and nuts ready to install.
Proper cleaning and preparation of the sink opening will allow your new drain hardware to seal tightly. Follow the manufacturer’s instructions for applying putty or gaskets with the new drain.
Installing the New Sink Drain
When your sink opening is prepped and you have all the necessary new drain parts on hand, follow these steps to install the new kitchen sink drain correctly:
1. Insert the drain flange into the sink opening from below. The flat side should face down onto the sink.
2. From above, insert the rubber gasket (and backup flange if included) aligned onto the drain flange.
3. From below, slide the metal friction washer up onto the drain flange, flat side facing down.
4. Hand tighten the drain locknut onto the flange threads from below the sink.
5. Tighten the drain locknut fully using a basin wrench or locking pliers.
6. Apply plumber’s tape to the drain tailpiece threads. Screw the tailpiece into the drain flange by hand.
7. Use a wrench to finish tightening the tailpiece. Don’t over tighten.
8. Reconnect the P-trap pieces to the tailpiece. Hand tighten then finish with wrenches. Don’t overtighten.
Run some water into the sink and check underneath to confirm no leaks before finishing reassembly under the sink. Then you can reconnect supply lines, turn on the water, and test your new drain!
Conclusion
While removing an old kitchen sink drain can feel daunting, having the right tools and techniques makes the process straightforward. Basics like turning off water lines, prepping your workspace, using a basin wrench, and taking precautions when removing P-traps or disposals will allow the project to go smoothly. Approach stuck drain nuts or tailpieces gently but persistently. Thorough cleaning and proper use of putty or gaskets keeps your new drain sealed tightly. With this complete guide, you can confidently unscrew and replace a kitchen sink drain.