Winterizing an inboard boat motor is an important maintenance task to protect the engine from damage caused by freezing temperatures. By following a few simple steps, you can ensure your boat motor is ready for storage during the winter months.
Page Contents
- 1 Why Winterize an Inboard Motor?
- 2 Supplies Needed
- 3 Step 1 – Flush the Engine
- 4 Step 2 – Change Fluids
- 5 Step 3 – Fog the Engine
- 6 Step 4 – Stabilize Fuel
- 7 Step 5 – Disconnect and Remove Battery
- 8 Step 6 – Drain Water Systems
- 9 Step 7 – Inspect Components
- 10 Step 8 – Corrosion Protection
- 11 Step 9 – Prepare Exterior
- 12 Step 10 – Store Properly
- 13 Conclusion
Why Winterize an Inboard Motor?
Inboard boat motors have components like the engine block, exhaust manifolds, and cooling systems that contain water. If this water is not properly drained and anti-freeze added, the trapped water can expand as it freezes and cause severe damage such as cracked engine blocks, damaged impellers, and split hoses or pipes. Properly winterizing flushes out all the trapped water and replaces it with non-freezing anti-freeze coolant.
Winterizing also involves fogging the cylinders, changing fluids, inspecting components, charging the battery, and protecting external parts. Doing this maintenance helps prevent corrosion, gumming, and deterioration over the inactive winter months. Trying to save time by not winterizing an inboard motor often leads to very costly repairs in the spring.
Supplies Needed
Gather the following supplies before beginning the winterization process:
- Screwdrivers
- Wrenches
- Pliers
- Funnel
- Engine flusher/ear muffs
- Fuel stabilizer
- Engine anti-freeze (propylene glycol based)
- Spray fogging oil
- Gear lube
- New engine oil and oil filter
- Clean rags
- Plastic bags
- Battery tender
- Corrosion protection spray
- Marine grease
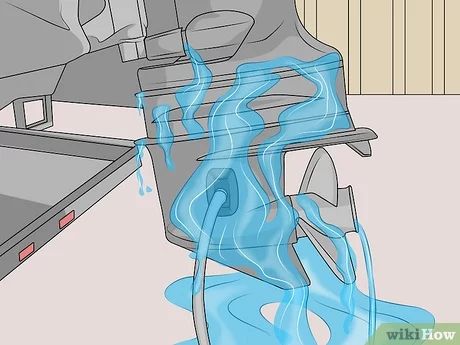
Step 1 – Flush the Engine
The first step is to flush the engine to remove any salty, brackish, or dirty water. This is done by attaching a hose to ear muffs or an engine flushing attachment. Start the engine and let it run for 10-15 minutes in neutral while flushing. Be sure to monitor the temperature gauge and do not let the engine overheat. This will flush out old water with fresh water. Drain the block after flushing by removing the drain plugs.
Step 2 – Change Fluids
Drain all old engine oil and replace the oil filter. Refill with new oil. Check the gear lube level and top off or change completely if needed. Inspect the coolant and replace if it is more than a year or two old. Use a propylene glycol antifreeze rated to at least -50°F.
Step 3 – Fog the Engine
Fogging oil helps coat the inside of the engine and prevents corrosion. With the spark plugs still removed from flushing, spray fogging oil into each cylinder through the spark plug holes. Crank the engine over a few revolutions to spread the oil. Replace the spark plugs and reconnect everything.
Step 4 – Stabilize Fuel
Fill the fuel tank with fresh fuel and add fuel stabilizer, following the amounts recommended on the stabilizer container. Run the engine for 10 minutes to circulate the stabilized fuel through the fuel system.
Step 5 – Disconnect and Remove Battery
Disconnect battery cables, negative first. Clean corrosion from the battery terminals and cable ends. Remove the battery and store it in a cool, dry place. Trickle charge the battery over the winter. Battery tender connections make this easy.
Step 6 – Drain Water Systems
Freshwater cooling systems need to be drained and flushed. Open pressure cap on coolant recovery tank. Disconnect hoses and drain. Make sure the drain plug is removed from the block. Run antifreeze through system until it flows clear from the drain hole. Reconnect hoses and refill system with antifreeze.
For raw water systems, inspect the raw water pump impeller and replace if worn. Lubricate impeller with marine waterproof grease. Make sure all raw water drain plugs are open.
Step 7 – Inspect Components
Inspect the following components. Replace or service as needed:
- Belts and hoses – replace any worn, brittle or cracked
- Cooling system – pressure test for leaks
- Fuel system – inspect for leaks
- Clamps – tighten any loose hose clamps
Check and lubricate the transmission and throttle linkages. Inspect prop shaft and stuffing boxes. Replace seals if leaking.
Step 8 – Corrosion Protection
Spray exposed metal components like the engine mounts, drive train, and cables with corrosion protectant. Put plastic bags over the exhaust ports to keep out moisture and pests.
Coat electrical connections and controls with a marine-grade protectant spray. Apply dielectric grease to prevent corrosion.
Step 9 – Prepare Exterior
Wash and wax the boat hull. Clean and treat the vinyl and cushions according to manufacturer directions. Ensure all exterior fittings are tightened and valves are closed.
Remove rain drain plugs so water does not collect in the boat. Install winter storage cover and secure firmly.
Step 10 – Store Properly
Store the boat under cover and up on blocks to prevent moisture accumulation and tire flat spots. Use support stands under trailer axles. Keep the trailer wheels off the ground.
Raise the outdrive and make sure the propeller shaft is pointed down to let water drain out. Store boat indoors or shrink wrap for maximum protection.
Conclusion
Properly winterizing your inboard motor takes some time and effort, but saves money and prevents problems in the long run. Flush the engine, change fluids, stabilize fuel, disconnect the battery, drain water systems, lubricate parts, and protect from corrosion. Store properly with the boat covered on trailer supports.
Following this winterization guide will help keep your boat motor in good shape over the winter. In the spring, reverse many of these steps to commission the boat. Your boat will be ready to enjoy another season of reliable performance on the water.