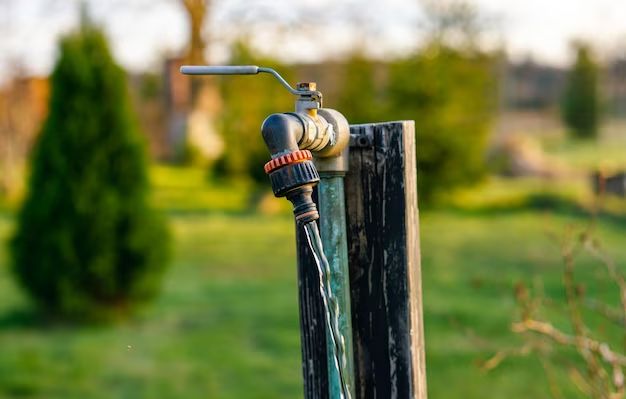
When installing an outdoor spigot or faucet, one of the most important considerations is determining the proper height above ground level. The ideal height depends on several factors, including avoiding freezing temperatures, accessibility, aesthetics, and safety. In general, outdoor spigots should be installed high enough above the ground to prevent freezing, avoid being a tripping hazard, and allow easy access, while also accounting for visual appeal. This article provides guidelines and recommendations for determining the optimal height for an outdoor spigot installation.
Page Contents
Avoid Freezing Temperatures
One of the primary reasons to install an outdoor spigot at a raised height is to prevent freezing during cold weather. Spigots installed close to the ground are more susceptible to freezing temperatures which can damage the pipe and prevent water flow. As a general rule, spigots should be installed at least 12-18 inches above the ground to avoid freezing. This height allows air circulation which helps prevent frost and ice from accumulating around the pipe. Proper drainage below the spigot is also important to keep the area dry.
In regions with very cold winters, installing the spigot 24-36 inches above ground is recommended. The higher elevation keeps it away from freezing at ground level. Insulating wrap or heat tape can provide additional freeze protection for extremely cold climates. Wall spigots are less prone to freezing than ground-level installations since they already have the warmth of the building wall helping to protect them.
Know the Frost Line
When determining spigot height based on freezing, it’s important to know your local frost line depth. The frost line is the depth at which the groundwater in soil is expected to freeze. This varies by region, from 10 inches in southern coastal areas to 48 inches or more in northern inland locations. Installing below the frost line leaves pipes vulnerable to freezing. Checking with local building codes for the minimum depth requirements in your area is recommended. As a rule of thumb, add 12-24 extra inches above the frost line when positioning your spigot height.
Accessibility
The height of the outdoor spigot also affects convenience and accessibility when using it. Installing too high can make it difficult to attach hoses or fill watering cans. The optimal range is usually 24 to 48 inches above ground level. This allows easy reach for most adults without excessive bending or stretching. For spigots to be utilized by children, such as at schools or parks, a lower height of 18-24 inches is ideal.
Wall-mounted spigots should be low enough to reach comfortably but high enough to allow clearance for a watering can, bucket or other container underneath. Aim for 36 to 42 inches above the ground as a standard accessible height for wall installations. Consider stairways or decks that change ground level when positioning wall spigots.
Aesthetic Appeal
Visual appearance is another factor when determining spigot height. While function takes priority, installing at an elevation that complements the style and landscaping of your home is ideal. For contemporary, minimalist homes, a higher placement around 48 inches looks sleek and discreet. Traditional cottages and country homes often use a lower height around 24-30 inches to match the welcoming, relaxed aesthetic.
Use Low-Profile Designs to Increase Flexibility
To increase height options without an obtrusive look, use low-profile spigot designs. Right-angle models hug closely to walls, with the handle and nozzle installed almost flush to hide the pipe. This allows installing higher for function while maintaining clean lines and subtle visual impact.
Safety Considerations
Proper spigot height helps avoid both safety issues like tripping and vandalism concerns. Install too low and the spigot becomes a hazard, especially for yards and play areas. Placing it high enough to be visible reduces the risk. For public spaces, a height of 36 inches or more discourages unwanted use and tampering.
In addition, outdoor spigots should not be positioned directly above electrical outlets. Dripping water can create electrocution and short circuit risks. Allow ample vertical clearance between any outdoor spigot and electrical source.
Typical Height Standards
Based on the factors of freezing, access, aesthetics and safety, here are some typical recommended heights for outdoor spigots:
| Location | Standard Spigot Height |
| Ground/Post Installation | 24-48 inches above ground |
| Wall Mounted, Accessible | 36-42 inches above ground |
| Wall Mounted, High for Aesthetics | 48 inches and higher |
| Frost Prone Climate | Minimum of 12-24 inches below frost line |
| Public Space/Tamper Resistant | Minimum 36 inches |
These general guidelines provide a starting point, but the optimum spigot height depends on your specific situation. Consider all factors including climate, use requirements, aesthetics and more when positioning your outdoor spigot. Adjusting higher or lower as needed allows you to maximize function and convenience.
Installing the Spigot at the Right Height
Once you’ve determined the ideal height for the spigot location, use proper installation techniques to place it at the correct elevation. Follow local plumbing codes and the manufacturer’s instructions. Safety gear like gloves and eye protection are recommended during installation.
Post or Ground Installation
For installing on a post or rising vertically from the ground:
– Dig a trench at least 12 inches below the frost line to avoid freezing. Run pipes underground to the water source.
– Position the vertical pipe at the desired height using a level to ensure it’s straight.
– For stable support, pour concrete around the pipe and allow to set completely before finishing the hookup.
– Attach the spigot handle and nozzle at the appropriate elevation using the manufacturer’s instructions.
– Test for leaks and check the drainage around the spigot. Add gravel or slope the ground to promote drainage.
Wall Mounted Spigot
For installing vertically on an exterior wall:
– Locate studs and position the mounting bracket at the desired height. Mark holes and drill pilot holes if attaching to masonry.
– Follow manufacturer’s instructions for mounting the spigot assembly securely to the wall. This may require pipe straps or other hardware.
– Connect supply pipes from the interior plumbing lines to the spigot valve. Position piping carefully so spigot can mount flush and securely.
– Attach spigot handle/nozzle and test for proper operation. Seal any gaps in exterior wall around the mounting.
Maintenance
Once installed at the proper height, regular maintenance keeps your outdoor spigot working safely and reliably:
– Disconnect/drain hoses in cold weather and close cutoff valves to interior plumbing for winter.
– Check for leaks, cracks or damage to pipes and repair immediately.
– Lubricate handle to prevent sticking and ensure smooth operation.
– Caulk any gaps or cracks around wall mounts.
– Keep area clear beneath spigot to promote drainage and prevent ice buildup.
Installing your outdoor spigot at the optimum height makes it more functional and convenient while also contributing to the aesthetics of your landscape. Considering all factors from climate to use requirements ensures it works reliably for many years. With routine maintenance and care, your properly positioned outdoor spigot will provide an accessible water source whenever needed.