Replacing a wheel stud is a common repair that most drivers will have to deal with at some point. Wheel studs are the threaded fasteners that hold the wheels onto your car. Over time, they can become damaged or break due to wear and tear or an impact like hitting a pothole or curb. When a wheel stud breaks, it’s important to replace it promptly to ensure the wheel stays securely fastened to your car. But how long does this repair take?
Page Contents
What is a Wheel Stud?
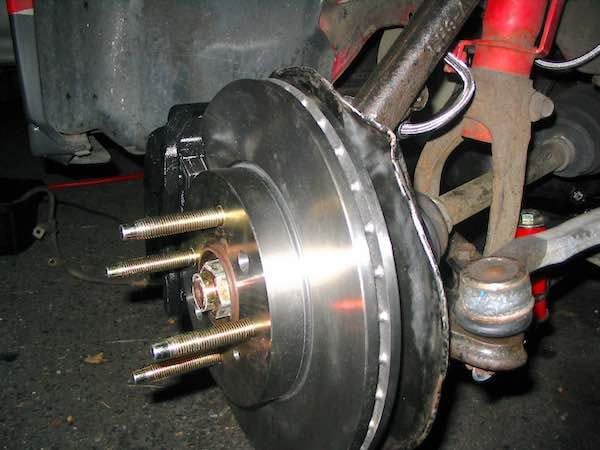
Wheel studs are threaded fasteners that hold the wheel to the hub on your car. The studs are screwed into threaded holes on the hub. When you put your wheel on, the holes in the wheel line up with the wheel studs sticking out from the hub. Lug nuts are then used to secure the wheel to the studs.
Cars typically have between 4 to 6 wheel studs per wheel. The studs are usually made from hardened steel for durability. On most vehicles, the studs are permanently fixed into the hub but on some vehicles they can removed if needed.
The studs play a critical role in securing the wheels and allowing them to rotate properly. Damaged or broken studs can prevent the wheel from being properly secured, leading to a serious safety hazard. That’s why it’s important to replace any damaged studs promptly.
When to Replace a Wheel Stud
There are a few signs that indicate a wheel stud needs to be replaced:
– The stud is visibly broken or damaged. You may see part of the stud is sheared or stripped.
– The wheel feels loose, even after tightening the lug nuts. This indicates the stud is not properly securing the wheel.
– You hear popping, clicking or rattling noises from the wheel area while driving. A loose or broken stud can make these noises as the wheel shifts.
– Rust around the base of the stud. Extensive corrosion can weaken the stud and its threads.
– Wheels were recently removed and reinstalled. The process of removing and reinstalling wheels can damage threads on studs.
If you notice any of these warning signs, have your wheel studs inspected and replaced if needed. Driving with a damaged stud can be extremely dangerous.
How Long Does Replacing a Wheel Stud Take?
Replacing a single broken wheel stud is usually a quick repair that takes about 30-45 minutes for one stud. This includes:
– 15 minutes to loosen the lug nuts and remove the wheel.
– 5 minutes to remove the damaged stud and install the new one.
– 15 minutes to put the wheel back on and fully tighten the lugs nuts.
If you need to replace multiple studs or remove a seized stud, it may take 1-2 hours to complete the job.
The time can also be affected by:
– Location of the stud. Rear studs tend to be easier to access.
– Type of vehicle. Trucks with dual rear wheels take longer.
– Whether the wheel hub needs to be disassembled to access the stud.
-Availability of spare studs. A trip to buy new studs adds time.
So while a single stud can be replaced quickly, it’s a good idea to budget at least an hour for this repair, especially if it’s your first time. Working on it leisurely without time pressure will help ensure the job is done properly.
Steps for Replacing a Wheel Stud
Replacing a wheel stud follows these key steps:
1. Loosen Lug Nuts
The first step is to loosen the lug nuts securing the wheel. Loosen each lug nut about one turn counter-clockwise but do not fully remove them yet.
2. Jack Up the Car
Using a jack, raise the vehicle until the wheel with the damaged stud is completely off the ground. Place jack stands under the appropriate vehicle jacking points for safety.
3. Remove the Tire
With the wheel raised off the ground, finish unscrewing the lug nuts by hand until they can spin freely. Pull the wheel off the hub to expose the wheel studs.
4. Remove the Damaged Stud
Use a lug wrench or socket wrench to unscrew the damaged wheel stud counter-clockwise to remove it. If it’s seized, you may need to use a torch or penetrating oil to help loosen it. Remove any rust or debris from the stud’s hole in the hub.
5. Install the New Stud
Screw in the new replacement wheel stud by hand until tight. Use a torque wrench to tighten it to the manufacturer’s specified torque, usually around 100 ft-lbs.
6. Mount the Wheel
With the new stud installed, place the wheel back over the studs and hand tighten the lug nuts to hold it in place.
7. Lower the Car
Carefully lower the vehicle fully to the ground using the jack.
8. Tighten the Lug Nuts
Using your lug wrench or a torque stick, tighten the lug nuts in a star pattern. Tighten in rounds until you reach the proper torque spec, usually around 70-100 ft-lbs depending on the vehicle.
9. Check Your Work
Before driving away, spin the wheel and visually check that it is centered and sits flush with no wobble. Test drive nearby and listen for any noises that could indicate a loose wheel.
Professional Replacement
While do-it-yourselfers can replace a single wheel stud at home, it’s best to have multiple stud replacements done professionally. Some key benefits of a professional mechanic include:
– Proper equipment – Shops have specialty air tools that make stud removal and installation much easier. Stuck studs can be difficult to remove without these.
– Wheel rebalancing – They will rebalance the wheel after stud work to prevent vibration.
– Additional inspections – Mechanics can inspect for any underlying issues like hub damage that may have contributed to the failed stud.
– Warranty – Repair shops will often warranty their stud replacement work in case of defects.
– Convenience – You can simply drop off your car instead of spending hours doing it yourself.
While paying for a shop does add cost, it gives you peace of mind knowing the job was done completely and professionally.
Cost to Replace a Wheel Stud
The typical cost for a single wheel stud replacement ranges from $75 to $200. However, prices can vary significantly based on these factors:
| Factor | Cost Impact |
|---|---|
| Number of studs needing replacement | Additional studs add cost |
| Shop hourly labor rate | Varies by region and shop |
| Vehicle make and model | More complex jobs cost more |
| Wheel type and size | Larger wheels take longer |
| Additional repairs needed | Hub damage or wheel rebalance extra |
Dealerships and OEM parts tend to be the most expensive option. You can save on labor costs by using local tire and auto repair shops instead. Shopping around for quotes is the best way to find a competitive price.
Preventing Wheel Stud Damage
You can help minimize the chances of a wheel stud failure using these good maintenance practices:
– Inspect studs regularly – Visually check for damage and corrosion.
– Address minor damage early – Don’t delay small repairs.
– Torque lug nuts properly – Use a calibrated torque wrench.
– Avoid impacts to wheels – Repair any curb rash or pothole damage.
– Lubricate studs – Use anti-seize lubricant when installing wheels.
– Check for wheel wobble – Any wobble indicates a possible loose or broken stud.
Conclusion
Having to replace a broken wheel stud is inconvenient, but thankfully it’s a fast and straightforward repair. For a single stud, most driveway mechanics can tackle the job in around 30-45 minutes with basic tools. If you need multiple studs replaced or run into issues removing the damaged stud, it’s best to have a professional shop complete the repairs. Proper torque and regular inspections will help you avoid any stud damage in the first place.