Chess is a classic strategy board game that is played between two players on a checkered chessboard. The chessboard consists of 64 squares (8 rows and 8 columns) alternating between light and dark colors. Chess boards can be made from a variety of materials, but wood is one of the most popular and common. When making a wooden chess board, an important consideration is determining how much wood will be needed.
Page Contents
- 1 Dimensions of a Chess Board
- 2 Wood Selection for Chess Boards
- 3 Board Construction
- 4 Amount of Wood Needed
- 5 Buying Wood for a Chess Board
- 6 Woodworking Tools Needed
- 7 Wood Preparation
- 8 Cutting the Square Pieces
- 9 Assembling the Playing Surface
- 10 Cutting Outer Frame Pieces
- 11 Assembling the Frame
- 12 Applying Finish
- 13 Conclusion
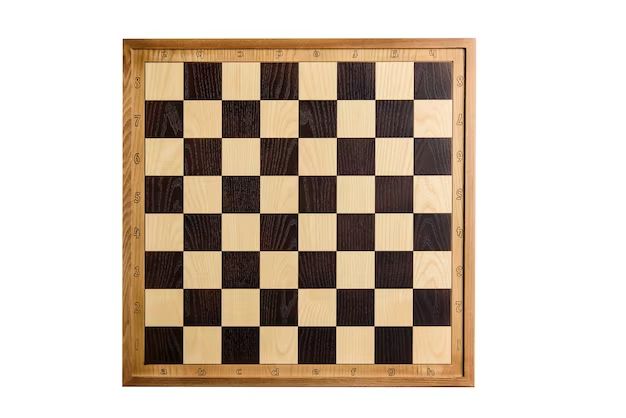
Dimensions of a Chess Board
A standard tournament chess board is square in shape and measures 20 inches on each side. This makes the total dimensions of a chess board 20 inches x 20 inches. The squares on the board are 2.25 inches per side. With 64 total squares, this means the full playing area of the chess board takes up 14.25 inches x 14.25 inches. The remaining space is taken up by the frame or border around the game squares.
For a 20 inch square chess board, the frame is typically about 2-3 inches wide on each side. This allows for a small buffer between the playing squares and the edge of the board. So the interior playing area is 14.25 inches square, with a 2-3 inch frame on each side.
Interior Playing Area Dimensions
- 14.25 inches x 14.25 inches
- Contains 64 squares of 2.25 inch x 2.25 inch
Total Board Dimensions
- 20 inches x 20 inches
- 2-3 inch frame on each side
Wood Selection for Chess Boards
The type of wood used to construct a chess board can vary. Some common options include:
- Maple – Hard and smooth but expensive
- Walnut – Beautiful grain but softs and dents easily
- Cherry – Ages well with a reddish tint
- Oak – Affordable, durable and stains well
- Mahogany – Rich color but requires special tools
- Purpleheart – Striking purple hue that fades over time
Maple, walnut, and cherry are some of the most popular woods for quality chess boards. But oak is an excellent choice for beginners due to its affordability and durability. The specific wood selected depends on the desired appearance, texture, durability, and budget.
Board Construction
A wooden chess board consists of two main components – the playing surface with squares and the outer frame or border.
Playing Surface
The playing surface is created from small wooden squares in an alternating light and dark pattern. There are 64 total squares covering an area of 14.25 inches x 14.25 inches. Each square has dimensions of 2.25 inches x 2.25 inches.
The light and dark squares must be made of different woods for visual contrast. Some popular color combinations include:
- Maple and walnut
- Oak and cherry
- Maple and purpleheart
The squares can be arranged in a checkerboard pattern and glued together. Using woods of different thickness can help distinguish the light and dark squares further.
Outer Frame
The outer frame or border surrounds the playing surface on all four sides. This frame is typically 2-3 inches wide on each edge. The frame helps hold all the square pieces together and gives the board a polished look.
The same wood used for the light or dark squares can also be used to construct the outer frame. Alternately, a third type of wood can be used for visual interest.
Amount of Wood Needed
Now that we know the size and construction of a chess board, we can calculate the total amount of wood required.
For a 20 inch square board with a 14.25 inch interior playing surface, we need wood for:
- 32 light squares of 2.25 inches x 2.25 inches
- 32 dark squares of 2.25 inches x 2.25 inches
- Outer frame of 2-3 inches wide and 20 inches per side
If using a board thickness of 0.5 inches throughout, here are the calculations:
Light Squares
- 32 squares needed
- Each square has an area of 2.25 x 2.25 = 5.0625 in2
- With 0.5 inch thickness, volume per square is 5.0625 x 0.5 = 2.53125 in3
- For 32 light squares, total volume is 32 x 2.53125 = 81 in3
Dark Squares
- 32 squares needed
- Same volume per square as light squares
- Total volume for 32 dark squares is 32 x 2.53125 = 81 in3
Outer Frame
The outer frame has thickness of 0.5 inches, width of 2 inches, and a perimeter of 4 x 20 = 80 inches.
- Volume = Thickness x Width x Perimeter
- = 0.5 x 2 x 80
- = 80 in3
Total Volume
- Light squares: 81 in3
- Dark squares: 81 in3
- Frame: 80 in3
- Total = 81 + 81 + 80 = 242 in3
Therefore, the total amount of wood needed for a 20 inch square chess board with a 0.5 inch thickness is approximately 242 cubic inches.
Buying Wood for a Chess Board
When purchasing wood for a DIY chess board project, it’s best to buy boards with a thickness of at least 0.5 inches. This provides adequate strength and durability. Some recommendations when buying wood include:
- Maple boards – Select boards rated Hard Maple, with a flat grain
- Walnut boards – Choose boards with nice color contrast between heartwood and sapwood
- Cherry boards – Look for boards cut from mature trees with rich color
- Oak boards – Red oak has nice grain patterns for the lighter squares
The amount of wood can be calculated based on the desired dimensions and thickness. Buy boards in square footage slightly larger than the areas calculated. This provides extra wood to work with in case of any defects or mistakes.
It’s also a good idea to purchase boards with a little extra length and width to accommodate the outer frame. The frame requires wood pieces that are 20 inches long for the sides. Leaving extra length allows cutting these frame pieces from nicer sections of the wood boards.
Woodworking Tools Needed
Building a chess board requires just a few basic woodworking tools:
Table Saw
A table saw with a fence is used to cut the board pieces to size smoothly and accurately. Both ripping and cross cuts are required.
Miter Saw
A power miter saw makes cutting the frame pieces to length easy. Precise 45 degree angled cuts may also be needed for mitered frame corners.
Router
A router and straight bit can be used to profile or round over the outer edges of the frame. The rounded corners give a finished look.
Orbital Sander
An orbital sander smooths out saw marks and flattens the surfaces prior to finishing. Fine grit abrasives provide the best results.
Drill
A drill with a square drive bit is used to create holes for wood dowels to reinforce the glue joints where the frame meets.
Clamps
Bar clamps or corner clamps hold pieces flush and tight during glue-up for good adhesion. Apply even clamping pressure.
Wood Glue
Waterproof wood glue creates a strong permanent bond between wood pieces. Allow adequate drying time before removing clamps.
Wood Finish Supplies
Sanding sealer, stain, topcoat provide a protective finish. Multiple coats of polyurethane give a smooth feel.
Wood Preparation
Proper planning and initial preparation of the wood pieces is crucial for an easy build process. Some tips include:
- Mill boards to desired thickness if needed
- Cut boards approximately 1 inch larger than calculated sizes
- Acclimate wood to shop conditions to prevent later warping
- Detect any defects and plan cuts to avoid areas
- Label each board with grain orientation for alignment
Taking the time to select quality boards and prep them for the best usability will make constructing the chess board much simpler.
Cutting the Square Pieces
The first step is to cut the 64 light and dark squares for the chess board playing surface. A table saw sled ensures straight cuts and square pieces.
Steps for cutting squares:
- Set fence to 2.25 inches and make multiple ripping passes to create strips
- Crosscut strips to 2.25 inches long using a miter gauge
- Repeat for both light and dark colored wood squares
- Keep squares organized and label sets for proper alignment
Test fit a few pieces together to ensure a flush fit. Make any minor size adjustments if the squares don’t align correctly.
Assembling the Playing Surface
Once all 64 squares are cut, arrange them in an alternating pattern aligned according to grain direction. Pay attention to the wood label orientation.
Follow these steps for clean playing surface assembly:
- Dry fit pieces in checkerboard pattern and make any adjustments
- Apply wood glue to edges of each connecting square
- Clamp rows tightly using cauls to add pressure
- Allow glue to fully cure overnight before removing clamps
- Sand entire surface uniformly to flatten
The result will be a flat and level 14.25 inch square checkerboard pattern ready for the outer frame.
Cutting Outer Frame Pieces
The next step is to cut and shape the outer frame pieces that will surround the playing surface.
Cut four frame parts to these dimensions:
- 2 sides – 20 inches long x 2 inches wide x 0.5 inches thick
- 2 ends – 14.25 inches long x 2 inches wide x 0.5 inches thick
A power miter saw makes quick work of cutting the frame boards to length accurately.
Use a router and rounding over bit to profile the outer edges of the frame. Test on scrap pieces first to check the profile.
Cut several small square wood pieces to use as corner braces on the inside of the frame.
Assembling the Frame
The individual frame pieces must now be assembled together with the playing surface to complete the chess board. alignment is critical.
Follow these steps for assembling the frame:
- Dry fit the frame pieces without glue to test fit
- Apply wood glue to the playing surface edges and mating frame edges
- Use corner clamps to hold the frame tight to the playing surface
- Install corner braces in each inside frame joint for strength
- Allow the glue to fully cure before removing clamps
The assembled board can now be lightly sanded and prepared for applying the desired finish.
Applying Finish
The right finish helps protect the chess board while also enhancing the beauty of the wood grain. Consider these tips for finishing:
- Sand entire board to 220 grit for a smooth foundation
- Clean surface well and remove any dust
- Apply 1-2 coats of sanding sealer as a base
- Stain if desired for richer color
- Protect with 3 coats of satin polyurethane
- Lightly sand and wipe clean between finish coats
Take your time with finishing to achieve the highest quality result. The finished chess board will look beautiful and stand the test of time.
Conclusion
Building a custom wooden chess board requires careful planning, material selection, and precise woodworking techniques. But the end result is a handcrafted game board that provides many years of enjoyment. Our calculations determined about 242 cubic inches of wood is needed for a standard 20 inch square board with a 0.5 inch thickness. Popular wood choices include maple, walnut, oak, and cherry. The main tools needed are a table saw, miter saw, router, sander, and clamps. With some practice assembling the playing surface and outer frame, you can create durable and exquisitely crafted chess boards to use and share.